.png.c9b8f3e9eda461da3c0e9ca5ff8c6888.png)
In a previous article. We talked about how to use FRP for intranet mapping. This allows intranet devices to be logged in through the public network. However, frp is relatively implemented by configuring command parameters. It's still a bit challenging for Xiaobai. Today I will introduce another simple method.
About NPS
nps is a lightweight, high-performance, and powerful intranet penetration proxy server. Currently, it supports tcp and udp traffic forwarding, and can support any tcp and udp upper-layer protocol (access to intranet websites, local payment interface debugging, SSH access, remote desktop, intranet dns resolution, etc.). In addition, it also supports intranet ttp proxy and intranet socks5 proxy, and has a powerful web management end.
Experimental Environment
Public network vps (server centos7) user side (kali linux, Windows 10)
Download nps
First, download it to the project address according to your own system type. The server is linux_arm64_server.tar.gz The client is windows_amd64_client.tar.gz
Installing the server
Download the server side according to the type of the public network server.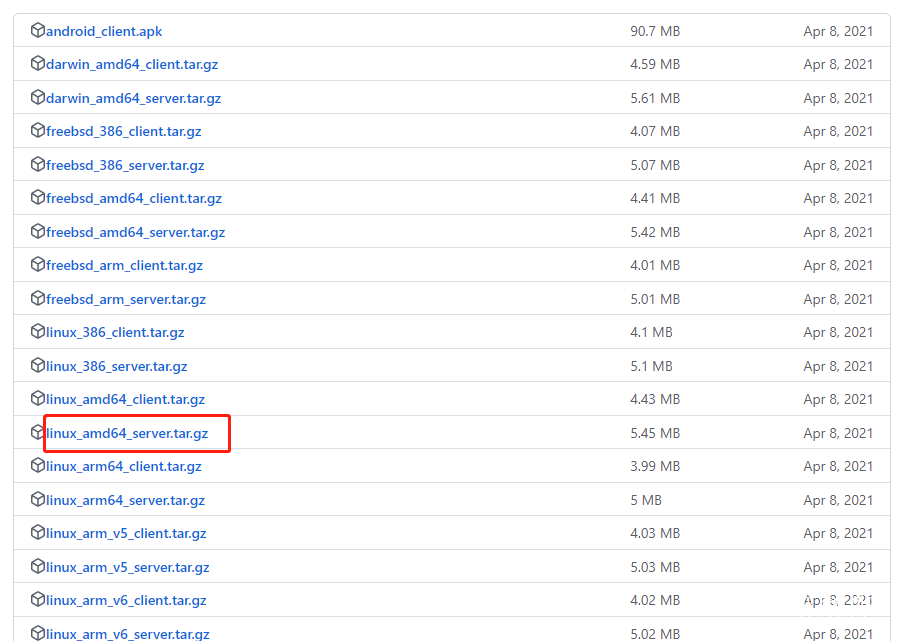
mkdir nps
cd
wget https://github.com/ehang-io/nps/releases/download/v0.26.10/linux_amd64_server.tar.gz
tar -zxvf linux_amd64_server.tar.gz configuration nps.confvim conf/nps.conf modification part
#web
web_host=a.o.com —— Cloud server public IP address
web_username=admin ——web console account settings
web_password=123 ——web console password settings
web_port=8080
web_ip=0.0.0.0
web_base_url=
web_open_ssl=false
web_cert_file=conf/server.pem
web_key_file=conf/server.key 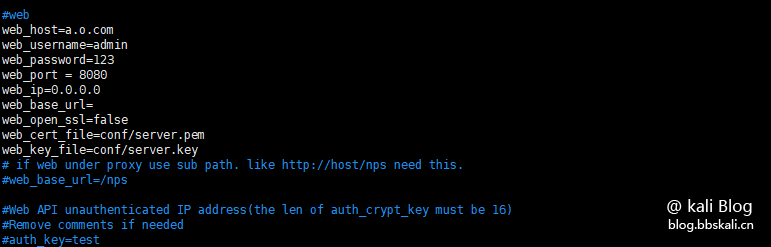 Install nps execution command
./nps install
./nps start #Start 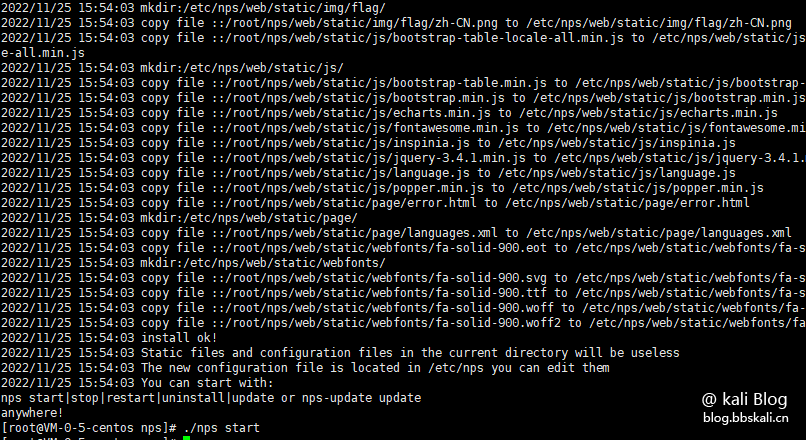
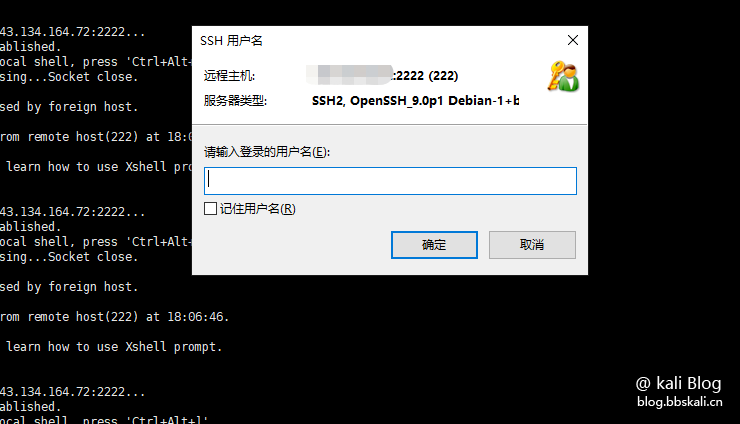
Access the web console
Browser access ip:8080 (the corresponding ports need to be opened for security group and firewall) 
Enter the account number and password in your configuration file to log in.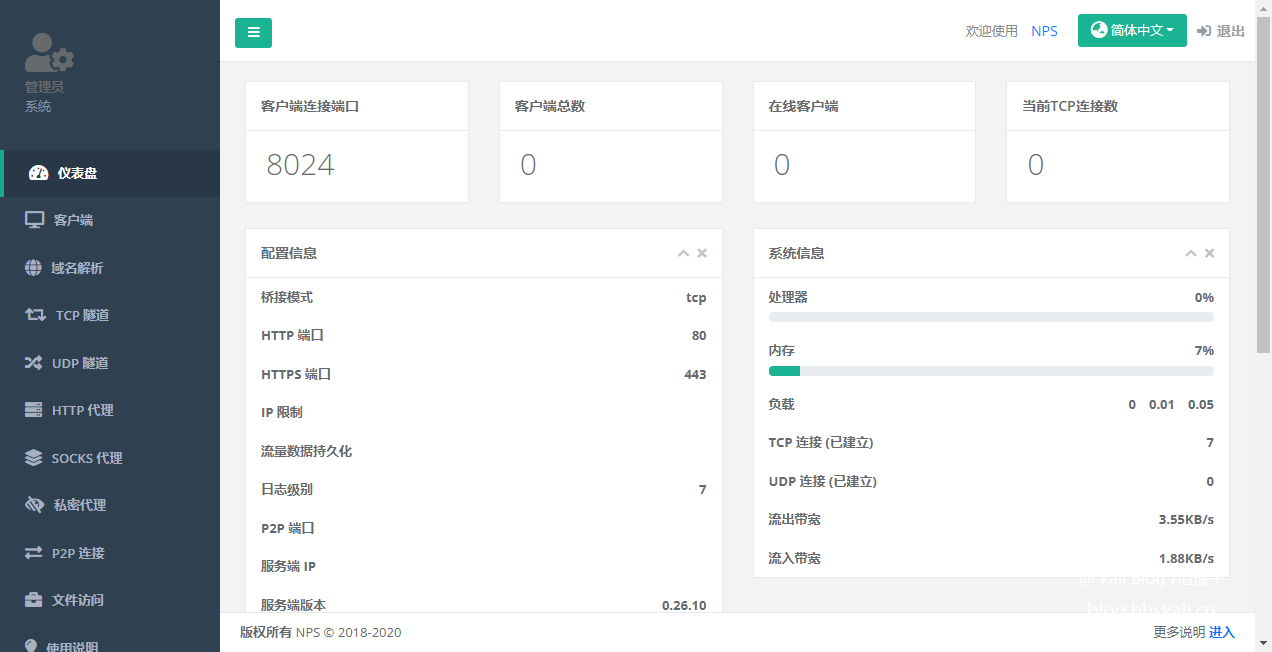
As mentioned above, after logging in to the background, we only need to add the mapped target in the background according to actual needs.
Add mapping directory
After the configuration is completed, click Submit.
Then click on the client and add a new client. Record the key!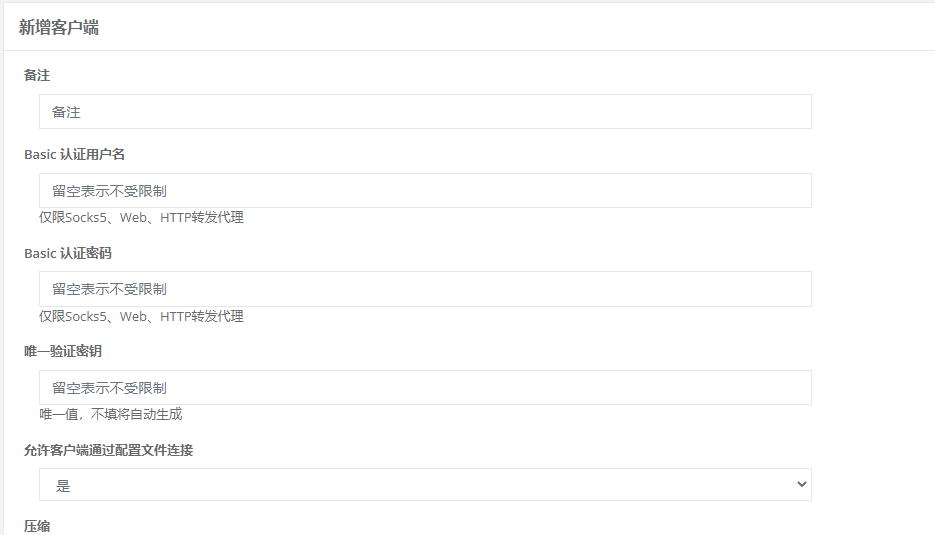
Click tcp—— to add and fill in the corresponding parameters according to the actual situation. Note that the client ID is the client ID we created in the previous step.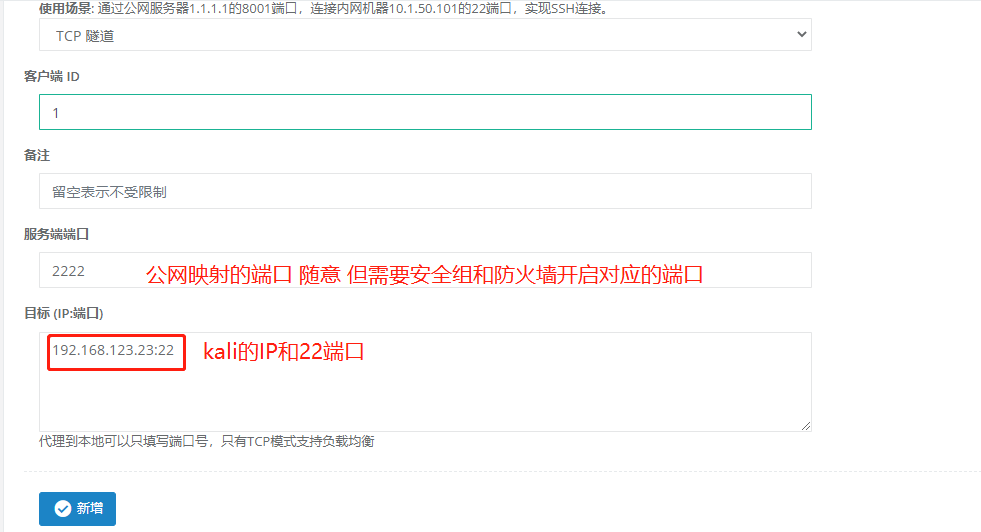
Configure client
Here, let’s take kali’s port 22 as an example.
First, download the corresponding client linux_arm64_client.tar.gz.
mkdir nps
wget https://github.com/ehang-io/nps/releases/download/v0.26.10/linux_arm64_client.tar.gz
tar -zxvf linux_arm64_client.tar.gz is decompressed, the file is as follows 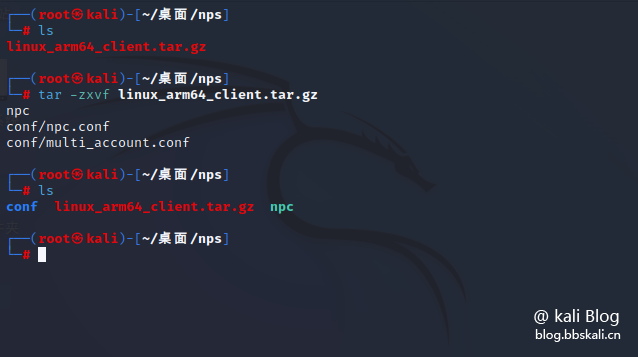
Connect
We only need the following command to achieve the connection.
./npc -server=Public IP:8024 -vkey=Your client key -type=tcp 
The client has also been successfully launched.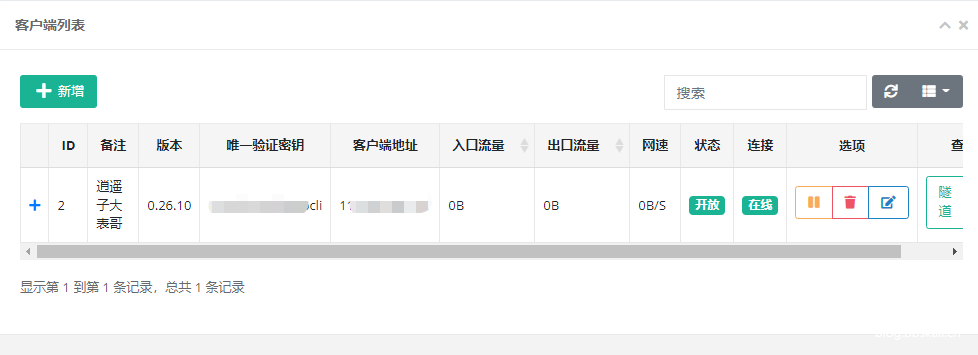
Test