


.png.c9b8f3e9eda461da3c0e9ca5ff8c6888.png)
Nezha probe can conveniently monitor the server's real-time network, disk and other status. Moreover, the interface is beautiful and simple to build, and it is a good tool in our daily operation and maintenance. In this article, let’s learn its installation process together.
Preparation
A server (kali is OK) Gitee account (github is unstable in China) domain name (not required)
Register oauth
For security, Nezha probe does not use local login. Instead, it uses third-party login interfaces such as Gitee and Github. Because Github is always in a state of distraction, he chose the domestic Gitee platform.
01 Registering two Gitee accounts is a problem with the third-party login interface. The author cannot log in with the same account when deploying. Whether Gitee or Github, you need two accounts, that is, use A to create an oauth application and use B to authorize login. 02 Create an oauth application login account, visit https://gitee.com/oauth/applications, and create an application. After creation is completed, the effect is as follows:
Callback address format:
http://{Server IP}:8008/oauth2/callback 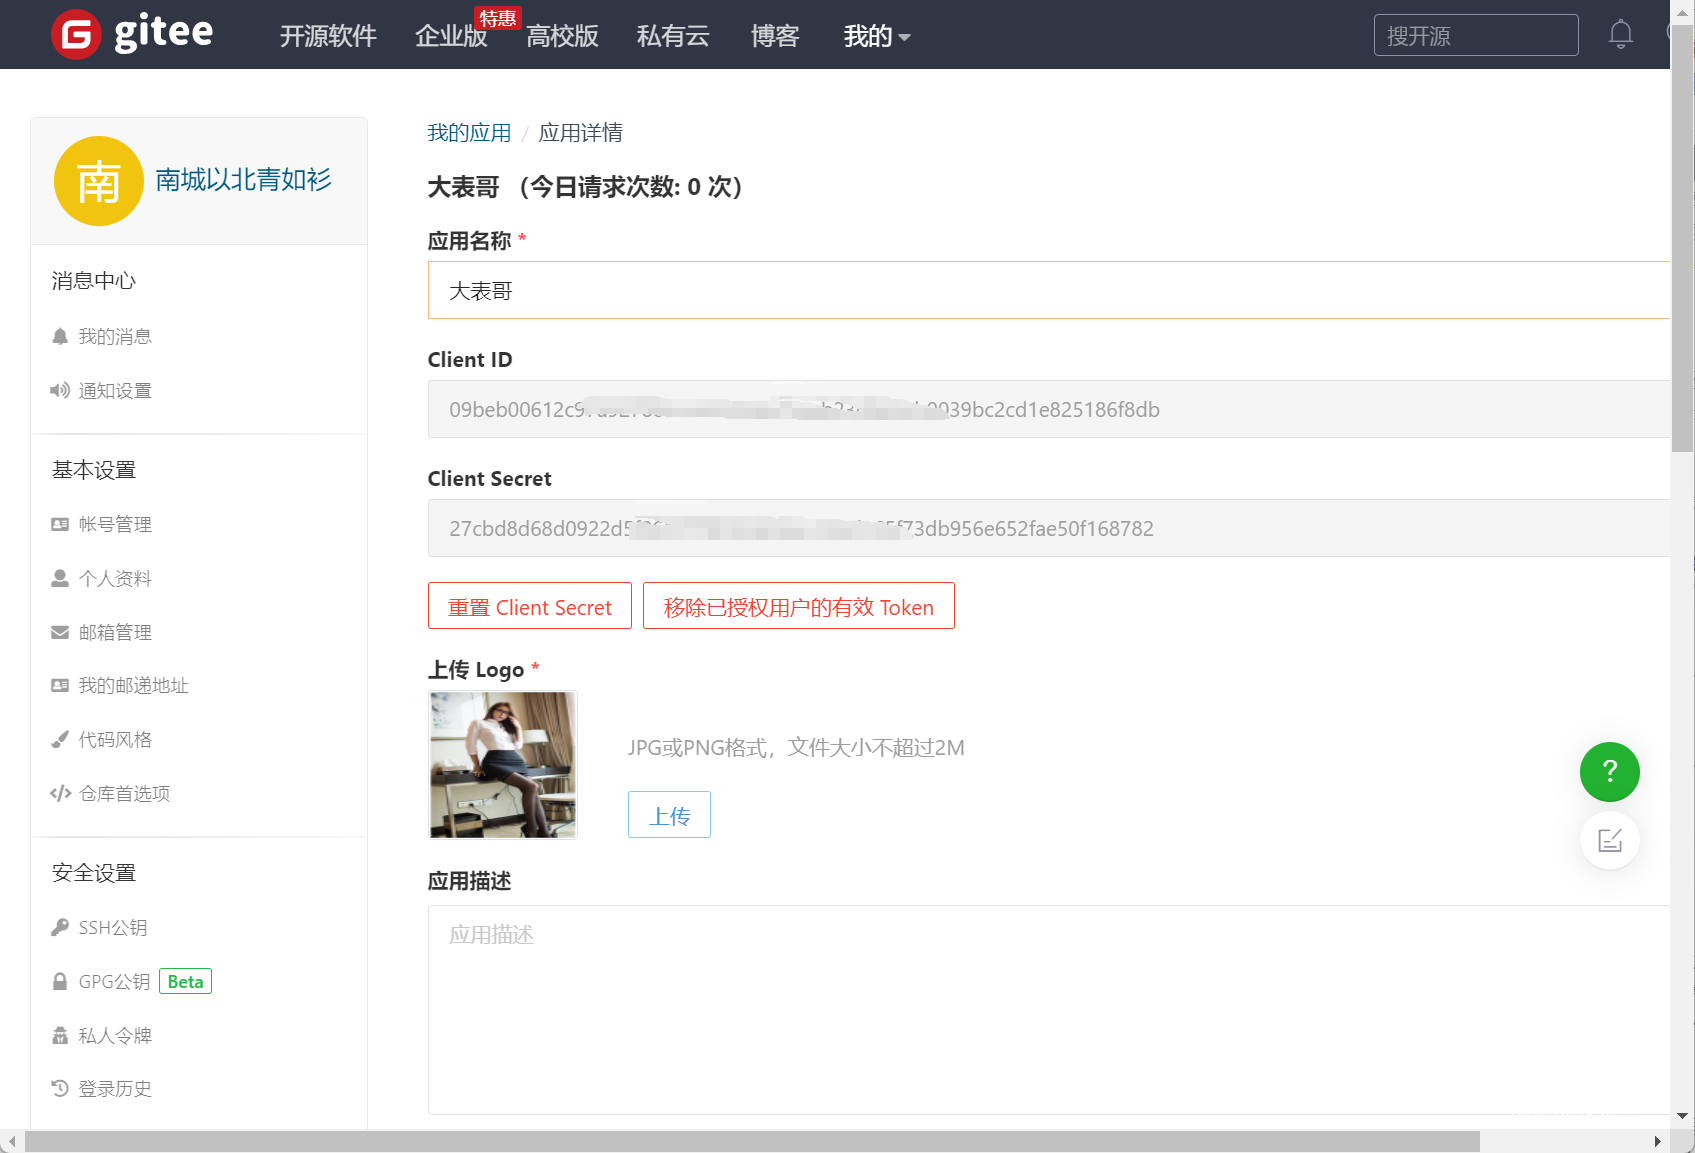
Record the ID and Secret values.
Installing the probe
Execute the command
curl -L https://gitee.com/naibahq/nezha/raw/master/script/install.sh -o nezha.sh chmod +x nezha.sh sudo CN=true ./nezha.sh Enter the corresponding information according to the prompts. It should be noted that Gitee's login account is Account B 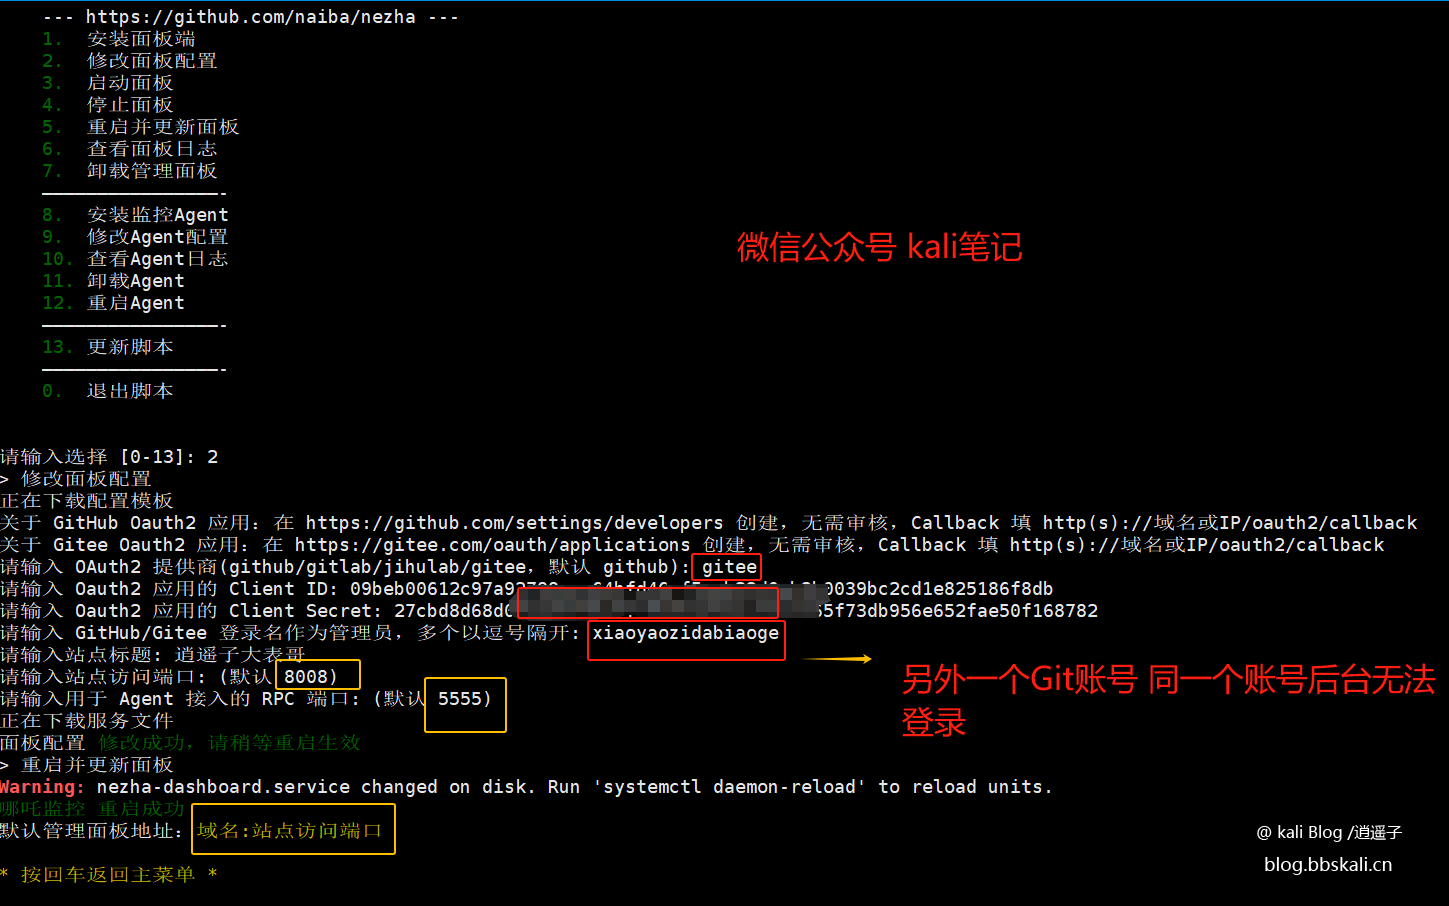
Next, open port 8008 5555 in the server firewall and server security groups respectively. Otherwise, I can't access it.
Next, visit ip:8008 and you will see the page.
Login the background
After entering the home page, click Login. Enter the information of account B and log in to Gitee. When the authorization page appears, click Authorization.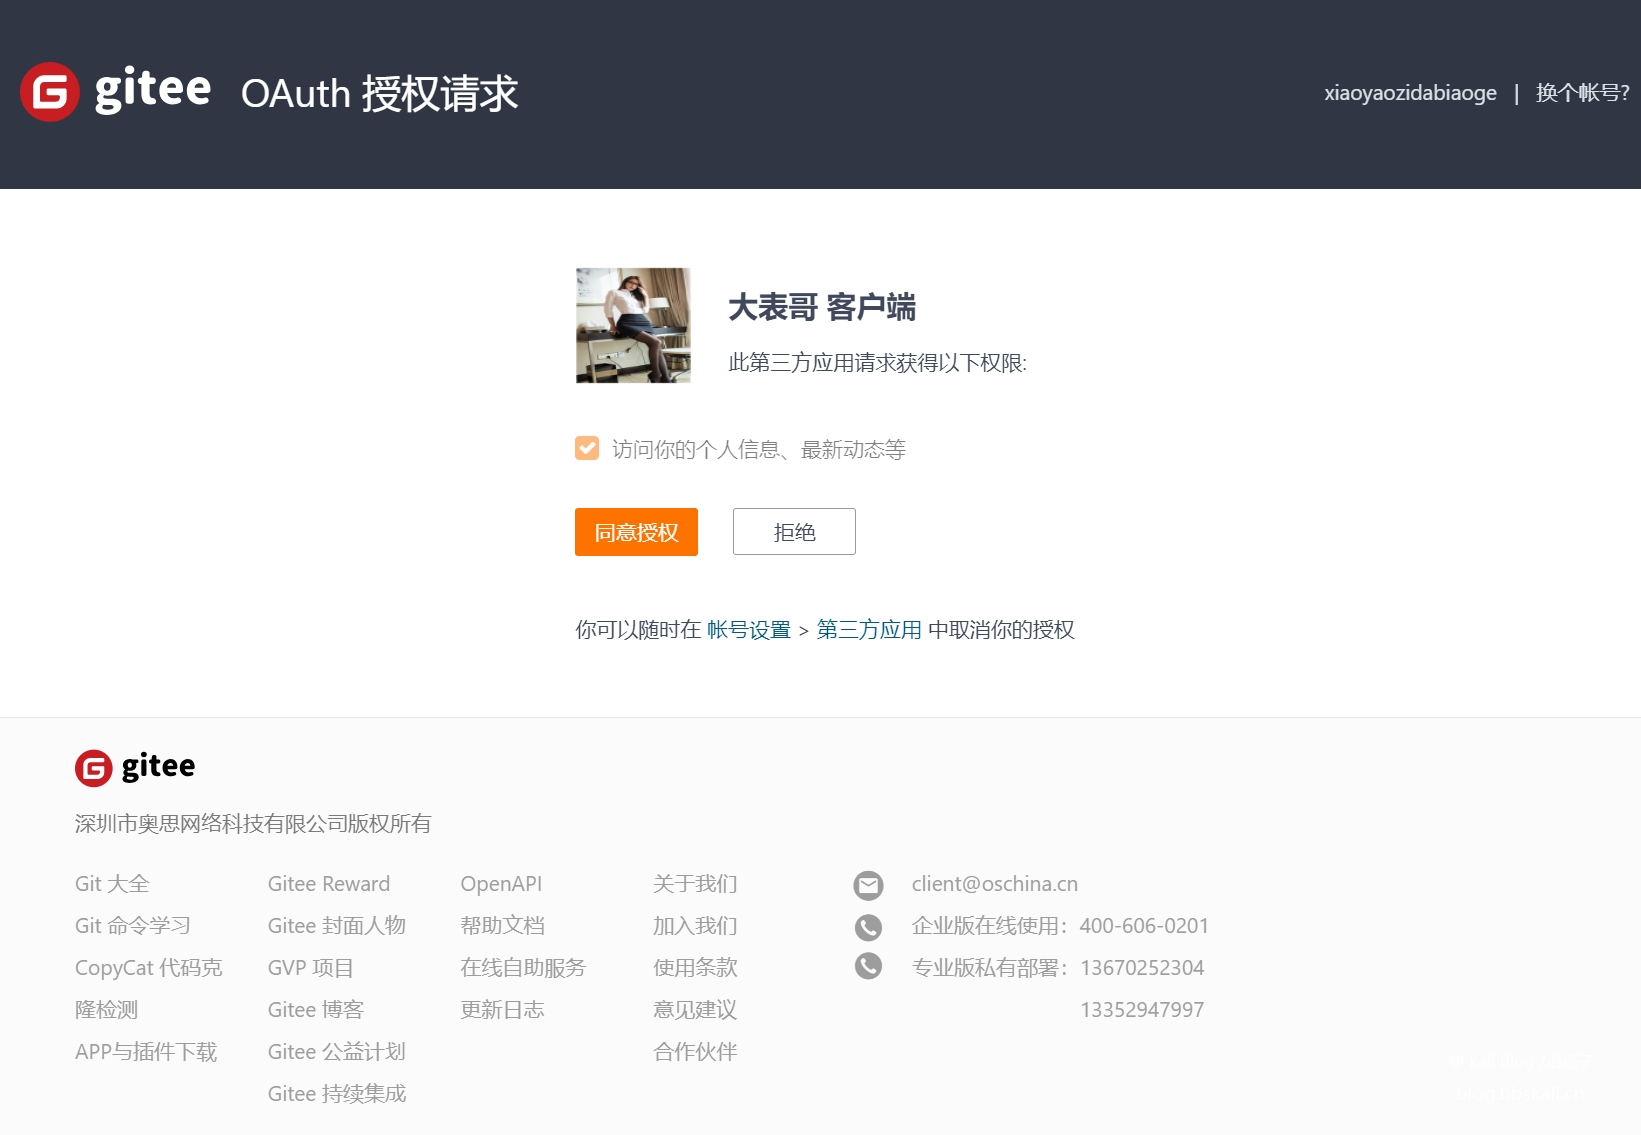
Click to add a new server, the configuration is as follows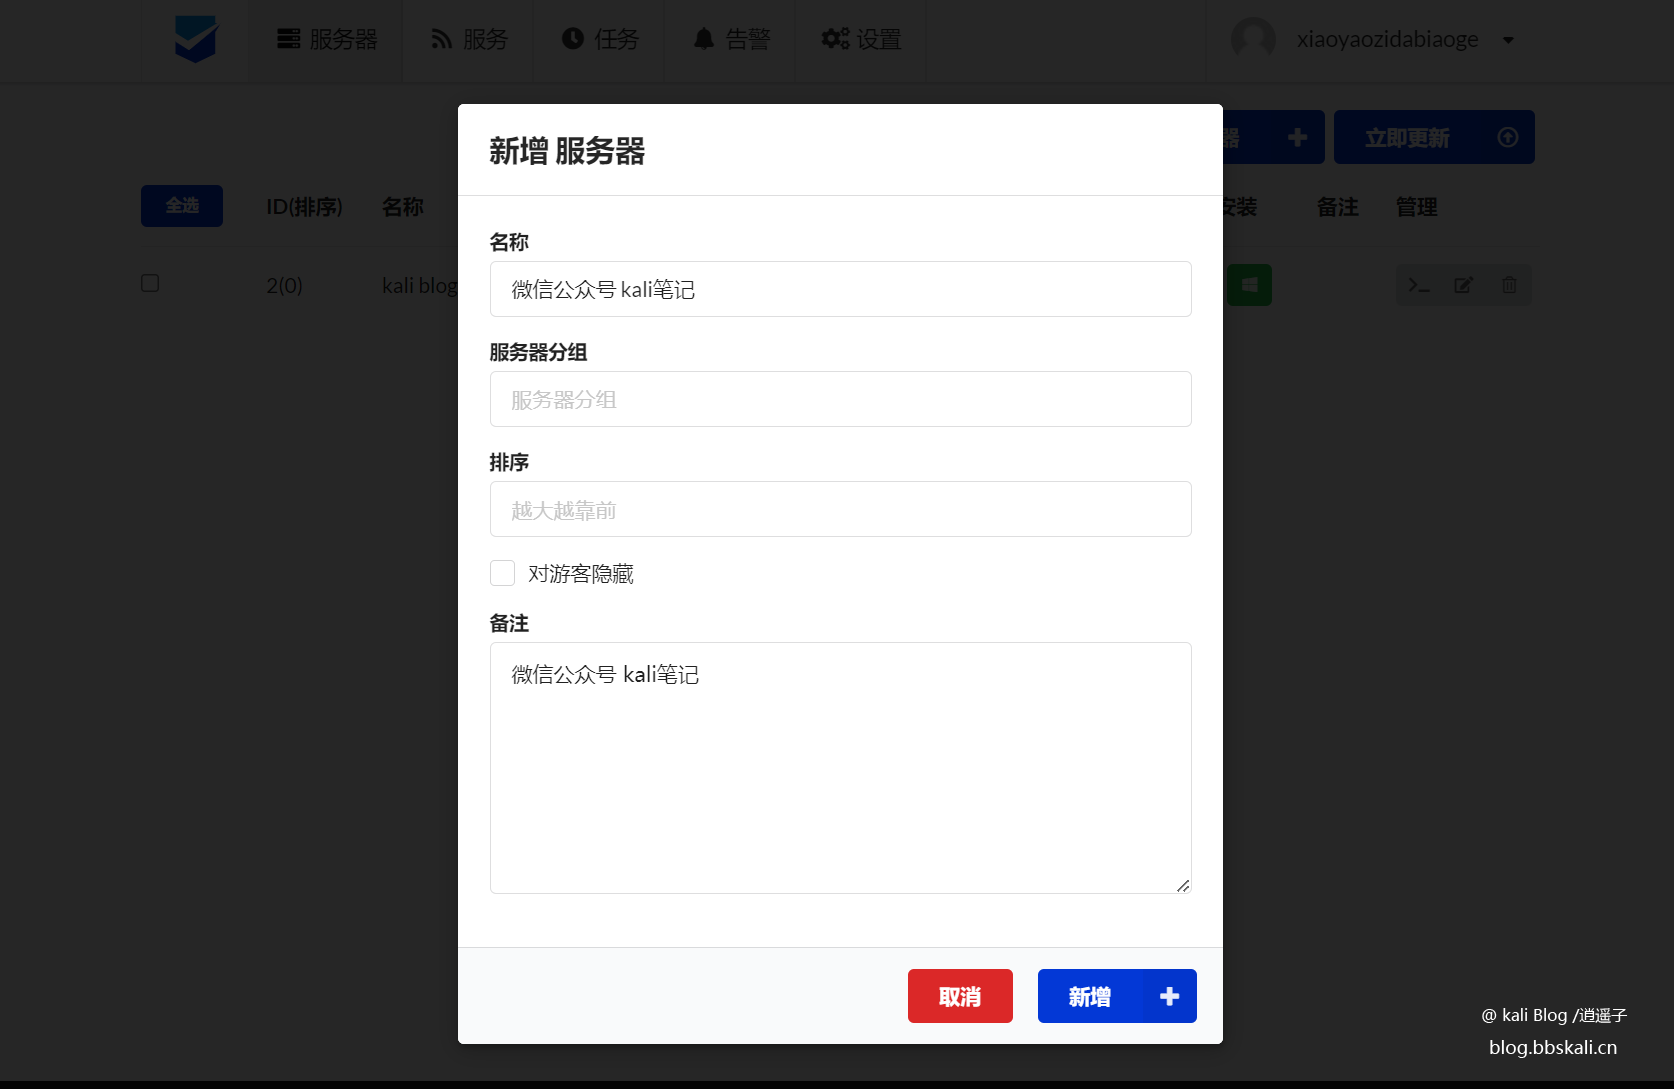
Click the Settings page to configure the server domain name/IP 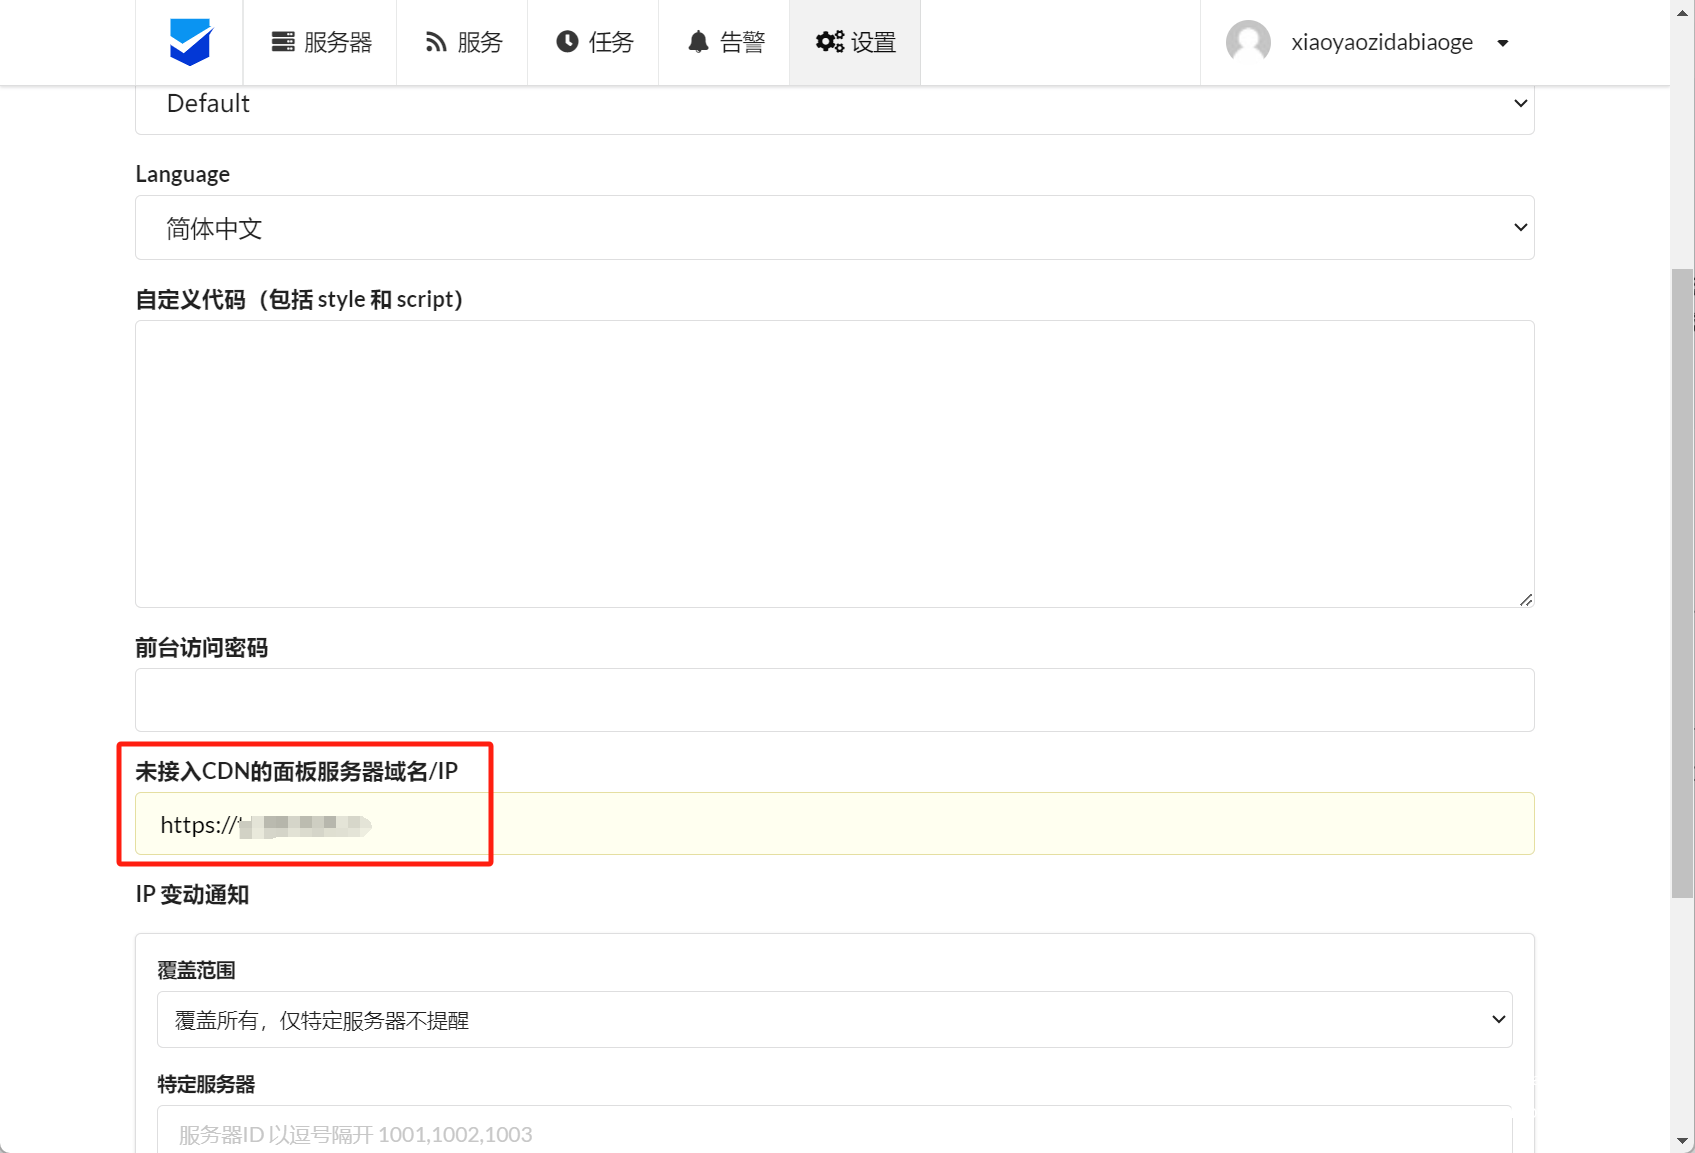
Add client (Agent)
Enter the panel background, select the icon according to the system type and copy it, and follow with one click.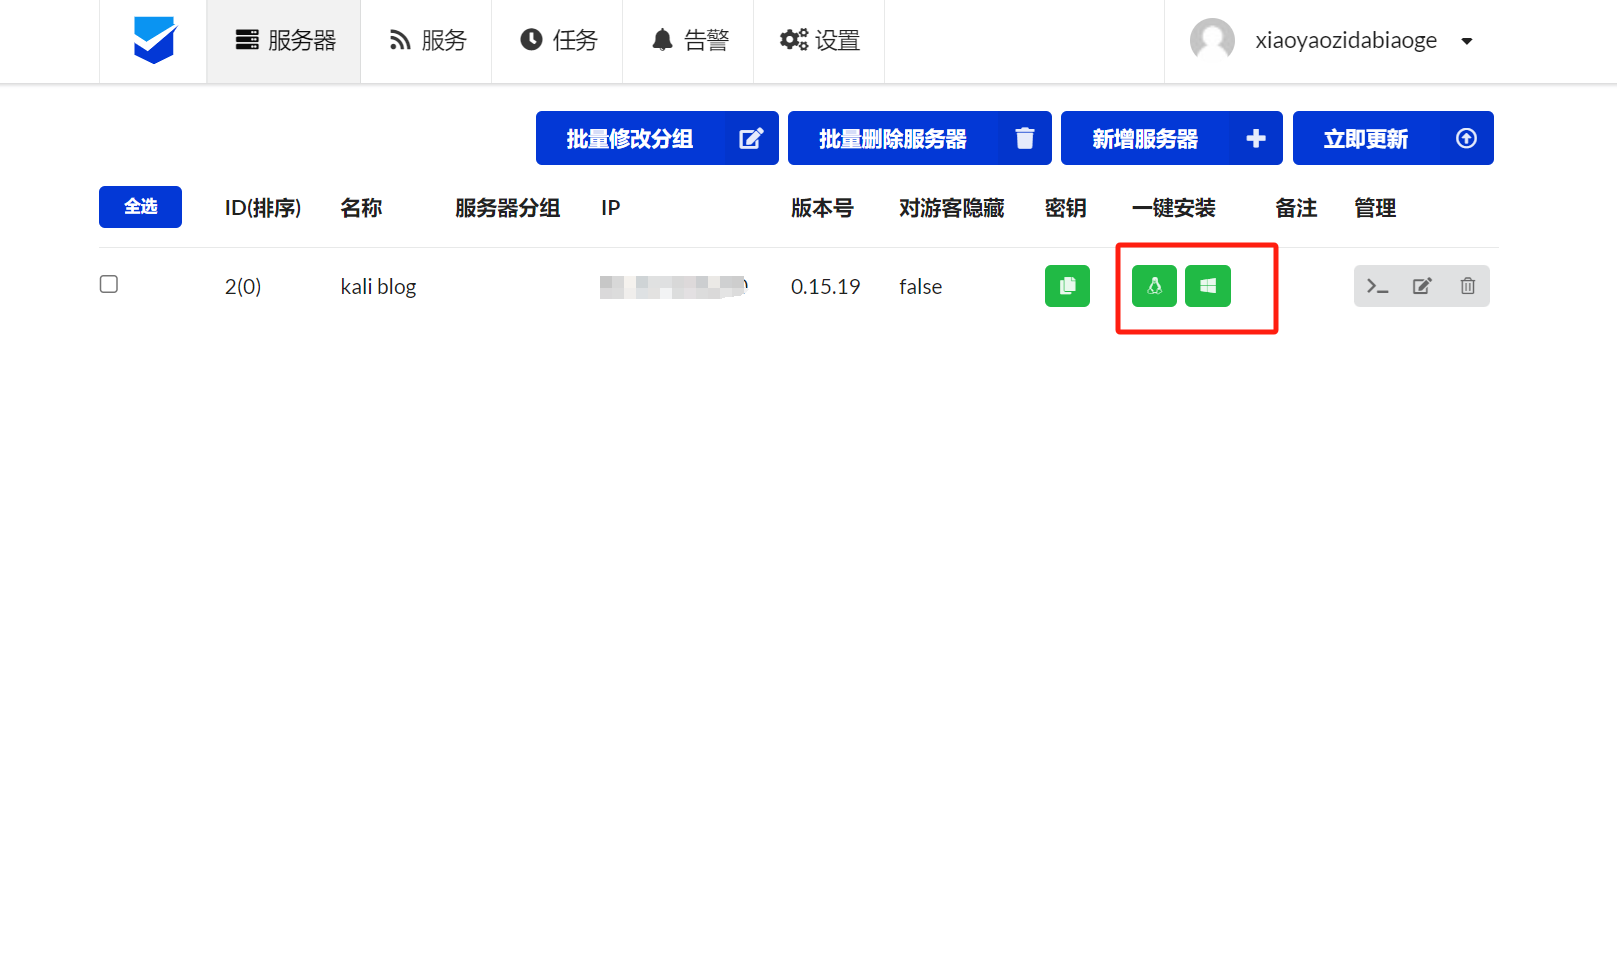
Or access the following command to download the installation script to the local area. Then install it manually.
curl -L https://gitee.com/naibahq/nezha/raw/master/script/install.sh -o nezha.sh chmod +x nezha.sh sudo CN=true ./nezha.sh 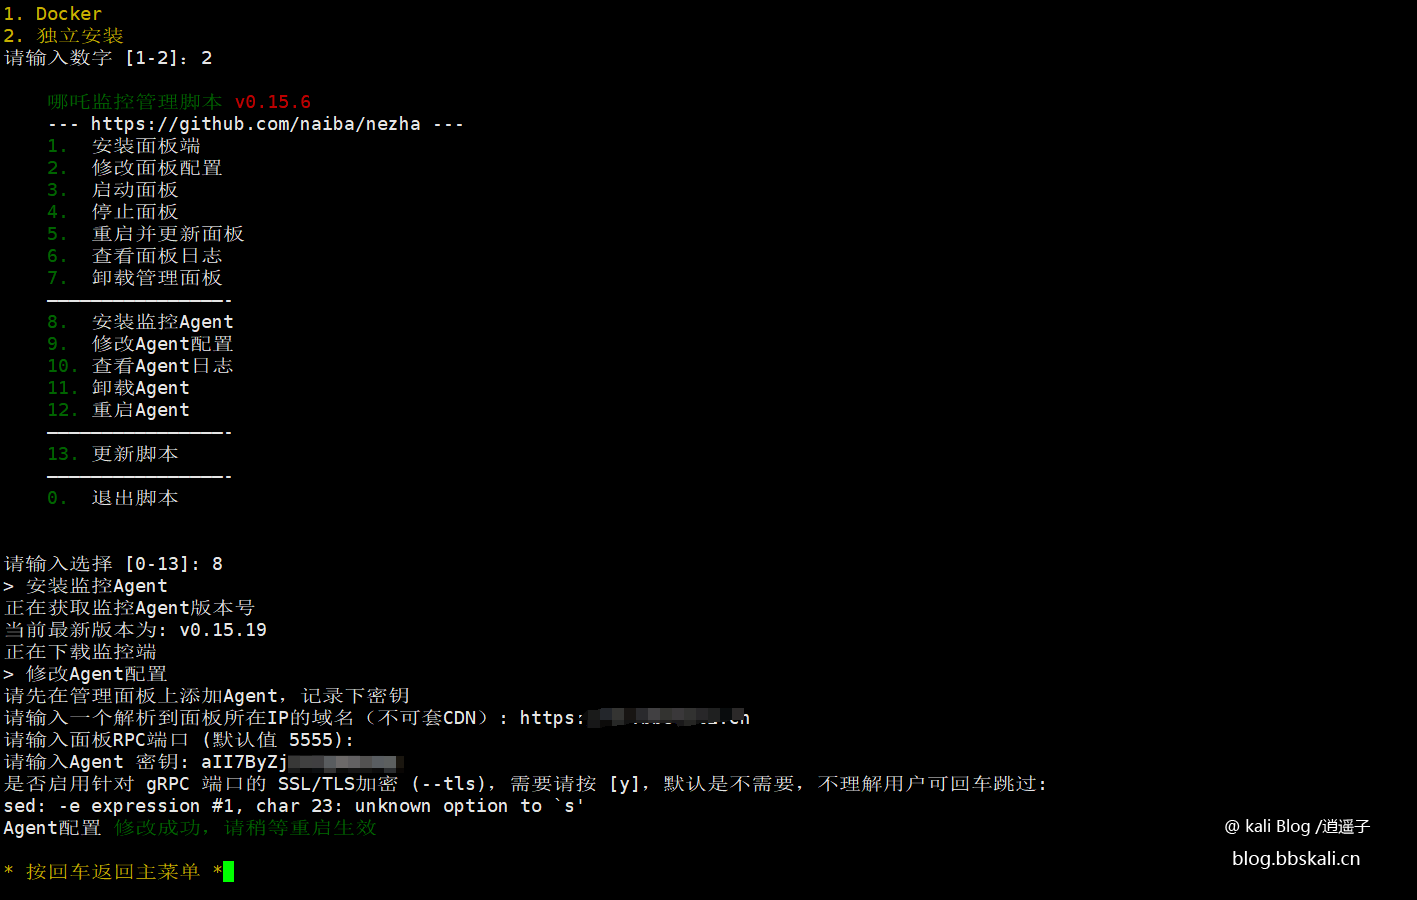
Also note that you can open the relevant ports.
After the configuration is completed, the effect is as follows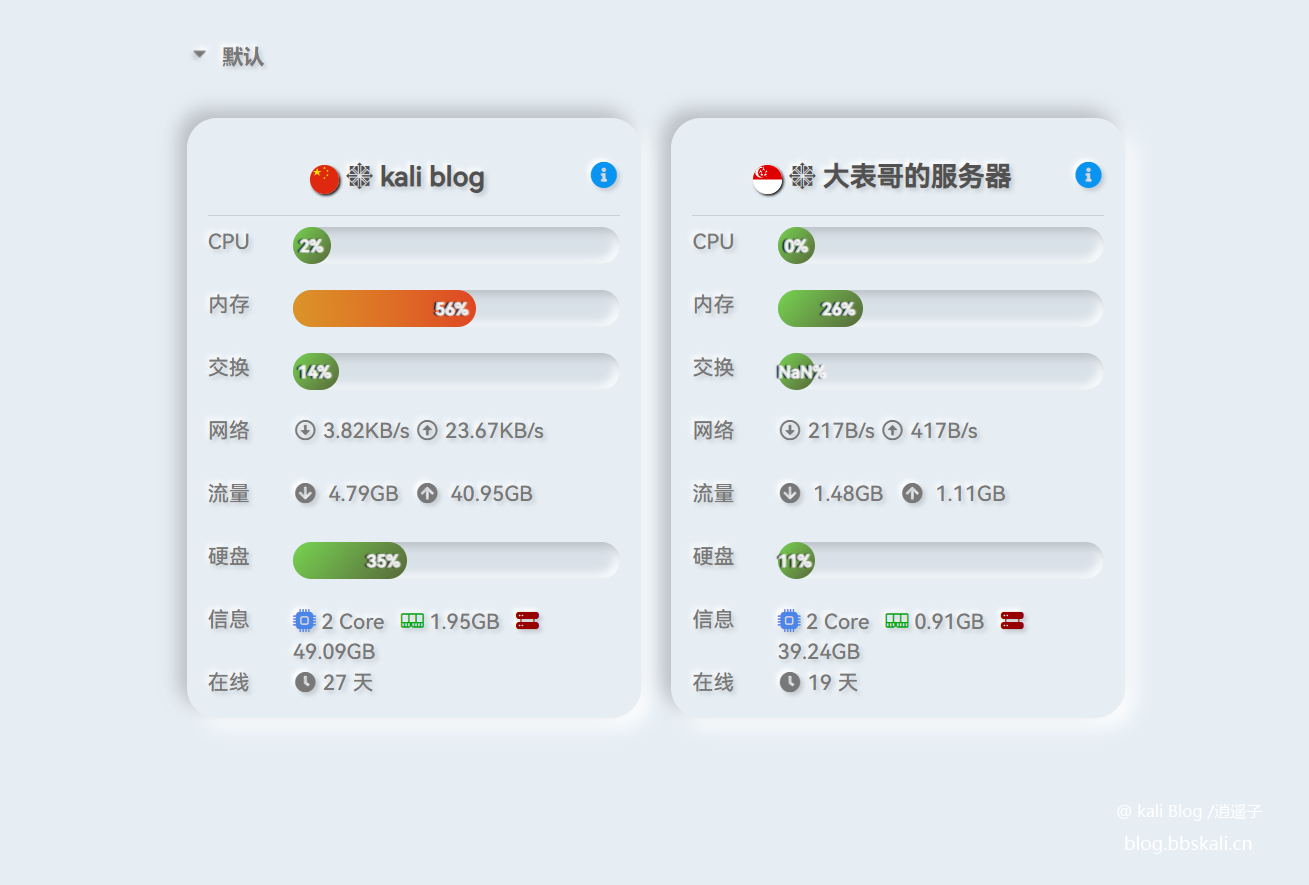
Configure domain name and proxy
If you have an available domain name, you can parse the current domain name. After the parsing is completed, the reverse proxy is configured as follows:
location /
{
proxy_pass http://127.0.0.1:8008;
proxy_set_header Host $host;
}
location /ws
{
proxy_pass http://127.0.0.1:8008;
proxy_http_version 1.1;
proxy_set_header Upgrade $http_upgrade;
proxy_set_header Connection 'Upgrade';
proxy_set_header Host $host;
}