The best trash guy. It hurts so much when you see the used host still in the corner. So after I persuaded me, I spent a huge amount of money to buy it. After getting it, I conducted a preliminary inspection of the equipment. There is basically no problem with the motherboard, and the processor is not unavailable. Since I have several hard drives on hand, I want to make a NAS and keep it at home.
Because the original cooling fan was too loud, it was broken when cleaning up the dust. So I spent a huge amount of money to buy a new fan that could freeze the CPU and dismantle several 500G hard drives.

Successfully lit 
Next, it is the installation process of the system. Here I installed Centos7. Because the several projects at hand are also under the centos system, they are used as backup machines for the project. I won’t talk about the specific installation process, and focus on the mount of the disk.
First check the current partition information
fdisk -l as follows, we get our two disks 
Disk /dev/sdb is the disk I just added. Next we need to format the partition.
mkfs.xfs /dev/sdb5 
Hang in partition
First, we create a file in the root directory and name it data
mkdir data mounts the partition just now to the data directory
mount /dev/sdb5 /data Now we can use the df command to view the current disk mount status.
df -Th 
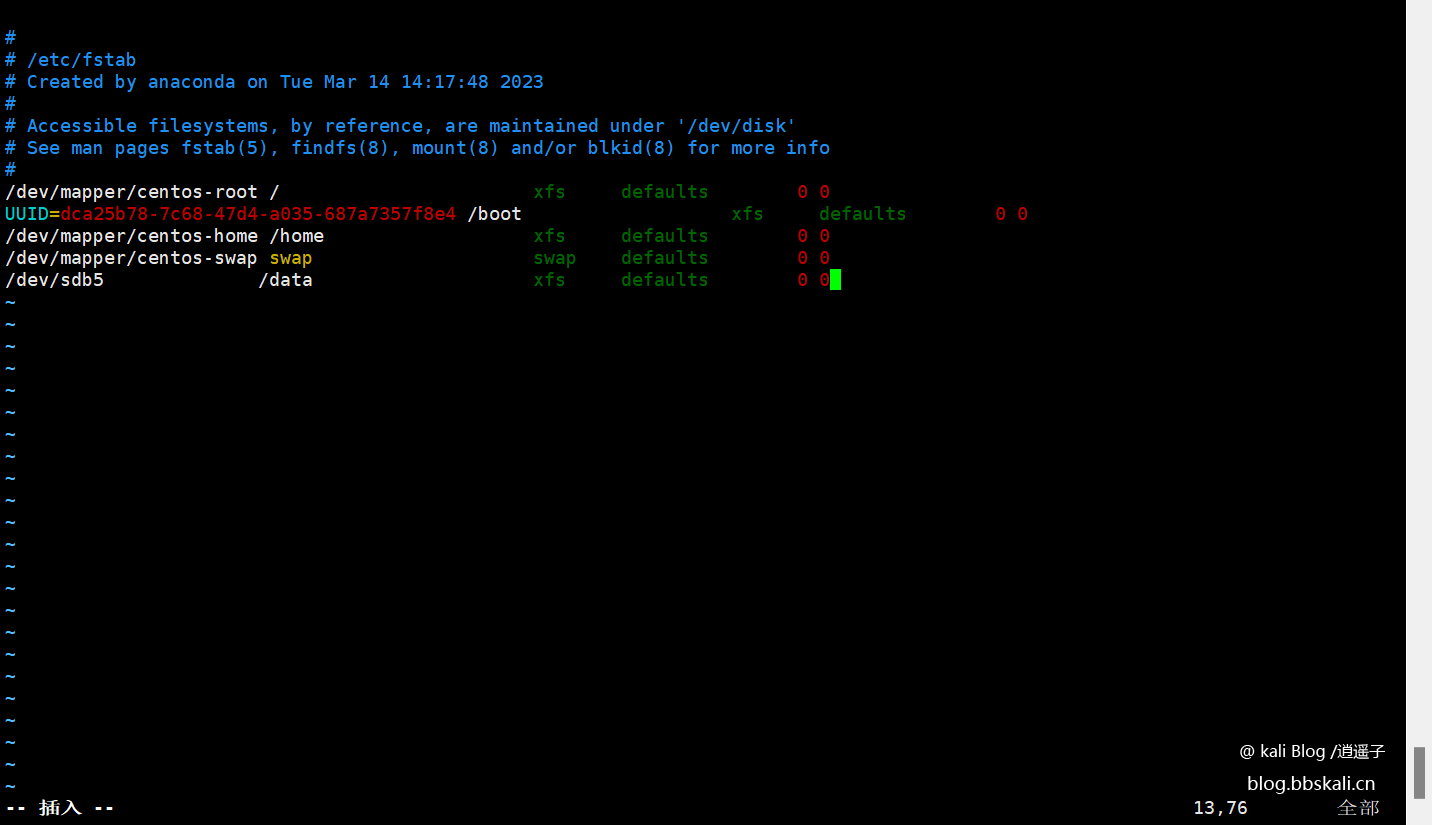
Set up automatic mount on startup
However, if the machine restarts, the directory will not be used directly (the df command cannot be viewed), so it needs to be set to start automatically mounting.
vim /etc/fstab
/* Add the following information */
/dev/sda /data xfs defaults 0 0 Parameters indicate the name of the device file, such as /dev/sda
LABEL of the device
UUID of the device, this method is mostly used in CentOS 7
Pseudo-file system: such as sysfs, proc, tmpfs, etc.


Recommended Comments