


By HireHackking in HACKER
· 1 view
In this article, we will use Xiao Ai to control the SG90 servo. This can simply realize some operations such as opening the door and opening the light using the servo.
Material preparation
ESP8266SG90 servo DuPont line 
Line connection
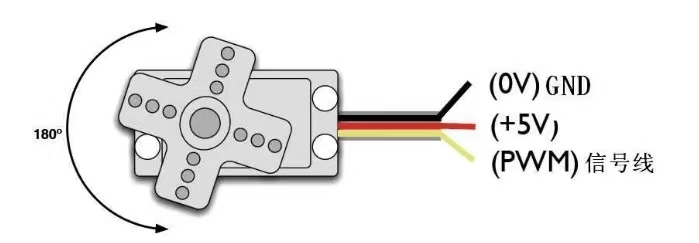
Three wires of the servo machine: Yellow wire->connect signal (D4), red wire->connect positive electrode (5V), brown wire->connect negative electrode (G) effect 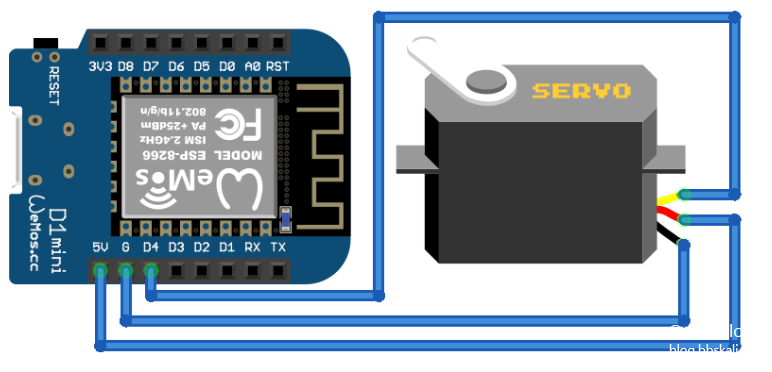
Code
#include Servo.h
#define BLINKER_WIFI
#define BLINKER_MIOT_OUTLET
#include Blinker.h
char auth[]='064****a9'; //key
char ssid[]='PDCN'; //wifi name
char pswd[]='1234567890'; //wifi password
//Create a new component object
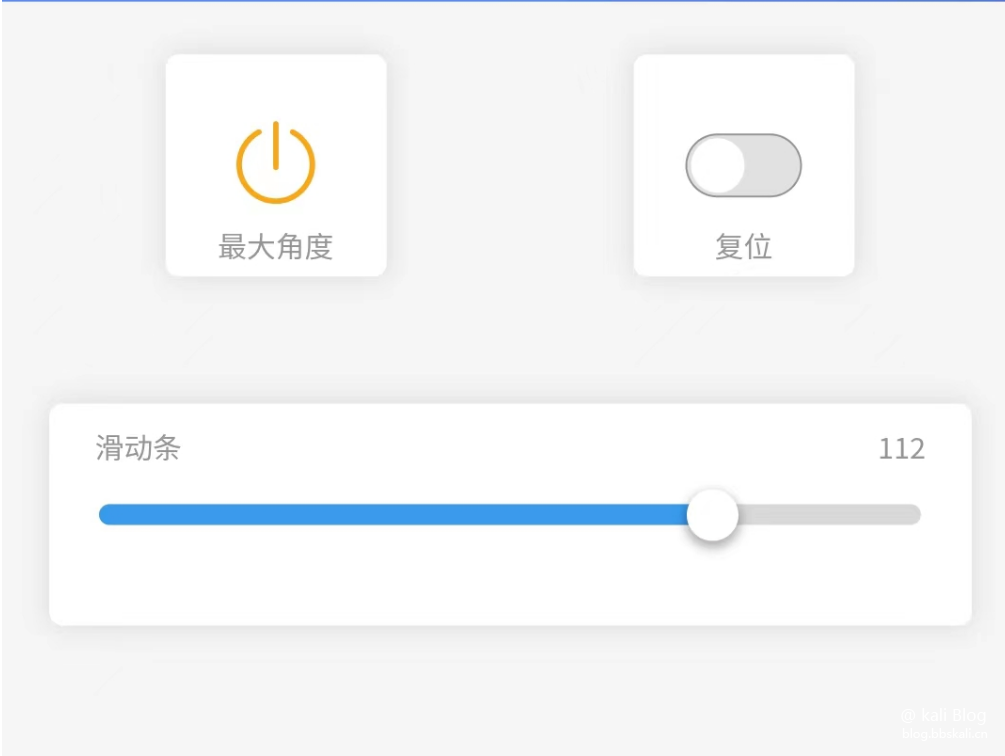
BlinkerButton Button1('btn-max'); //Maximum button
BlinkerButton Button2('btn-min'); //Minimum value button
Servo myservo;
BlinkerSlider Slider3('ser-num'); //Real-time position Slider Data key name Range 1-180
int servo_max,servo_min,ser_num,time_num;
void button1_callback(const String state) { //Maximum button function
BLINKER_LOG('get button state: ', servo_max);
myservo.write(servo_max);
Blinker.vibrate();
}
void button2_callback(const String state) { //Minimum button function
BLINKER_LOG('get button state: ', servo_min);
myservo.write(servo_min);
Blinker.vibrate();
}
void slider3_callback(int32_t value) //Slider function
{
ser_num=value;
myservo.write(ser_num);
Blinker.delay(100);
BLINKER_LOG('get slider value: ', value);
}
//Little Love Function
void miotPowerState(const String state)
{
BLINKER_LOG('need set power state: ', state);
if (state==BLINKER_CMD_ON) {
BLINKER_LOG('get button state: ', servo_max);
myservo.write(servo_max);
Blinker.vibrate();
}
else if (state==BLINKER_CMD_OFF) {
BLINKER_LOG('get button state: ', servo_min);
myservo.write(servo_min);
Blinker.vibrate();
}
}
void setup() {
Serial.begin(115200);
BLINKER_DEBUG.stream(Serial);
Blinker.begin(auth, ssid, pswd);
Button1.attach(button1_callback);
Button2.attach(button2_callback);
Slider3.attach(slider3_callback);
BlinkerMIOT.attachPowerState(miotPowerState);
myservo.attach(2); //servo.attach(): Set the servo data pin
myservo.write(10); //servo.write(): sets the rotation angle
servo_max=150;//The degree of rotation, here my range is 0-150°
servo_min=0;
time_num=500;
}
void loop() {
Blinker.run();
}
Regarding the pins, please refer to the figure below 
Effect
Recommended Comments